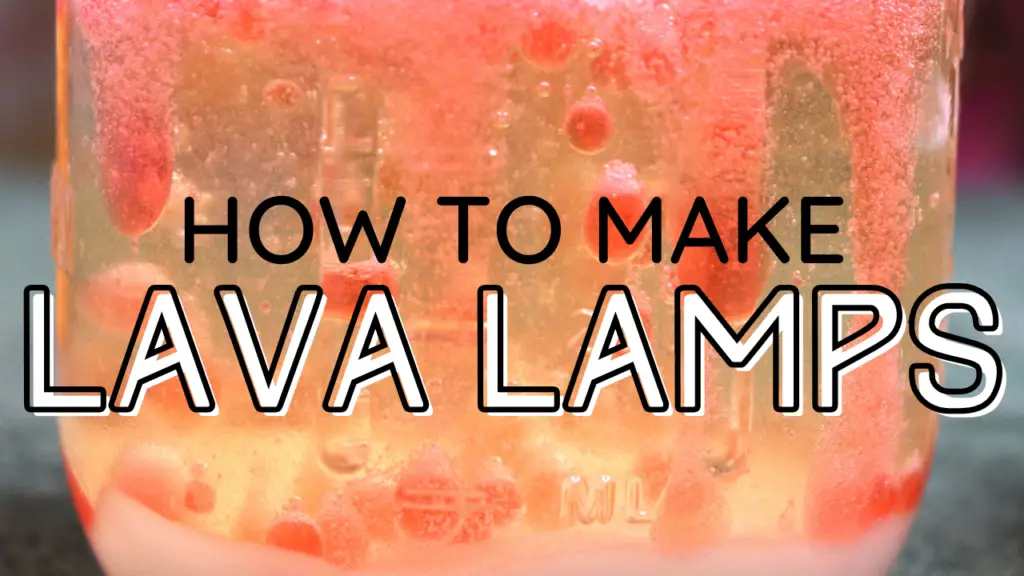
TeachersCollegesj
Knowledge repository and useful advices

What is the hypothesis of making a lava lamp?

Table of Contents
- 1 What is the hypothesis of making a lava lamp?
- 2 Why is it called a lava lamp?
- 3 Why is a lava lamp a chemical reaction?
- 4 What is the controlled variable in a lava lamp experiment?
- 5 What is a good hypothesis for a lava lamp?
- 6 How are the blobs in a lava lamp made?
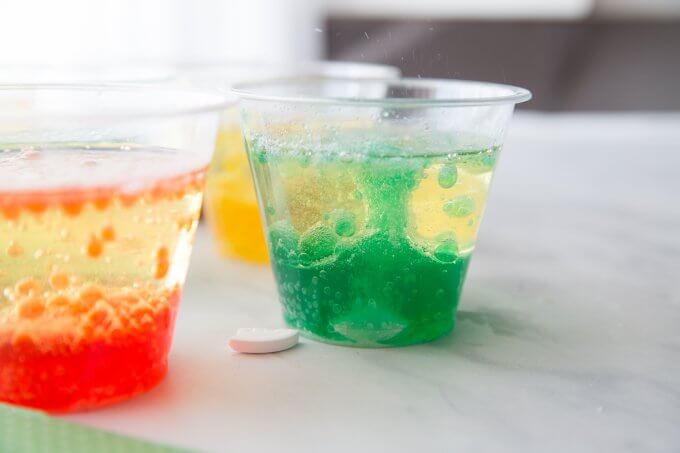
Hypothesis:We think that adding oil, water, and food coloring together will make a lava lamp effect because we alredy know that water and oil separate because of their complete density contrast. The alka-seltzer will make it have a lava lamp effect.
Why is it called a lava lamp?
As the warmed wax rises through the surrounding liquid, it cools, loses its buoyancy, and falls back to the bottom of the vessel in a cycle that is visually suggestive of pāhoehoe lava, hence the name. The lamps are designed in a variety of styles and colours.
What makes a lava lamp work?
In a liquid motion lamp, the heat usually comes from a light bulb. The heavier liquid absorbs the heat, and as it heats up, it expands. As it expands it becomes less dense. Because the liquids have very similar densities, the formerly heavier liquid is suddenly lighter than the other liquid, so it rises.
Why is a lava lamp a chemical reaction?
In the water layer, the tablet begins to dissolve and the chemicals in the tablet react with each other creating bubbles of carbon dioxide gas. Changes in density as gas is added to or taken away from water cause it to float up and sink down through the oil. Thus the lava lamp is created!
What is the controlled variable in a lava lamp experiment?
Hypothesis and Variables INDEPENDENT VARIABLE- The temperature of the water. DEPENDENT VARIABLE- We are measuring how well the lava lamp works. CONSTANTS- The amount of water, oil, and salt put in the the container will be about the same. CONTROL GROUP- The control group will be hot lava lamp.
What kind of light does a lava lamp need?
What is a good hypothesis for a lava lamp?
How are the blobs in a lava lamp made.
How does the wax in a lava lamp work?
Privacy Overview
| Cookie | Duration | Description |
|---|---|---|
| cookielawinfo-checkbox-analytics | 11 months | This cookie is set by GDPR Cookie Consent plugin. The cookie is used to store the user consent for the cookies in the category "Analytics". |
| cookielawinfo-checkbox-functional | 11 months | The cookie is set by GDPR cookie consent to record the user consent for the cookies in the category "Functional". |
| cookielawinfo-checkbox-necessary | 11 months | This cookie is set by GDPR Cookie Consent plugin. The cookies is used to store the user consent for the cookies in the category "Necessary". |
| cookielawinfo-checkbox-others | 11 months | This cookie is set by GDPR Cookie Consent plugin. The cookie is used to store the user consent for the cookies in the category "Other. |
| cookielawinfo-checkbox-performance | 11 months | This cookie is set by GDPR Cookie Consent plugin. The cookie is used to store the user consent for the cookies in the category "Performance". |
| viewed_cookie_policy | 11 months | The cookie is set by the GDPR Cookie Consent plugin and is used to store whether or not user has consented to the use of cookies. It does not store any personal data. |
- Properties Of Fluids
Can you recall the mesmerising feel of watching a lava lamp, with its large coloured bubbles rising, sinking and morphing? Guess what! You can make your lava lamp by using materials that are present at home. This is a science experiment for class 5 , which explains the concepts of liquid density and chemical reactions.

Lava Lamp Experiment
Lava lamp works based on two important scientific principles – density and polarity. This can explain why oil and water don’t mix. Understand the working principle of a lava lamp clearly by performing the lava lamp experiment given here.
Materials for Lava Lamp Experiment
- A plastic bottle.
- Food colouring
- Vegetable oil
- Fizz tablets like Alka-Seltzer
- Fill the bottle with a quarter full of water. Use the funnel to fill the water so that water doesn’t spill outside.
- Add vegetable oil in the quarter-filled water bottle until it is full.
- Now, wait for a few minutes until the water and oil get separate.
- Add food colouring into the bottle.
- Now we can see that food colouring goes through oil and get mixed with water.
- Cut Fizz tablet into a few smaller pieces and drop only one piece in the bottle. This will start reacting and appears like a lava lamp.
- Whenever required, drop another piece of the tablet to make a flow of bubbling in case the lava lamp stops.
Observation
The density of oil is lower than the density of water, and both don’t mix well. The water and oil that is added in the bottle stay separately due to its density. Meanwhile, the food colouring goes through oil and mixes with water because the food colouring has the same density of water.
When you drop a piece of fizz tablet in the bottle, it releases carbon dioxide that appears as a small bubble and reaches the top by taking some of the water along with it. Now the interesting part is when the bubbles disappear on the top, and the colour falls back. Adding more tablet keeps the reaction for the longer time so that you can enjoy the lava lamp for an extended period of time.
For more interesting experiments, below are the links:
- Tornado In a Bottle
- Anemometer – Measurement of Wind Speed
Frequently Asked Questions – FAQs
What are the scientific principles on which the lava lamp works, state true or false: the density of oil is higher than the density of water., does the oil mix with water, what is the relationship between density and temperature, what happens when the fizz tablet is dropped in the bottle.

Put your understanding of this concept to test by answering a few MCQs. Click ‘Start Quiz’ to begin!
Select the correct answer and click on the “Finish” button Check your score and answers at the end of the quiz
Visit BYJU’S for all Physics related queries and study materials
Your result is as below
Request OTP on Voice Call
| PHYSICS Related Links | |
Leave a Comment Cancel reply
Your Mobile number and Email id will not be published. Required fields are marked *
Post My Comment
Register with BYJU'S & Download Free PDFs
Register with byju's & watch live videos.
Talk to our experts
1800-120-456-456
- Lava Lamp Experiment

What is a Lava Lamp?
Lava lamps, also known as liquid motion lamps, have been doing the rounds for ages. The lava lamp science project hypothesis talks about the density of two liquids and the solubility of the two same liquids. In the lava lamp, we have liquids that are very close to each other in density and are insoluble in each other. Many people often end up using oil and water because they are insoluble in each other. But the two liquids have densities that are very different from one another. So you need to find two liquids with very close densities for the experiment to work.
(Image to be added soon)
Once you have found the two liquids, heat the bottom of the mixture with a light bulb. The denser liquid will absorb the heat and expand. While expanding it low becomes less dense. As both the liquids have similar densities, the previously denser liquid becomes lighter and rises over the other liquid. All of this happens in very slow motion, and the density changes that occur are very mild.
When Does a Lava Lamp Expire?
A bottle of a lava lamp is said to last nearly 2000 hours. After this, you can either replace it with a new lava lamp or bring a new bottle. A lava lamp usually starts working an hour after turning them on. Most lava lamps run on battery nowadays. You can change the batteries too in case the lamps stop working.
Lava Lamp Experiment
The lava lamp experiment works on the principle of density and polarity. Let us see how to make a lava lamp.
Apparatus Needed For Lava Lamp Experiment:
Flask or a bottle
Water
Vegetable oil
Alka-Seltzer or some other fizz tablets
What is to Be Done
Fill the bottle or flask with water. Fill it to a quarter. It is advised to use a funnel so that the water doesn’t spill outside.
Now add vegetable oil to the bottle until it is full to the brim.
Wait for some time. Let the vegetable oil and water levels separate.
Add food coloring to the mixture. Pick any color, think of any choice. Since the food coloring is also water-based, it will sink and settle at the bottom of the flask.
Take an Alka-Seltzer tablet and break it into small pieces. Start adding them to the flask one by one.
The reactions will start inside the bottle as soon as the tablets are added.
In case the lava lamp reaction stops, keep adding more tablets.
What Do We Observe
We observe that in the lava lamp experiment, the density of oil is much lower than that of water. Although the water and oil layers separate due to the densities the food couriering has the same density as that of water. As soon as we add the fizz tablets, small bubbles appear that come to the top and bring some water along with it. The bubbles disaster as soon as the reaction stops. You can keep your lava lamp actively working by adding more tablets from time to time.
Solved Examples
What Chemical Reactions Take Place in The Lava Lamp Experiment?
Ans: The Alka seltzer, when reacted with water, produces carbon dioxide gas bubbles. They stick to the water droplets. The water and gas combination is less dense than oil, and hence they rise to the top of the flask. The real lava lamps use polar and nonpolar liquids, just like the homemade ones do. The lava lamp experiment measures density and polarity.
Can Wax Be Used in Some Lava Lamps?
Ans: Yes. Lava lamps are often filled with wax, water, and other chemicals to make them look brighter and colorful.
Fun Facts About The Lava Lamp Experiment
The lava lamp was first discovered in the year 1948. The ideal lava lamp took 15 years to design.
There can never be two same lava lamps.
Initially, lava lamps were considered to be unusual and luxurious items, but over time, they have become accessorized products.
Lava lamps can be highly expensive too.
The lava lamp experiment is a widespread and fun experiment for kids nowadays.
The most massive lava lamp is said to hold thousands of gallons of lava.
Homemade Lava Lamps: Chemistry in action!
Sharing is caring!
- Pinterest 3
Did you have a lava lamp growing up? As it turns out, it is easy and inexpensive to create your own lava lamp while learning a thing or two about chemistry.
Creating your own lava lamp is a great way to showcase the reaction between vinegar and baking soda to your child in a colorful way. Plus, given the nature of this experiment, the reaction continues for quite some time!
It’s easy to set up and there are tons of lessons you can teach your child with this experiment, including chemistry, how colors mix to create new colors, and challenging their fine motor skills.
How to make the Lava Lamp science experiment
Supplies you will need.
For the Lava Lamp experiment, you’ll need:
- A container (we used a tall mason jar)
- Cooking oil
- Baking soda
- Food coloring
Before you start
Due to the reaction occurring in this experiment, do not use a lid on your container!
Instructions
Here is how to do the Lava Lamp science experiment:
Step 1: Add baking soda to the container
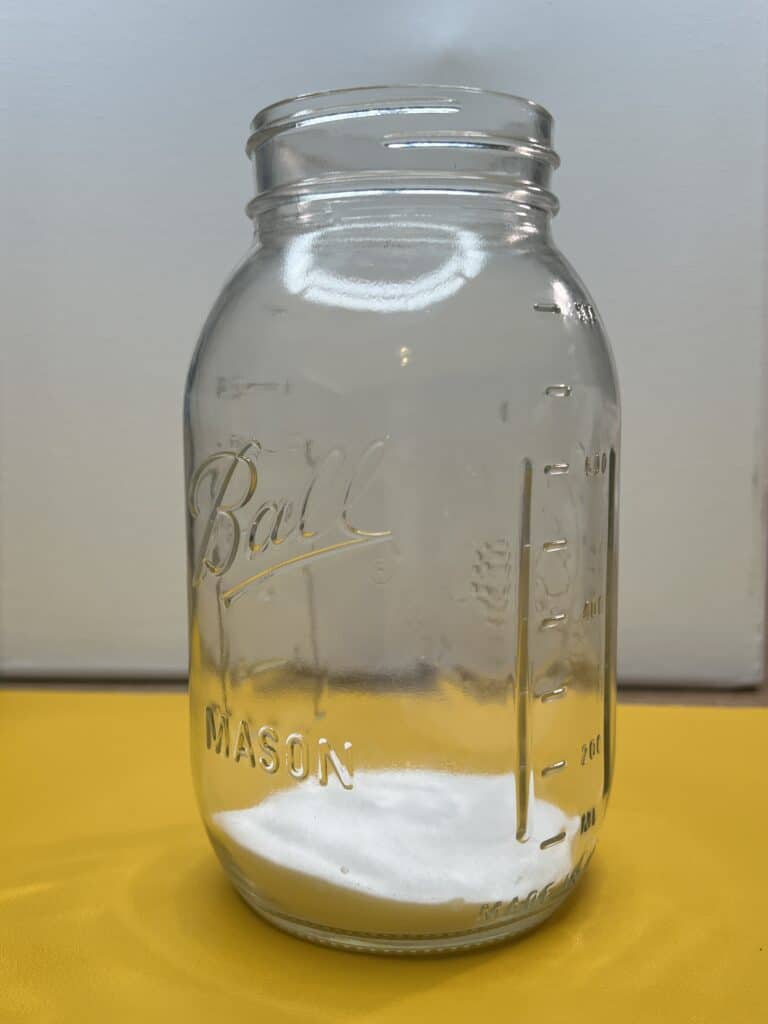
Add enough baking soda to cover the bottom of your container, plus a little extra.
Get your child involved : Have your child add the baking soda to the container! I helped guide the baking soda to the container and then let her pour it. It’s great for helping your child follow directions!
Step 2: Add cooking oil to the container
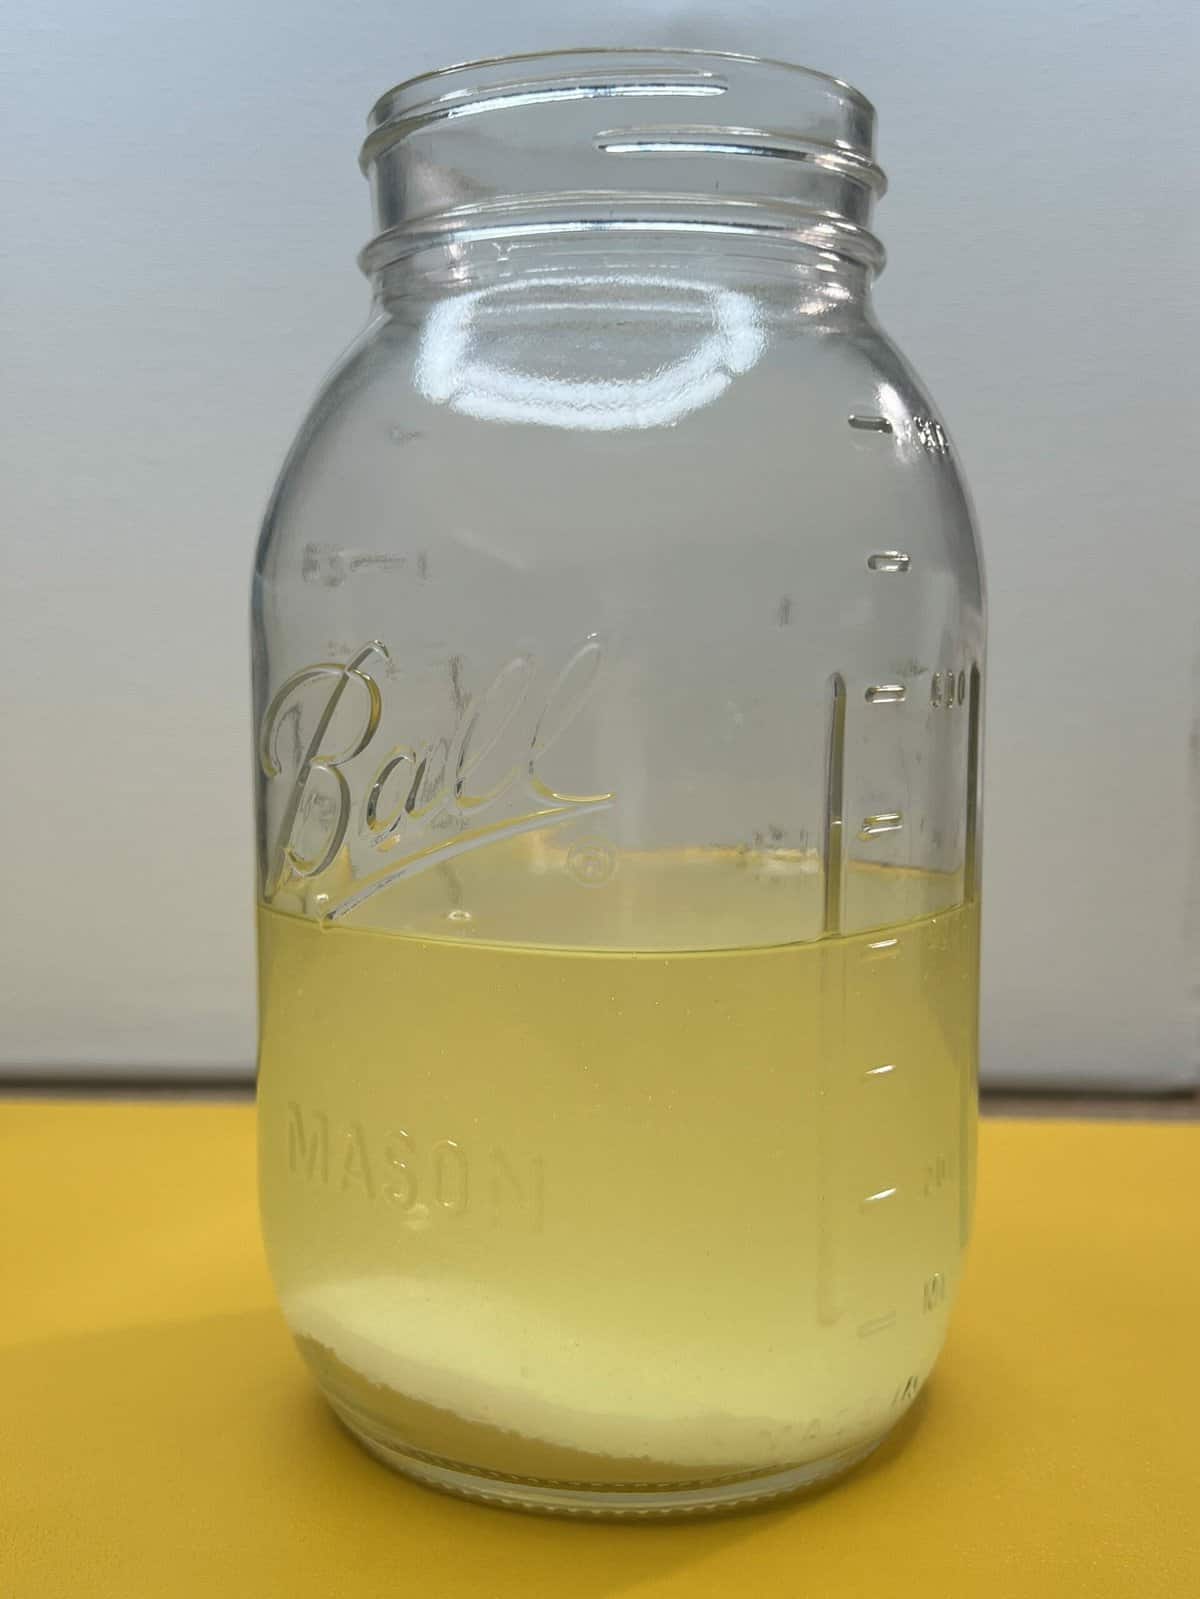
Start pouring the cooking oil directly on top of the baking soda. Don’t worry – they won’t mix. Even if they mix at first, the baking soda will settle back to the bottom of your container.
Since the cooking oil is where you will see the action of this experiment – don’t skimp! I filled my container about 1/2 full with cooking oil, but that’s because we were running low. Ideally, I would have filled it about 2/3 full!
Get your child involved : I also let my child pour in the cooking oil. Since the cooking oil bottle was pretty large and heavy, I helped her get the bottle up to the mason jar and helped her start pouring. From there, she poured the rest.
Step 3: Create your colored vinegar in a separate container

I used a small ramekin for my colored vinegar. I filled it about halfway full, then added 3-4 drops of food coloring (you can add more if you want a deeper color). Then, use your pipette to give it a good swirl to mix it together.
Get your child involved : Let your child add however many droplets of food coloring to your vinegar. Even better if you can mix colors to create new colors, then talk about it!
Step 4: Use a pipette to add colored vinegar to the container

The reaction will be pretty slow at first because there is quite a bit of baking soda at the bottom of the mason jar and very little vinegar.
The more colored vinegar you add, the bigger the reaction!
Get your child involved : Allow your child to do this step entirely on their own! It’s fantastic for fine motor skills and it lets them take charge of the reaction.
Try experimenting
We wanted to see what would happen if we added multiple colors to the experiment at once.
- Would the colors mix into one color?
- Would each individual color stay intact?
We found that each color stayed separate from the others, giving us a pretty neat-looking lava lamp! Be sure to hit play in the video below to watch the individual colors in the lava lamp.
The science behind the Lava Lamp science experiment
The Lava Lamp experiment is excellent for learning about chemistry and seeing the reaction between an acid and a base!
How it works
The Lava Lamp experiment is a classic vinegar-baking soda experiment. The difference this time is that the reaction takes place in the cooking oil, creating colorful beads bouncing around.
As we add the colored vinegar to the container, it sinks to the bottom because vinegar is more dense than oil.
Once it reaches the baking soda at the bottom of the container, it creates carbon dioxide bubbles mixed with vinegar, which float to the surface of the oil. When it reaches the surface, the bubble pops and colored vinegar sinks back down to cause another reaction. This is how you see dancing colored bubbles.
More chemistry experiments to try out with your child
- Fizzing lemons experiment – using lemons and baking soda to make a lemon volcano
- Magic Milk experiment – an explosion of colors with a chemical reaction lesson
- Fizzing paint experiment – another vinegar and baking soda reaction, but with an artistic twist!
FAQ about the Lava Lamp Science Experiment
How do you make the lava lamp experiment with alka seltzer.
Since Alka Seltzer provides carbon dioxide bubbles without the use of vinegar and baking soda, you will need fewer ingredients for the lava lamp experiment.
Simply fill the bottom of your container 1/3 of the way full with water, add the food coloring you desire, fill the rest of your container with oil, and add the Alka Seltzer.
Related experiments
Fizz, Pop, Inflate: The magical balloon experiment with a chemical reaction
Chemical reactions happen all around us, sometimes without even knowing it. From baking a loaf of bread in the kitchen to rust forming on a metal surface outside, chemical reactions are happening...
Rev Up with Engineering Fun: Build a Chemical Reaction Car!
The Rev Up engineering experiment is so great because it combines engineering with science while keeping your child engaged in the excitement! This experiment involves science and engineering by...
Department of Chemistry
| The lava lamp effect experiment uses an indigestion tablet to slowly release gas that propels droplets of water upwards through a layer of oil. As the gas is released from the top of the reaction, the water falls back down through the oil layer as a result of its greater density thus resulting in a circulating effect of rising and falling water droplets. These are only suggested teaching points; other aspects of this experiment could be used to explain a number of other principles in science. | |
| This file contains a set of detailed instructions, suggested questions, suggested improvements and disposal procedures for this experiment. Lava lamp experiment instructions | |
| Before attempting this experiment, please ensure that you have read the safety section in the document above and performed a complete risk assessment. If you have any , , please use these forms. | |
Table of Contents
Lava lamps are also known as liquid motion lamps. The hypothesis of a lava lamp is about the density of two liquids and the solubility of the two same liquids. The two liquids used in lava lamps are very close to each other in density and are insoluble in each other. Mostly, people use oil and water as they are insoluble in each other. But these liquids have different densities from each other. So, we need liquids whose densities are very close to each other.
Fill Out the Form for Expert Academic Guidance!
Please indicate your interest Live Classes Books Test Series Self Learning
Verify OTP Code (required)
I agree to the terms and conditions and privacy policy .
Fill complete details
Target Exam ---
Also Check: Mercury Metal
When the two liquids are found, heat the bottom of the mixture using a light bulb. The liquid with a higher density will absorb the heat and expand. While expanding, low becomes less dense. Both liquids have similar densities; the previously denser liquid becomes lighter and rises over the other liquid. This happens in a passive motion. Density change occurs very mildly.

When does a Lava Lamp expire?
Lava Lamp lasts nearly 2000 hours. After this, the bottle should be changed or replaced with a new lava lamp. The lava lamp starts working after one hour of turning on. Nowadays, most lava lamps run on batteries. Batteries can be changed if the lamp stops working.
Also Check: Nitrogen
Lava Lamp Experiment
The principle of the Lava Lamp Experiment is density and polarity. The Lava Lamp experiment explains why oil and water don’t mix. Let’s see how to make a Lava Lamp:
Apparatus Needed
- A flask or a bottle
- Vegetable Oil
- Alka- Seltzer or some other fizz tablets
Also Check: Magnesium
- Fill the bottle with water upto quarter. Use a funnel to fill so that the water doesn’t spill out.
- Add vegetable oil to the bottle. Keep adding until it is full to the brim.
- Wait until the vegetable oil and water levels separate.
- Add food color to the mixture. Food color is water based, it will sink and settle at the bottom.
- Break Alka- Seltzer tablet into small pieces. Add them to the flask one by one.
- As soon the tables are added, the reactions will start inside the bottle.
- Keep adding more tablets if the lava lamp reaction stops.
Also Check: Mercury Element
Observation
The oil density is lower than the water’s in the lava lamp experiment. The water and oil stay separate due to their density. Food colouring mixes with water as it has the same density as that of water. When we add Alka- Seltzer tablets in the bottle, carbon dioxide is released, appearing as small bubbles. It reaches the top by taking some water along with it. The colour falls back when the bubbles disappear on the top. If we add more tablets, the reaction will go for a longer time.
Lava Lamp Experiment Explanation
- Oil has a less dense composition than water, so it stays afloat on top of the water. The density of food coloring and water is the same; it sinks through the oil and combines with it.
- When the tablet is dropped in it, it settles to the bottom and starts to dissolve, and carbon dioxide is emitted. As the gas is lighter than water, it hovers to the surface. Air bubbles carry colored water to the surface.
- When air escapes from the color water, water becomes heavy and sinks. The process is repeated until the tablet is entirely dissolved.
- We can add more tablets to run the Lava Lamp Experiment for a longer period of time.
Also Check: Chlorine
Fun Facts About the Lava Lamp Experiment
- The Lava Lamp was discovered in 1948. It took about 15 years to design the ideal lava lamp.
- No two lava lamps can be the same.
- Earlier, the lava lamps were considered as unusual and luxurious items. But now they have become accessorized products.
- Lava Lamps can be highly expensive.
- Nowadays, the lava lamp experiment is a widespread and fun experiment for kids.
- The most massive lava lamp holds thousands of gallons of lava.

What is Density?
Density is a measurement of how compact or denser a substance is. It is also defined as the mass per unit volume.
Density Formula:
The formula to calculate density is:
Density=MassVolume
This formula helps determine how much mass occupies a specific volume.
Density of Water:
The density of water is around 1 gram per cubic centimetre, providing a baseline for understanding this essential property of liquids.
Density of Air:
Referring to how much mass of air is present in a certain volume, the density of air is a key factor in various scientific and atmospheric discussions.
Density Units:
Density is commonly measured in units like grams per cubic centimeter. Understanding these units is crucial in expressing and comparing the density of different substances.
What is Polarity?
Polarity refers to the positive or negative charge of an atom or molecule. Or it can be defined as the distribution of electrical charge within a molecule.
Lava Lamp: FAQs
On which principle does the lava lamp experiment work.
The Lava Lamp Experiment works on the principle of density and polarity.
What happens when fizz tablets are dropped in the bottle?
When fizz tablets are dropped in the bottle, carbon dioxide is released in the form of small bubbles. It reaches the top by taking some of the water along with it.
What is the relation between temperature and density?
Density is inversely proportional to temperature.
What are the reactions taking place in the Lava Lamp Experiment?
Alka Seltzer, when reacted with water, produce bubbles of carbon dioxide. They stick to the water droplets. The combination of water and gas is less than the oil. They rise to the top of the flask. The real lava lamp uses polar and non-polar liquids. The Lava Lamp measures density and polarity.
Related content

Get access to free Mock Test and Master Class
Register to Get Free Mock Test and Study Material
Offer Ends in 5:00
Select your Course
Please select class.

Discovery: Research at Princeton
Findings, feature articles, books and awards from Princeton University researchers
Of lava lamps and living cells

Cliff Brangwynne upends tradition to establish a new view of biology
By Jerimiah Oetting
Cliff Brangwynne was seeing cells in the sidewalk again.
It was another long day in the lab at Harvard Medical School, where Brangwynne would often work late nights, staring at cells. Sometimes he spent so much time staring at cells through the microscope that the cells would follow him home, their shapes imprinted on his vision. Walking late at night, he’d see them dancing over the buildings and the empty streets and sidewalks.
Though Brangwynne was in his college years, he wasn’t a student — in fact, some would call him a drop-out. He’d been enrolled at Carnegie Mellon University, a first-generation college student, when a mixture of burnout and wanderlust prompted him to take a year off midway through his degree. At first he thought he would take a yearlong trip to Latin America. But he was interested in materials science — he liked how it described the world in terms of math and physics. He also loved biology: he loved that innumerable cells could self-assemble into organisms that eventually walk around and talk about philosophy.
Brangwynne suspected that his two interests, biology and materials science, were more connected than his coursework suggested.
“I knew the two fields were related, because cells are doing all these crazy things that reflect weird material properties and states — flowing and oozing and moving around,” said Brangwynne, now a professor of chemical and biological engineering at Princeton. “But the biologists I would talk to knew nothing about the materials, and the materials people I talked to knew nothing about biology.”
A Scientific American article would finally connect the dots. Written by Harvard scientist Donald Ingber, “The Architecture of Life” described the structure of a cell in the same way that an engineer might explain the architecture of a building, down to the biological materials of its construction. Ingber brought together materials science and biology in a way that resonated with Brangwynne’s interests. He was so excited about Ingber’s ideas that he wrote him a letter. When Brangwynne took the year off from college, instead of heading south on his yearlong trip, he headed to Harvard to take a job in Ingber’s lab. As Brangwynne recalls, the experience was nothing short of magical.
Brangwynne’s research shows that structures within living cells can form and dissolve depending on changing conditions, more like the undulating interior of a lava lamp than the fixed parts of a table lamp.

Clifford Brangwynne sees similarities between living cells and salad dressing, in which oil and vinegar separate according to the laws of physics. The idea has caught on, and now many scientists are exploring how such physical processes can drive the formation of the cell’s structures and play key roles in cellular division and gene expression.
Clifford Brangwynne, the June K. Wu ’92 Professor of Chemical and Biological Engineering and inaugural director of the Princeton Bioengineering Initiative, and a Howard Hughes Medical Institute investigator. Photo by Sameer A. Khan/Fotobuddy
Maybe it was all the late nights staring through a microscope, pondering the materials of cells. Or perhaps it was the work-induced hallucinations that followed —the soft, squishy building blocks of life, stuck in his vision, superimposed on the cold and rigid bricks of Boston. Whatever caused it, Brangwynne saw cells and their structures a little differently than other scientists, and it would lead him to a major discovery that had been hiding in plain sight.
All shook up
Oil and vinegar don’t mix. Even a vigorously shaken bottle of vinaigrette dressing will eventually separate into two distinct layers. The two layers are both liquids, so this separation is known as a phase separation — two liquids, segregating from each other because of their characteristic chemistries.
Phase separation, so well-known in salad dressings, was unheard of in cellular biology. But Brangwynne, with his background in materials science, knew that everything, including cells and salads, adheres to the same laws of physics. If phase separation could happen in a bottle at dinner, why not within a cell?
That’s the question Brangwynne asked himself when, once again, cells appeared to be playing tricks on his vision. He had returned to Carnegie Mellon to finish his undergraduate degree in 2001, and then went back to Harvard where he earned his Ph.D. working with David Weitz, a pioneer in the field of soft-matter physics — the physics of “squishy materials.” Then he headed to Max Planck Institute of Molecular Cell Biology and Genetics to work with Tony Hyman, a leader in the study of cellular structures.
After squashing some cells from a roundworm and looking at them under a microscope, Brangwynne observed a structure, which scientists had long assumed to be a solid, instead blobbing apart and coalescing in lava lamp fashion. The supposedly solid structures were behaving much like droplets of oil in vinaigrette dressing. Despite the liquid environment of the cell, the droplets remained distinct from their surroundings. They came together to form bigger blobs and broke apart into smaller ones.
With Hyman and colleagues from the lab, Brangwynne published this observation in the journal Science in a 2009 paper , which described the liquid-like behavior of the structures. He correctly suspected that the droplets he saw weren’t just a curiosity specific to roundworms — they were an entirely overlooked form of cellular organization.
Today, these structures are known as “biomolecular condensates,” because, although made from proteins and other molecules, they form in a manner similar to the condensation of water on a windowpane on a rainy day, or a dewdrop on a blade of grass. When concentrations of certain proteins disperse in the cell’s liquid, they begin to stick together, forming larger and larger droplets. But unlike normal condensation, they don’t glob together randomly. The proteins bind together in specific ways that create a functional structure.
The most well-studied cellular structures are bound by membranes, which separate their inner machinery against the milieu inside the cell. But these droplets don’t need a membrane; they exclude their surroundings the way that oil droplets exclude water.
By foregoing the complications of a membrane, the cellular structures can form and dissolve depending on changing conditions, revealing the cell as a much more dynamic and malleable environment than previously thought — more like a lava lamp with its undulating interior than a table lamp with fixed parts.
Since 2009, the droplets have been discovered as key parts of dozens of processes, including cellular division and gene expression. They’ve been implicated in degenerative diseases, like Alzheimer’s and ALS. Some scientists even speculate that these blobs of molecules, simpler than any cell or structure that requires a membrane, may have been the precursors to the earliest forms of life on Earth.
Much like the blobs themselves, the research spawned by their discovery defies boundaries. A growing number of scientists, at Princeton and beyond, are coalescing around Brangwynne and his discovery, finding condensates within their own study systems by collaborating over methods that cross disciplines.
“I don’t think this has been oversold in any way,” said Ned Wingreen, a professor of molecular biology at Princeton who also trained in physics. “This is a real revolution. It is truly, literally rewriting the textbooks.”
Glomming onto the next big thing
Crack open a biology textbook, and you invariably will find an illustrated version of a cell: a central nucleus, surrounded by colorful squiggles and bean-shaped capsules. In this picture-perfect universe, globular proteins float dutifully through the cell’s liquid interior to find their perfectly shaped counterparts. They connect, perform their function, then separate, drifting off into the cartoon sunset.
“We’re absolutely kidding ourselves with those diagrams,” said Wingreen, the Howard A. Prior Professor in the Life Sciences, and professor of molecular biology and the Lewis-Sigler Institute for Integrative Genomics.
Wingreen studies the physics underlying biological systems. In contrast to those neat diagrams in textbooks, everything inside the cell is constantly bouncing around randomly. In this complicated soup of moving and shaking proteins and molecules, it’s no wonder that biologists assumed a membrane was critical to exclude all the cellular riffraff from the work happening inside the cell’s most important structures.
But many cellular processes occur only if the right proteins are in the right place at the right time. How this happens inside a cell’s busy interior remains a mystery.
“Here comes phase separation to the rescue,” Wingreen said. When the cell produces enough of a specific protein, they begin to glom together. As they do, the droplet that forms contains a high concentration of those proteins, making it much more likely that they will accomplish their task.
Wingreen uses the example of DNA repair — a process that occurs within the cell’s nucleus. Sometimes, DNA suffers a double-stranded break. The repairing proteins could form a droplet around the break, repair it, and then dissolve.
For a theoretical biophysicist like Wingreen, studying this process is “a theorist’s dream.” But he was only mildly curious about Brangwynne’s blobs until he attended a 2015 meeting held by the Princeton Center for Theoretical Science that was focused on condensate research. Many consider it the fledgling field’s first important workshop.
“It was definitely a who’s who of people in the field,” Wingreen said of the meeting, which he co-organized with Brangwynne and Mikko Haataja, professor of mechanical and aerospace engineering. The list of attendees and speakers included many scientists who have since made big discoveries involving the cellular droplets, including many currently working at Princeton.
“It was like when a band plays a small venue before they got cool,” Brangwynne said.
The number of researchers was still small and “cultish” back then. But after the workshop, the idea started to gain traction across cellular biology. Citations for Brangwynne’s 2009 paper skyrocketed. Brangwynne says he knew his discovery was important, but “it became a really big deal. And it’s hard to claim I knew that was going to happen — of course I was passionate about the science we were doing, but I didn’t realize the whole world would become similarly obsessed with it.”
For Wingreen, the meeting proclaimed in no uncertain terms that these liquid droplets were going to be transformative for cellular biology. “I’ve got to be working in this field,” he recalled thinking.
Wingreen wasn’t alone. Countless other scientists would soon find blobs of proteins in their study systems, offering new and exciting ways to understand mysterious cellular processes.
“Brangwynne brainwashed me!” said Mike Levine, the director of Princeton’s Lewis-Sigler Institute for Integrative Genomics. Levine has studied gene regulation, the “most interesting biological process on Earth,” for more than 40 years. Now, he thinks condensates play a pivotal role in that process.
Turning genes into proteins requires a series of steps involving enzymes, which first transcribe double-stranded DNA into single-stranded RNA, and later translate RNA into proteins. But how do these enzymes know which genes to transcribe and which to ignore? How does the whole process operate with such precision?
The old idea was that one by one, RNA polymerase, the enzyme responsible for transcription, would swoop in, transcribe a gene, and swoop away. But recent innovations in imaging techniques, pioneered by Princeton’s Thomas Gregor, professor of physics and the Lewis-Sigler Institute for Integrative Genomics, showed that there were actually great distances between all of these pieces of cellular machinery. Somehow, genes were being activated from afar, and the enzymes were still finding the right places to go.
“I believe Brangwynne-style liquid condensates will be the explanation to these observations,” said Levine, Princeton’s Anthony B. Evnin ’62 Professor in Genomics and a professor of molecular biology.
Instead of a single RNA polymerase finding its DNA partner, Levine thinks a large droplet full of the enzymes likely forms around areas of the genome that are activated for transcription. In other areas, droplets exclude those RNA polymerase enzymes, like oil excludes water, repressing transcription and effectively shutting off those genes.
The implications of this discovery, according to Levine, would be enormous. “The key to how genomes are organized in functional units may all be driven by these dynamic condensates,” he said. “This is going to have a lot of legs, and a lot of impact on the future of genomics.”
Levine is careful to say these ideas are still “wildly speculative” at this point. But recent experiments in his lab have resulted in videos of “clear-cut condensates,” formed during transcription — blobs that can fuse together and break apart in a dynamic, liquid fashion.
To study these processes requires leveraging the expertise of many Princeton faculty members, combining classical genomics, computational biology and biophysics.
“Phase separation is really in the sweet spot of what Princeton is all about, in terms of encouraging interdisciplinary research,” he said. “Princeton is a powerhouse in the field.”
The explosion of work in the area also underscores Princeton’s strength in building from fundamental discoveries in basic science toward innovations in bioengineering that could have wide benefits for human health and the environment.
Brangwynne, for example, is collaborating with Assistant Professor José Avalos, who is jointly appointed in the Department of Chemical and Biological Engineering and the Andlinger Center for Energy and the Environment. Their work seeks to engineer synthetic condensates that help turn yeast cells into chemical factories, including potentially the production of advanced biofuels.
Across several departments in the School of Engineering and Applied Science, faculty members are bringing computational approaches to studying condensates, including Athanassios Panagiotopoulos, the Susan Dod Brown Professor of Chemical and Biological Engineering, and Professor Mikko Haataja and Assistant Professor Andrej Košmrlj in the Department of Mechanical and Aerospace Engineering. In the Department of Chemistry, Assistant Professor William Jacobs adds to the deep bench of Princeton theorists interested in this problem.
A future phase
With much attention focused on this new way of looking at the biological world, it is not surprising that Brangwynne, who in addition to his appointment at Princeton is a Howard Hughes Medical Institute investigator, has received some attention. He has won numerous awards, including a John D. and Catherine T. MacArthur Foundation fellowship, and in 2020 was named a Laureate for the Blavatnik National Awards for Young Scientists. One of Brangwynne’s favorite sayings is that biological systems are the most richly textured forms of matter in the universe. “Black holes, quasars, supercomputers —nothing can compete with the complexity of even the most basic bacterial cell,” he said. Cellular droplets have revealed the strange and dynamic ways that cells organize themselves. They defy the notion that important cellular processes depend on the trappings of a membrane. How these delicate processes evolved is an open question. “The cell is like a universe,” Brangwynne said. “Any place you point to with a very fine needle, you could spend a lifetime studying it. And people do.”
But despite centuries of scientists looking at cells under microscopes, Brangwynne’s blobs had evaded discovery until a decade ago. Seeing them required a more fluid view of science, and demanded a vision unfettered by the boundaries of scientific disciplines. It required thinkers, like Brangwynne, who see things a little differently. How many mysteries still remain in the blind spots? “Phase separation is one foundational physical principle,” Brangwynne said. “I think it’s probably one of many that have yet to be discovered.”
Although made from proteins and other molecules, the structures form in a manner similar to the condensation of water on a windowpane on a rainy day, or a dewdrop on a blade of grass.

In recent papers in the journal Cell, Princeton research teams reported the development of new tools that harness light to accurately probe intracellular phase separation — the process by which the chaotic liquid matter inside cells transforms into functioning cellular compartments called membraneless organelles.
“Black holes, quasars, supercomputers — nothing can compete with the complexity of even the most basic bacterial cell.” CLIFFORD BRANGWYNNE, THE JUNE K. WU ’92 PROFESSOR OF CHEMICAL AND BIOLOGICAL ENGINEERING AND INAUGURAL DIRECTOR OF THE PRINCETON BIOENGINEERING INITIATIVE

Much like the blobs themselves, the research spawned by their discovery defies boundaries.

“It’s a big discovery, and it only could have been done by having all of these people come together and look at it from different angles.”
Coming together and branching out
Princeton’s small size and range of expertise give it an advantage in working fluidly between fundamental science and engineering. Its buildings are close together, and there is a spirit of collaboration that encourages this interdisciplinary work, said Associate Professor Sabine Petry in the Department of Molecular Biology.
Petry studies microtubules — the skeletal strands that make up the scaffolding that provides the cell’s shape and structure. Microtubules play an important role in cellular division because they form the mitotic spindle, a structure that segregates copies of chromosomes between newly formed cells.
Petry devised a way to study a mitotic spindle outside of the cell, where she could more clearly image its formation. She and her team discovered that the linear microtubule strands, in fact, give birth to new microtubule strands from their sides, branching out like the limbs of a tree.
Understanding how microtubules branch could have implications for new therapies, such as targeted cancer treatments and ways to promote cellular growth after a spinal injury. Petry found that one protein, called TPX2, was responsible for the branching of microtubules.
Petry was curious if TPX2 might also behave like a liquid. Sure enough, outside of the cell, TPX2 readily glommed together into a blob. But its liquid properties didn’t stop there. Once TPX2 was in the wet environment of a cell, Petry said it preferred to organize into droplets along the length of the microtubules, following the same physical laws by which “dewdrops form on a spider web.” Droplets of TPX2 indicated where the microtubule would branch.
Petry says this discovery is at the intersection of physics and biology. The paper, which is currently a pre-print, was co-authored by graduate students Sagar Setru in Princeton’s Lewis-Sigler Institute for Integrative Genomics and Bernardo Gouveia in the Department of Chemical and Biological Engineering.
“It’s a big discovery, and it only could have been done by having all of these people come together and look at it from different angles,” Petry said.
Share this:
You must be logged in to post a comment.
Your browser is not supported
Sorry but it looks as if your browser is out of date. To get the best experience using our site we recommend that you upgrade or switch browsers.
Find a solution
- Skip to main content
- Skip to navigation
- Back to parent navigation item
- Find resources
- Experiments and investigations
- Cross-curricular activities
- Meet the scientists
- Boost your knowledge
- Beyond the classroom
- Get funding
- About the RSC

- More navigation items
Primary science investigations
- 2 Air pressure and the antigravity bottle
- 3 Air pressure, gases and the leaky bottle
- 4 Dissolving, density and ‘heavy’ sugar
- 5 Fizzy irreversible changes and bath bombs
- 6 Irreversible changes and the ‘fire extinguisher’
- 7 Irreversible changes and the ‘freaky hand’
- 8 Properties of gases, air pressure and ‘sticky’ cups
- 9 Properties of solids and ‘biscuit bashing’
- 10 Viscosity and ‘racing’ liquids
- 11 Freezing and the ‘intriguing ice’ experiment
- 12 Liquids, gases and the ‘lava lamp’
Liquids, gases and the ‘lava lamp’
- No comments
Try this investigation to explore liquids and gases, and practise taking accurate measurements
This resource is also available in Welsh and Irish

Get the Welsh language version .

Get the Irish language version .
This experiment focuses on carbon dioxide gas fizzing through liquids. First watch the video of the ‘lava lamp’ demonstration, then find out how you can investigate the mass of carbon dioxide in fizzy drinks with your learners.
Learning objectives
- To show understanding of solids, liquids and gases.
- To understand that gases have mass.
Enquiry skills:
- To take accurate measurements.
- To apply maths skills in science.
Watch the video
The video below shows how to carry out the ‘lava lamp’ demonstration.
Source: Royal Society of Chemistry
Make a lava lamp to explore mixing liquids and more concepts in primary science.
Download the supporting materials
Set up and run the investigation with your class using the teacher notes and classroom slides, featuring a full equipment list, method, key words and definitions, questions for learners, FAQs and more.
- Teacher notes
PDF | Editable Word document
Classroom slides
PDF | Editable PowerPoint document
DOWNLOAD ALL
What do learners need to know first?
Learners should already know that there are three states of matter: solids, liquids and gases. They should have a basic understanding of the properties of each state of matter.
Equipment list
Each group of learners should have:
- A set of electronic scales
- A 500 ml bottle of fizzy drink
- Measuring jug (with a capacity of at least 500 ml)
- Spoons, straws or something else to stir the drinks with
Additional resources
- Investigate the properties of liquids and gases further in our leaky bottle investigation , or explore the amount if sugar in fizzy drinks with our heavy sugar investigation .
- Try our particle disco demonstration from our collection of video demonstrations exploring liquids .
- Read up on solids, liquids and gases in this That’s Chemistry! textbook chapter .
- Introduce your learners to solids, liquids and gases with our primary science podcast .
Lava lamp: teacher notes
Lava lamp: classroom slides, additional information.
Primary science investigations were developed in collaboration with the Primary Science Teaching Trust

Air pressure and the antigravity bottle

Air pressure, gases and the leaky bottle

Dissolving, density and ‘heavy’ sugar

Fizzy irreversible changes and bath bombs

Irreversible changes and the ‘fire extinguisher’

Irreversible changes and the ‘freaky hand’

Properties of gases, air pressure and ‘sticky’ cups

Properties of solids and ‘biscuit bashing’

Viscosity and ‘racing’ liquids

Freezing and the ‘intriguing ice’ experiment

- Practical experiments
- Properties of matter
- Observing and measuring
Related articles

Particle diagrams | Structure strip | 14–16
By Kristy Turner
Support learners to describe and evaluate the particle model for solids, liquids and gases with this writing activity

Illustrate polymer properties with a self-siphoning solution
2024-04-22T05:38:00Z By Declan Fleming
Demonstrate the tubeless siphon with poly(ethylene glycol) and highlight the polymer’s viscoelasticity to your 11–16 learners

Revealing blueberries’ nanostructure
2024-03-22T11:00:00Z By Nina Notman
Find out how microscopic, self-assembling particles give blueberries their characteristic blue hue
No comments yet
Only registered users can comment on this article., more primary science.

Catherine’s chemistry practical skills sessions
Find out how Catherine organised her chemistry practical skills sessions and get tips for applying to the RSC Primary Science Teaching Empowerment Fund

CPD support from the Primary Science Teaching Trust
Explore professional development resources, webinars and support from the Primary Science Teaching Trust.

STEM careers and skills activities
Five out of five
Introduce primary learners to STEM careers and encourage them to explore their own skills. Includes a game, colouring poster, fact files and teaching notes.
- Newsletters
- Find your local education coordinator
Site powered by Webvision Cloud
Skip to Main Content
Chemistry project
Make a Lava Lamp
- Flask or empty water bottle (a clear plastic bottle works well)
- Vegetable oil, cooking oil, or baby oil
- Food coloring
- Alka-Seltzer
- Fill the flask most of the way with your choice of oil.
- Fill the rest of the flask with water. The oil floats and the water sinks to the bottom of the jar under the oil and looks like little, clear blobs.
- Add a few drops of food coloring; your choice of color. The food coloring is water-based, so it will also sink and color the water that is now at the bottom of the flask.
- Break an Alka-seltzer tablet into a few small pieces, and drop them in the flask one at a time.
- Watch your lava lamp erupt into activity! As the chemical reaction slows down, simply add more Alka-seltzer.
A lava lamp works because of two different scientific principles: density, and polarity.
Concept 1: Density
Density is the measurement of how compact a substance is - how much of it fits in a certain amount of space.
(The scientific equation is density = mass/volume .)
If you measure an equal volume of oil and water, you'll find that the water is heavier than the same amount of oil. This is because water molecules are packed more tightly; a cup of water actually has more mass than a cup of oil.
Because water is more dense than oil, it will sink to the bottom when the two are put in the same container. Density is affected by temperature—the hotter a liquid is, the less dense it will be.
Concept 2: Polarity
Polarity is the quality of having two oppositely charged poles.
Water molecules are "polar" because they have a lopsided electrical charge that attracts other atoms. The end of the molecule with the two hydrogen atoms is positively charged. The other end, with the oxygen, is negatively charged.
Just like in a magnet, where north poles are attracted to south poles ("opposites attract"), the positive end of the water molecule will connect with the negative end of other molecules.
Oil molecules, however, are non-polar— they don't have a positive or negative charge, so they are not attracted to the water molecules at all. This is why oil and water don't mix!
What Happened:

Set up your chemistry projects like a pro with this lab equipment! This set contains the most commonly used chemistry lab equipment, equipping you to explore critical chemistry concepts with durable glassware.
View Details:
In Stock & Ready to Ship
Need It Fast? See Delivery Options In Cart.

You observe temperature every day with how hot or cold you feel. Temperature is so much more than that! Design and carry out a fun experiment by making a thermometer and using it to measure the effects of various conditions on temperature.
Wonder (K-2nd grade)
Item ships to the United States only.

Combining flavor, fun & chemistry, this spherification kit is a great & tasty intro to food science! Use food-grade versions of three chemicals used in molecular gastronomy recipes to create colorful, edible spheres!
Ideal for Grades 6+

If you are what you eat, what makes up your food? Experiment and learn about the connections between chemistry & nutrition for a meaningful STEM activity.

Learn how to make elephant toothpaste with the Elephant Toothpaste Reaction Kit - an incredibly fun, educational & hands-on demonstration of chemical reactions! Provide kids with a safer version of a classic experiment.

Create and watch a chemiluminescence reaction. Combine instant light powder and water in a beaker, and then watch in amazement as blue light glows!

Discover the relationship between crystalline structure and phase changes with the Super Cool science curriculum kit! Make and view crystals to discover the importance of physical changes on how we use matter.
Launch (8th-12th grade)
Lava Lamp variation
Snowstorm in a Boiling Flask
- Boiling (or Florence) Flask ; or any clear glassware
- White Paint
- Glitter (white or blue)
- Alka-seltzer
- Mix about 1tsp of white paint with about 100 ml of water
- Add a generous amount of glitter to the mixture
- Pour the white, glittered water into the boiling flask (or any clear glassware) . This should fill your glassware about 1/5th full
- Fill the rest of the glassware with baby oil. The clear baby oil is less dense than the water mixture and will stay on top
- Break an alka-seltzer tablet into a few small pieces
- Drop the alka-selzer pieces in the flask one at a time.
- Watch as the snowstorm appears!
- As the reaction slows down, simply add more alka-seltzer.
Just like in the lava lamp project our homemade snowstorm was created when we used alka-seltzer to react with the water to produce carbon dioxide gas bubbles. These stick to the water droplets. The water / gas combo is less dense than the oil, so they rise to the top of the flask. At the top, the gas bubbles pop and escape into the air, allowing the dense water to sink back to the bottom again. Refer to the science lesson from the lava lamp project above or print this free lesson.
Printable Project

Pin This Project

FREE Science eBook
4 Popular Slime Recipes
DIY Super Bubbles
Make a Bouncy Ball
We get it. Science can be messy. But Home Science Tools' products and service can handle it.
Our products are durable, reliable, and affordable to take you from the field to the lab to the kitchen. They won't let you down, no matter what they're up against. Whether it's (over)eager young scientists year after year, or rigorous requirements that come once-in-a lifetime.
And if your science inquiry doesn't go as expected, you can expect our customer service team to help. Count on friendly voices at the other end of the phone and expert advice in your inbox. They're not happy until you are.
Bottom line? We guarantee our products and service won't mess up your science study—no matter how messy it gets.
Questions? Get in touch with our Customer Service team.
Make Your Own Lava Lamp

Introduction: Make Your Own Lava Lamp

The purpose of this experiment is to show the density in a lava lamp. Our hypothesis is when the temperature increases, then the time taken for the reaction to be complete decreases because the temperature gives more kinetic energy for the molecules, and so they will collide faster.
Step 1: Materials

- 1 plastic soda bottle with cap or any long cup
- Vegetable oil
- Baking soda or salt
- Food coloring
Step 2: Procedure

1. Get a tall cup
2. Add two thirds of water into the cup
3. Add two or three teaspoons of oil
4. Add two or three teaspoons of salt or baking soda until a reaction occurs
5. Add food coloring
6. Tip the bottle back and forth to observe the reaction properly
Step 3: Data and Photos

Step 4: Data Analysis

The oil floats on to if the water because it is less dense or lighter than water. The food coloring has the same density as the water, so it sinks through the oil and mixes with the water. When you add the salt, it sinks to the bottom then starts to dissolve. We tried this experiment twice to make sure our data was correct, so that our experiment resulted with proper measurement and no mistakes. When we recorded the measurements of the temperature of the lava lamp and when it erupts, it did not come to the same results as all temperatures were completely different from one another, but the hot and room temperature lava lamps were similar, which we also tried twice.
Step 5: Results and Conclusion

Our results were that when oil is applied to water, they separate. When we applied the food coloring, it dissolves in the water rather than the oil. Chemicals react with water when the baking soda is added, creating bubbles. The impact is similar to that of a lava lamp. Like lava, the food coloring flows around the container. So, our lava lamp experiment was successful and worked just as planned.
Our conclusion was that after trying different household products, the baking soda, oil and water mixture made the best lava lamp other than the salt, oil, and water lava lamp. It had more active bubbles that rose to the surface and was more interesting than the other one and also worked better and in a proper way.
Step 6: Application

This experiment is important because many people can’t go out during this time or can’t afford to buy a lava lamp, so we can ease their problems by applying science and fun into an experiment while also learning how it works. It can also be important to teach people the chemistry behind lava lamps and how various substances react with other substances, so it can be applied for learning or something like cooking. This can also be applied in practice to learn more about dissolving and mixtures.
In this experiment I learned many things, like the chemistry behind a lava lamp and how various substances react with each other. For example, the baking soda reacts with the water to produce carbon dioxide gas bubbles and stick to the water droplets. This experiment was something I’ve never tried before, and it was very fun to learn something new in this experiment while having fun too.
Recommendations

Art and Sculpture Contest

Woodworking Contest

Outdoor Life Contest

Science Fun
DIY Lava Lamp Chemical Reaction Science Experiment
In this fun and easy science experiment, we are going to show you how to make a DIY lava lamp by using a chemical reaction. Most do-it-yourself lava lamp science experiments require the use of an Alka-Seltzer tablet, but in this version we are going to show you how to make an awesome lava lamp with a few items you probably already have in your kitchen. This is a great visual science experiment to observe and also provides insight into density.
- 1 cup of vegetable oil
- 1/4 cup of vinegar
- Food coloring
- 1 tablespoon baking soda
- 1 tablespoon water
- Clear cup or glass
- Small bowl or cup
- Tray to catch and contain any spills caused by the bubbling chemical reaction.
Instructions:
- Place the glass in the tray.
- Add the 1 cup of vegetable oil to the glass.
- Next, add the 1/4 cup of vinegar.
- Add 4 to 8 drop of food coloring.
- Mix well with the spoon.
- Now mix the baking soda and water in the small bowl.
- Pour the baking soda and water mixture into the glass.
- Observe what happens.
EXPLORE AWESOME SCIENCE EXPERIMENT VIDEOS!
How it Works:
The oil is less dense and thus seems to float on the vinegar. The oil is also less dense than the baking soda and water mixture. When the mixture is poured into the glass, it sinks to the bottom and the chemical reaction occurs between the baking soda and vinegar. This endothermic chemical reaction creates carbon dioxide as well as causes the glass to cool noticeably. As the carbon dioxide bubbles rise toward the surface, little globs of colored water stick to the bubbles creating the lava lamp effect. As the bubbles reach the surface, they pop, and the colored water sinks back toward the bottom of the glass.
Make This A Science Project:
Does the temperature of the vinegar effect the chemical reaction? Do other types of oil behave differently than the vegetable oil. Do different amounts of water or baking soda cause any noticeable changes in the chemical reaction?
EXPLORE TONS OF FUN AND EASY SCIENCE EXPERIMENTS!
SUBSCRIBE AND NEVER MISS A NEW SCIENCE FUN VIDEO!
previous experiment
Next experiment.
Get Your ALL ACCESS Shop Pass here →
How To Make A Lava Lamp

Have you ever made a DIY lava lamp? We love to explore science with common household items. A homemade lava lamp (or density experiment) is one of our favorite science experiments for kids .
Lava Lamp Experiment
You can also experiment with salt with this lava lamp instead of using Alka Seltzer tablets!
- Valentine’s Day Lava Lamp
- Earth Day Lava Lamp
- Halloween Lava Lamp
- Water Bottles, Mason Jars, or Plastic Cups
- Food Coloring
- Baby Oil or Cooking Oil
- Alka Seltzer Tablets (generic is fine)
💡 Lava Lamp Tip: Set up this experiment on a plastic tray or dollar store cookie sheet to minimize the mess. Dollar stores also have nice little mason jar-like jars you can use too. Science in a jar is quite fun, so we picked up six of them the last time we were there!
LAVA LAMP INSTRUCTIONS:
STEP 1: Gather your ingredients! We started with one cup and then made a rainbow of lava lamps.
STEP 2: Fill your cup or jar(s) about 2/3 of the way with oil. You can experiment with more and less and see which one gives the best results. Make sure to keep track of your results. See below for more tips on experimentation and using the scientific method .

STEP 3: Next, you want to fill your jar(s) the rest of the way with water. These steps are great for helping your kids practice fine motor skills and learn about approximate measurements.
💡 Make sure to observe what happens to the oil and water in your jars as you add each ingredient.
STEP 4: Add drops of food coloring to your oil and water and watch what happens. However, you don’t want to mix the colors into the liquids. It’s ok if you do, but I love how the coming chemical reaction looks if you don’t mix them!

STEP 5: Now it’s time for the grand finale of this lava lamp experiment! Drop an Alka Seltzer tablet or its generic equivalent into each cup or jar. Make sure to watch closely as the magic happens!
When the lava lamp chemical reaction slows down, add another tablet. What do you think will happen? How is the colored water moving up through the oil? Ask plenty of questions to get your kids thinking!
Click here to get your FREE Science Challenges Calendar

Lava Lamp Science Information
Quite a few things are going on here with both physics and chemistry! First, remember liquid is one of three states of matter . It flows, pours, and takes the shape of the container you put it in.
However, liquids have different viscosity or thicknesses. Does the oil pour differently than the water? What do you notice about the food coloring drops you added to the oil/water? Think about the viscosity of other liquids you use.
Why don’t all liquids mix? Did you notice the oil and water separated? That’s because water is heavier than oil.
💡 Making a density tower is another great way to observe how not all liquids share the same density.
Liquids are made up of different numbers of atoms and molecules. In some liquids, these atoms and molecules are packed together more tightly, resulting in a denser liquid. Learn more about density here.
Now for the chemical reaction ! When the two substances combine (Alka seltzer tablet and water), they create carbon dioxide, all the bubbling you see. These bubbles carry the colored water to the top of the oil, where they pop, and the water then falls back down.
How To Set Up A Lava Lamp Science Fair Project
Want to turn this lava lamp into a cool lava lamp science project? Check out these helpful resources below.
💡 By changing the water’s temperature, you can observe and measure how it affects the behavior of the bubbles of carbon dioxide.
Sample Hypothesis: “If the temperature of the water used in a homemade lava lamp increases, then the movement of the colored gas bubbles will become faster and more vigorous because heat affects the density and buoyancy of the liquids involved.”
- Independent Variable: The temperature of the water used in the lava lamp.
- Dependent Variable: The speed and movement pattern of the colored gas bubbles in the lava lamp.
- Controlled Variables are…
Also check out…
- Easy Science Fair Projects
- Science Project Tips From A Teacher
- Science Fair Board Ideas
More Fun Science Experiments to Try
- Skittles Experiment
- Baking Soda and Vinegar Volcano
- Growing Borax Crystals
- Elephant Toothpaste
- Magic Milk Experiment
- Egg In Vinegar Experiment
Printable Science Projects Pack
If you’re looking to grab all of our printable science projects in one convenient place plus exclusive worksheets and bonuses like a STEAM Project pack, our Science Project Pack is what you need! Over 300+ Pages!
- 90+ classic science activities with journal pages, supply lists, set up and process, and science information. NEW! Activity-specific observation pages!
- Best science practices posters and our original science method process folders for extra alternatives!
- Be a Collector activities pack introduces kids to the world of making collections through the eyes of a scientist. What will they collect first?
- Know the Words Science vocabulary pack includes flashcards, crosswords, and word searches that illuminate keywords in the experiments!
- My science journal writing prompts explore what it means to be a scientist!!
- Bonus STEAM Project Pack: Art meets science with doable projects!
- Bonus Quick Grab Packs for Biology, Earth Science, Chemistry, and Physics
- Science Fair Project Pack with experiments to try!

14 Comments
Amazing. I’m a counselor for children and adolescents of all different functional levels and I love incorporating art into therapy. Thank you for this idea. It is so cool!
Your welcome! So glad that this can be useful to you. My son loves anything that will erupt too!
Baby oil works the best for this experiment. It is clear, so it allows for the food coloring to really stand out.
Baby oil is great for this experiment but regular oil works well too in case you don’t have any on hand.
- Pingback: Liquid Density Tower Physics Activity and Experiment for Kids
- Pingback: Marshmallow Edible Slime Recipe or Putty Idea for Kids
Thank you for the idea , I might use it for an extra credit project
- Pingback: Simple and Educational STEM Projects for Toddlers
This science experiment, this is what I’m going to to do for a science fair project!!!
- Pingback: Science Activities For Kids « Craft Supplies
- Pingback: Walking Water Science Experiment for Kids STEM and Rainbow Science
- Pingback: Peeps Slime Candy Science for Easter Science and Sensory play
How can I download instructions for the experiments? I’d rather have a print out to check with during experiments than my phone.
Check out my classic science pack in the SHOP! https://little-bins-for-little-hands.myshopify.com/products/classic-science-pack
Comments are closed.

Subscribe to receive a free 5-Day STEM Challenge Guide
~ projects to try now ~.


Super Cool Lava Lamp Experiment for Kids
This lava lamp experiment is super cool! Your kids will love exploring colored water and oil, but a surprise ingredient will make this science activity even more exciting!

It’s always a hit with the kids. So grab a few household supplies and give this lava lamp science activity a try!
Lava Lamp Science Experiment
As part of our science lessons this school year, we are trying out all kinds of really neat science experiments and activities. This lava lamp experiment tops the list!
*Disclaimer: Adult supervision is required for this experiment. You must supervise your children at all times while doing it. Do not allow children to put any of the items in their mouth and do not do this experiment if your children still put things in their mouth.
Both of my kids had a blast with this. We’ve actually done it several times and with all different colors, but it never ceases to amaze them. It’s almost shocking how long they will engage with it.

One great thing about this science experiment is that you only need a few supplies and your probably already have most of them in your home or classroom.

Lava Lamp Experiment
Supplies Needed:
As an Amazon Associate I earn from qualifying purchases.
- Vegetable Oil
- Food coloring – primary colors or neon
- Original Alka Seltzer tablets
To begin, color about 1/2 cup of water with food coloring. I like using these gel food colors for vibrant coloring.
Take the Alka Seltzer tablets and break them into 2 or 3 pieces. Place them in a small cup or container.

Fill a glass about 3/4 full with vegetable oil. Then pour in the colored water until the liquid in the cup is about 1-2 inches from the top.
You don’t want it to overflow! Well, unless you want to turn it into an eruption experiment too. For this reason and quick cleanup, I like to do this on a tray.
Add pieces of the Alka Seltzer tablet to the cup. *DO NOT let kids put the tablet in their mouth at any time.

Why this Science Experiment Works
The water and oil do not mix and the oil doesn’t change color because the food coloring is water soluble. The Alka Seltzer reacts with the water to make bubbles of carbon dioxide.
The bubbles attach themselves to the blobs of colored water and bring them to the top of the glass. When the bubbles pop the blobs of colored water fall back to the bottom of the glass.
This lava science experiment is sure to WOW your kids. They may even ask you to do it over and over again like mine did!

Video of Lava Lamp Experiment
Winter Lava Lamp Experiment!
This Blizzard Lava Lamp experiment is super cool! Your kids will love exploring colored water and oil with a winter twist!
Our kids were so excited because it looked like a blizzard was going on inside the glass. They had a blast with this fun science activity!

Benefits of Science Experiments with Kids
Science experiments help foster curiosity, ignite children’s imagination and help nurture a love for learning! It’s a great way for kids to develop fine motor skills, problem solving and analytical thinking while having fun and being creative!
From colorful chemical reactions to mesmerizing physics your kids will have a blast learning.
1. Hands-On Learning
When young kids actively engage in experiments, they grasp complicated concepts more easily. The tactile nature of experiments allows them to visualize abstract ideas, fostering comprehension that traditional teaching methods might struggle to achieve.
2. Cultivating Critical Thinking
Through engaging in science experiments, children refine their skills in observing, analyzing, and incorporating new information.
3. Fostering Creativity
Science experiments often involve a degree of unpredictability. When children witness unexpected outcomes, they are prompted to think creatively and to experiment with new strategies. This nurtures an environment of innovation, where they learn that failure is not a setback, but rather an opportunity to learn!
4. Building Confidence and Self-Esteem
As kids conduct experiments and have successful results, their confidence grows. This newfound confidence will have a positive ripple effect, encouraging them to tackle new challenges with enthusiasm and perseverance.
5. Real-Life Application
Science experiments bring scientific theories to life, showcasing how the principles are applied in real-world situations.
6. Improved Fine Motor Skills
Engagement in science experiments is a fun way for kids to work on fine motor skills. They will be accomplishing a variety of tasks using their hands, while learning and having a great time.
7. Bonding and Collaborative Learning
Science experiments can become wonderful bonding experiences for families, friends, and classmates. Whether it’s a family project or a group activity in the classroom, kids will develop connections and create great memories.
Science experiments offer amazing benefits for kids while being fun and engaging!
Other Fun Science Experiments
Grow a Rainbow with this fun science experiment! This is quick to setup and you just need markers, a paper towel and two cups of water!
Try this super simple Oobleck recipe that only requires two household ingredients!
If your kids love this oobleck activity, they will absolutely love the Dinosaur Dig Excavation activity!
This rainbow Walking Water Science Experiment is one of our most popular science activities!
This rain cloud jar science experiment gives children a chance to explore clouds and rain in a fun and engaging way.
Explore chromatography with this fun chromatography science experiment for kids!

Red carpet style at the lavish Ambani wedding
Celebrities arrive on the red carpet as Anant Ambani - the youngest son of Asia's richest person Mukesh Ambani - marries his long-time girlfriend Radhika Merchant.

MUMBAI, INDIA
Share this photo

More in this Collection

Share this gallery

More In Pictures

Our oddest photos of the week
Odd and unusual images from around the world this week.

More from Reuters
IMAGES
COMMENTS
What is a good hypothesis for a lava lamp? Hypothesis:We think that adding oil, water, and food coloring together will make a lava lamp effect because we alredy know that water and oil separate because of their complete density contrast. The alka-seltzer will make it have a lava lamp effect. Click to see full answer.
Kids love watching this version of a lava lamp because of the colorful blobs that are moving around. What better way to teach kids about chemistry than to show them something that will captivate them!
The lava lamp can be prepared using simple household materials like food colouring, vegetable oil and bottle. Through this experiment, we learn about chemical reactions and the density of liquids.
What is a Lava Lamp? Lava lamps, also known as liquid motion lamps, have been doing the rounds for ages. The lava lamp science project hypothesis talks about the density of two liquids and the solubility of the two same liquids. In the lava lamp, we have liquids that are very close to each other in density and are insoluble in each other. Many people often end up using oil and water because ...
A lava lamp is an example of a convection current. Convection currents cause liquids and gases to rise and fall because of changes in their density. There are convection currents all around you, even in the Earth's crust! When globs get warmed by the light bulb they rise to the top of the lamp, where they cool and sink.
Make a lava lamp while investigating the effect of temperature on chemical reactions.
FAQ about the Lava Lamp Science Experiment How do you make the Lava Lamp experiment with Alka Seltzer? Since Alka Seltzer provides carbon dioxide bubbles without the use of vinegar and baking soda, you will need fewer ingredients for the lava lamp experiment.
The "lava lamp" created in the following experiments displays a multitude of important fluid and thermodynamic properties. Concepts such as: convection, surface tension, buoyancy, density, fluid drag, and the differences between heat convection and other convective processes are evident simply by observation.
Construct Hypothesis- I predict that the vegetable oil and water (will or will not) mix. Test with an Experiment- Lava Lamp Experiment. Make observations Conclusion- I saw that the vegetable oil and water did not mix. Is the hypothesis true or false- The hypothesis was (true or false).
Lava Lamp The lava lamp effect experiment uses an indigestion tablet to slowly release gas that propels droplets of water upwards through a layer of oil. As the gas is released from the top of the reaction, the water falls back down through the oil layer as a result of its greater density thus resulting in a circulating effect of rising and falling water droplets.
Lava Lamp Lava lamps are also known as liquid motion lamps. The hypothesis of a lava lamp is about the density of two liquids and the solubility of the two same liquids. The two liquids used in lava lamps are very close to each other in density and are insoluble in each other. Mostly, people use oil and water as they are insoluble in each other.
Brangwynne's research shows that structures within living cells can form and dissolve depending on changing conditions, more like the undulating interior of a lava lamp than the fixed parts of a table lamp. Clifford Brangwynne sees similarities between living cells and salad dressing, in which oil and vinegar separate according to the laws of ...
Lava Lamp Science Experiment! This is a safe and fun science experiment you can do at home! Learn more about hands-on science, and find other fun experiments at SFFE!
Get the Irish language version. This experiment focuses on carbon dioxide gas fizzing through liquids. First watch the video of the 'lava lamp' demonstration, then find out how you can investigate the mass of carbon dioxide in fizzy drinks with your learners.
Make a Lava Lamp You know the mesmerizing feel of watching a lava lamp, with its large colored bubbles sinking, rising, and morphing? The action you see is actually a fun science experiment as it's caused by the density and polarity of the substances. With this project, you can make your own (temporary) DIY lava lamp with household materials!
A Lava Lamp Model for the Deep Earth. Lava lamps, those glowing, roiling conversation pieces, went out with the '70s. And now they're back, not only with the '70s revival but in the thinking of geophysicists who ponder the mantle, the vast layer of viscous rock between Earth's molten iron core and the outer shell of tectonic plates.
Hypothesis: We predict that the lava lamp will bubble due to the reaction cause by adding the effervescent tablets. This is a homemade lava lamp
Learn how to make a lava lamp in the simple tutorial below. These DIY lava lamps are SO COOL and completely mesmerizing to watch! The bubbles float up and fall back down in this simple science experiment that's fun for both kids and adults.
Make Your Own Lava Lamp: The purpose of this experiment is to show the density in a lava lamp. Our hypothesis is when the temperature increases, then the time taken for the reaction to be complete decreases because the temperature gives more kinetic energy for the molecules…
DIY Lava Lamp Chemical Reaction Science Experiment In this fun and easy science experiment, we are going to show you how to make a DIY lava lamp by using a chemical reaction.
Make a homemade lava lamp for fun science. Your kids will want to try this lava lamp experiment to see the cool chemical reactions!
Lava Lamp Experiment. March 20th, 2020. At-Home Experiments. Activity Time: 30 minutes. Recommended Grades: Pre-K to early primary with adult supervision. Objectives: In this experiment, you will see how density and polarity, when they are powered by the release of a gas, cause a reaction between oil and water. two glasses or jars, 12 - 16 oz.
This lava lamp experiment is super cool! Your kids will love exploring colored water and oil, but a surprise ingredient will make this science activity even more exciting! It's always a hit with the kids. So grab a few household supplies and give this lava lamp science activity a try!
Celebrities arrive on the red carpet as Anant Ambani - the youngest son of Asia's richest person Mukesh Ambani - marries his long-time girlfriend Radhika Merchant.