
Spanish Oral Presentation Guide for Beginners
by TruFluency | Featured Spanish Blog , Learn Spanish , Spanish Presentation

The moment to show off your Spanish skills is here, and we’ll teach you how to wow your audience, coworkers, boss, or clients. The way you introduce and close your presentation can have a positive or negative effect on your audience. So, it’s normal that you get nervous about speaking in front of a crowd and communicating your ideas effectively.
Practicing oral presentations in Spanish helps you focus on pronunciation and clarity while broadening your academic, job, and business opportunities . However, what may be even more valuable is that it gives you the chance to take risks, gain confidence, and exercise persuasion in a foreign language.
If you have a presentation soon, and want to blow everyone’s mind, here is your guide to giving oral presentations in Spanish for beginners.
5 Engaging Presentation Openings
The first part of our Spanish oral presentation guide is to help you find the most engaging ways to open your speech.
1. Start with a Reflexive or Engaging Question
For example:
¿Sabían ustedes que la entonación de nuestra voz no es sonido sino emoción? (Did you know that the intonation of our voice is not sound but emotion?)
Starting with a question allows you to keep your audience attentive throughout your message.
2. Tell an Anecdote
55% of our communication stems from non-verbal language ; everything our audience reads through our expressions, mannerisms, tone, etc., while 38% of our communication is vocal and 7% is words.
Hence, the importance of telling a story at the beginning of your presentation, so your audience connects with what you are going to deliver. We are all natural communicators.
At first, you may feel shy about opening yourself to the world, but believe it or not: your story counts, your story inspires, and even more than you think.
3. Utilize Objects
Generate interest with an object that’s relevant to your message. For instance, you can follow a similar script to this one:
Esta cartera que hoy acompaña mi atuendo tiene un significado muy especial. Esta cartera ha sido elaborada, tejida y pensada por gente que cree en sus sueños. ¡Qué gusto estar el día de hoy aquí hablando con emprendedores que creen en construir!
(This purse that matches my outfit today has a very special meaning to me. This purse has been sewn, knitted, and created by people that believe in their dreams. What a pleasure to be here today talking with entrepreneurs that believe in building things!)
Utilizing resources as elements of your speech will help your public to relate and feel part of your speech. Everything has a meaning and a representation. Remember that your public will forget what you said but will always remember how you made them feel. So, make them feel welcome!
4. Statistics
Using statistical data will help give your statement a significant rational weight. Remember that statistics aren’t read, they’re interpreted. This forces you to describe exhaustive research about a topic.
This isn’t about boring your audience with numbers, it’s about using statistics as a tool to make people reflect on your message. An example of an introduction in Spanish with statistics is:
¿Sabían ustedes que el 80% de los consumidores que adquieren sus productos en línea confían más en las recomendaciones de sus amigos o familiares que de las propias empresas?
(Did you know that 80% of consumers that buy your products online trust more in the recommendations of their friends and family than on the ones of companies?)
5. Who are you?
Greet your audience. This is fundamental to bond with them. Say your name, who you are, what your topic is and why it is important to pay attention to you. Let’s put it into practice with this example:
Hoy me encuentro feliz de estar con ustedes compartiendo lo que sé. Mi nombre es Liam Jones, soy periodista y locutor de radio, y hoy quiero que aprendas a utilizar tu voz para hacerte escuchar.
(Today I am very happy to be with you sharing what I know. My name is Liam Jones. I am a journalist and radio host, and I want you to learn to use your voice to make yourself heard.)
Respect your essence, know yourself and regularly practice the above types of introduction.
Verbal and Non-Verbal Presentation Tips
The next part of our Spanish oral presentation guide is divided into verbal and non-verbal language.
Non-Verbal Language Tips
Your gestures can emphasize, substitute or contradict what you express with words.
Use open gestures, like moving your hands, stretching your arms and legs, and opening your shoulders. Additionally, avoid having objects in your way between your body and the audience, such as folders, books, and tables. Your face should be visible all the time.
Choose gestures that ease people’s understanding of your speech. For example, pointing in a direction.
Avoid fidgeting out of nervousness. For instance, touching your hair or glasses.
Distribute your gaze amongst your audience, so everybody feels included. You can divide your audience into different quadrants. Let’s say, four, and choose a person of each quadrant to “talk to”.
Volume and Intonation
Mentally “take measurements” of the room, so the volume you choose to use is enough for both people in the front row and in the back to hear you. Also, avoid monotonous intonation. Highlight with your voice the keywords of your speech.
Rhythm and Pronunciation
Slow down when you need to separate ideas, this reflects confidence and helps you recover people’s attention. Pronunciation should be clear , so be careful with mumbling sounds.
Nobody has the right to tell you how to dress, but it’s recommendable that your attire matches both your personality and the context of your presentation.
Verbal Language Tips
Order and structure.
A presentation that has order and structure is easy to follow, understand, and remember.
Organize your speech in parts. For example: importance, data, chronology, interesting bullet points, zoom in, and zoom out.
Use discourse markers; words that organize and connect ideas. Some examples are:
To Start Interventions El objetivo de esta exposición es… / Hablaré en primer lugar de… / Para comenzar… (The objective of this presentation is… / Firstly, I’ll speak about… / For starters…)
To Introduce Comments or Examples Por ejemplo… / Como es el caso de… / Recordemos, en ese sentido, que… (For example… / As is the case with… / Let’s remember, in this sense, that…)
To Structure the Discourse En primer lugar… / En segundo lugar… / Por un lado,…por otro lado… / Finalmente… (In first place… /In second place… /On the one hand…on the other hand… /Finally…)
To Resume the Subject Volviendo a lo que hemos visto al principio… / Como decía… / Señalaba que… (Going back to what we’ve seen at the beginning… /Like I was saying… / I was pointing out that…)
To Establish Logical Relationships Consecuentemente… / Eso nos demuestra que… / Deducimos, entonces… (Consequently… / That shows us that… / We deduce, then…)
To Conclude Tratemos, finalmente, el último aspecto… / En resumen,… / Para terminar… / En conclusión… (Let’s address, finally, the last aspect… / In summary… / Lastly… / In conclusion…)
You should adapt it to your audience’s knowledge, formality level, and the purpose of your presentation.
Sentences should be short and simple. Avoid the overuse of muletillas (catch phrases).
Oral Presentation Conclusions in Spanish
When you’re giving a presentation in Spanish, do not miss the chance to leave a good impression. The final part of a speech is what we remember the most. So, use it to deliver a message or briefly summarize what you want to convey. You can create a compelling conclusion with a phrase, rhetorical question, quote, or call-to-action.
En conclusión, cualquiera puede padecer de un problema de salud mental. (In conclusion, anyone can have a mental health problem.)
Si las personas más brillantes pueden padecer problemas de salud mental, ¿por qué nosotros no? (If the most brilliant people can have mental health issues, why can’t we?)
La mente es como un paracaídas, si no se abre, no sirve para nada. Muchas gracias, público oyente, por haber abierto su mente a escucharme en esta exposición. (The mind is like a parachute, if it isn’t opened, it doesn’t work. Thank you very much, listening public, for having opened your minds to listen to me in this presentation.)
Ready to be confident in your next Spanish oral presentation?
The key to giving a memorable oral presentation in Spanish is to be original, creative, and do something that’s unusual but true to your essence. Thus, you’ll make the difference.
If after reading our Spanish oral presentation guide, you think you still need help to prepare yourself for your Spanish presentation, count on our top-notch team of Spanish fluency coaches . So, don’t let fear of success hold you back, and book with one of our coaches.
Save 20% off your first month of lessons with code TF20 today!
Popular Posts
Latest blogs.

Useful Phrases to Give a Presentation in Spanish
¿has dado alguna vez una presentación en español .
Si es así, ya sabes que puede ser bastante difícil pensar en las palabras correctas cuando todos te están mirando. ¡Cuánta presión y qué nervios!
Bueno, no te preocupes, porque en esta entrada aprenderás una serie de frases en español que te ayudarán a que tus presentaciones sean más profesionales.
INTRODUCCIÓN

Al comienzo de tu presentación sería ideal seguir los siguientes pasos:
- Preséntate a ti mismo y a tu tema.
- Haz un resumen de tu exposición.
- Dile a la audiencia cómo manejarás las preguntas.
Para presentarte di tu nombre, en qué empresa trabajas y/o cuál es tu trabajo específico:
“Buenas tardes. Mi nombre es (tu nombre) y soy (tu trabajo) en (tu empresa)” .
Luego, puedes decirle a la audiencia cuál es el tema general. Aquí hay dos frases que puedes usar:
“Mi presentación es sobre…”
“Hoy me gustaría hablarte de…”
Siempre es una buena idea darle a la audiencia un resumen o una descripción general de su presentación. Recuerda dirigirte a tu público tratándoles de USTED :
“Permítanme darles una descripción general de la presentación de hoy”.
“En primer lugar voy a hablar de… (tema 1)”
“Después de eso, echaremos un vistazo a… (tema 2)”
“Entonces, consideraremos… (tema 3)”
“Y finalmente, explicaré… (tema final)”
Luego, dile a la audiencia si desea que la gente le haga preguntas en medio de la presentación o solo al final. Aquí hay una frase para cada uno:
“Por favor, siéntase libre de interrumpirme si tiene alguna pregunta”.
“Dejaré algo de tiempo para preguntas al final de la presentación”.
HACER TRANSICIONES ENTRE TEMAS
Para comenzar el primer tema, puedes usar frases como éstas:
“Me gustaría comenzar por/con… ”.
“Empecemos por… ”.
En este contexto, las palabras “comenzar” y “empezar” significan lo mismo.
Para pasar a otro tema, puede usar estas frases:
“Ahora vamos a pasar a…”
“Ahora veamos…”
“Ahora me gustaría discutir…”
“Ahora déjame pasar a…”
Notarás que todos comienzan con la palabra “ahora”: esta es una señal para tu audiencia de que estás presentando un nuevo tema.
CON REFERENCIA A DIAPOSITIVAS / GRÁFICOS

Si estás dando una presentación en PowerPoint, querrás consultar las diapositivas, que pueden mostrar imágenes, mapas, gráficos, cuadros, tablas, etc.
Aquí hay algunas frases que puedes usar:
“Esta diapositiva muestra… ”.
“Mirando esta diapositiva, podemos ver que… ”.
“Como puede ver en esta diapositiva…” .
REPITIENDO / CORRIGIENDO

¿Qué harías si dijeras algo incorrecto o confuso durante tu presentación?
Primero, ¡no te pongas nervioso/a! Los hablantes nativos de español también cometen errores durante las presentaciones, así que ¡no es el fin del mundo!.
Aquí tienes algunas frases para retomar el rumbo:
Frases para decir algo de nuevo usando diferentes palabras:
“Déjeme decirlo de otra manera”.
“Déjeme reformular eso”.
“En otras palabras…”
Frases para corregir un error:
“Lo siento, eso no es correcto. quise decir que… [hemos contratado a 15 nuevos empleados, no a 50] ”.
Disculpe + corrección con énfasis.
Por ejemplo: “La escuela fue fundada en 1999, disculpe , mil novecientos ochenta y nueve”.
Frases para describir efectos:
Por lo tanto … (usualmente usado para una conclusión lógica)
Este producto es más caro de producir. Por lo tanto, los márgenes de beneficio son más bajos.
En consecuencia … (más formal)
La empresa no obtuvo el permiso de construcción adecuado. En consecuencia, tuvimos que pagar una multa por incumplimiento.
Como resultado …
Hemos invertido en mejores equipos de seguridad y, como resultado , la cantidad de accidentes se ha reducido .
Entonces …
Los anuncios tuvieron éxito, entonces , ahora planeamos expandir el programa.
Las palabras “por lo tanto” y “en consecuencia” se usan típicamente al comienzo de una oración. “Como resultado” se puede usar al principio o al final de una oración, y la palabra “entonces” se usa típicamente en el medio de una oración.

Al final de su presentación, puede dar un breve resumen de sus puntos principales o el mensaje más importante. Aquí hay algunas frases para eso:
“En conclusión…” “Cerraré resumiendo los puntos principales”. “Permítanme recordarles brevemente lo que hemos cubierto”. Como frase final, puedes decir: “Gracias por su atención.”

Para informar a la audiencia que está listo para responder preguntas, puede decir:
“¿Alguien tiene alguna pregunta?” (generalmente se hace en una reunión/grupo más pequeño)
“Me gustaría dar paso a las preguntas ahora”. (generalmente se hace cuando se presenta a un grupo más grande)
Si no entendió la pregunta de la persona, puede decir: “Lo siento, no entendí eso, ¿podrías repetirlo?”
“Lo siento, no entiendo muy bien tu pregunta, ¿te importaría reformularla?” Las expresiones “lo siento” y “te importaría” se incluyen por cortesía.
Si la pregunta requiere información que no tienes en este momento, pero que podrías averiguar más adelante, puedes decir esto: “Esa es una pregunta interesante. En realidad, no lo sé muy bien, pero intentaré responderte más tarde con una respuesta”.
Si no puede responder la pregunta, pero alguien más puede, entonces diga: “Desafortunadamente, no soy la mejor persona para responder eso, pero puedo ponerlo en contacto con un colega mío” .
Finalmente, si la respuesta a la pregunta va a ser muy larga, puede decir: “Me temo que tomaría mucho tiempo explicarlo, pero tal vez tú y yo podamos hablar de eso más a fondo después”. Esto significa que no desea responder la pregunta de inmediato, pero está dispuesto a hablar con la persona al respecto después de la presentación.
Esto es todo por ahora.
Espero que te sea muy útil.
Deja un comentario Cancelar la respuesta
BASIC INFORMATION ON DATA PROTECTION Responsible: Teresa Buendia (Teresa Buendía) Purpose: To moderate and respond to user comments Legitimation: Consent of the interested party Recipients: Will not be sold to third parties except legal obligation. Rights: You can exercise at any time your rights of access, rectification, deletion, opposition and other legally established rights through the following e-mail: [email protected]. Additional Information: You can consult the additional and detailed information on data protection here.
Guarda mi nombre, correo electrónico y web en este navegador para la próxima vez que comente.
By making your comment you accept the Privacy Policy *
Privacy Overview
LinguaJunkie.com
A very cranky language blogger dishing out brutal language tips.
How to Introduce Yourself in Spanish Fluently. 14 Fun Phrases (AUDIO)
Want to introduce yourself in Spanish?
Yes? Good – keep reading.
This is for those that truly want to learn the language. So, here’s how you introduce yourself. You’ll pick up 14 easy lines… and this might take you 2 to 3 minutes or less. With this lesson…
- You get the Spanish phrases and translations.
- Read out loud to practice your speaking.
- Feel free to print this sheet out for extra review.
- Listen to the audio lesson to hear the pronunciation.
So, let’s look at the ways to introduce yourself in Spanish.
| These colorful and printable PDFs teach you Spanish phrases… and they’re free for new learners. |
1) Mi nombre es (name).
Of all the ways to say introduce yourself in Spanish, this is the most formal way. To say “my name is” in Spanish, you just need the phrase “ Mi nombre es .” Then say your name. So, leave me a comment below and add your name. That will be your introduction!
- Mi nombre es (name) .
- Meaning: My name is (name) .
- Very formal
By the way, you’ll also want to HEAR Spanish as you read this. So, check out this FREE Spanish Audio Lesson by SpanishPod101.com . Press play below. You will hear “mi nombre es” and “me llamo” in the audio lesson below.
2) Me llamo (name)
This is the most common way to introduce yourself. “Llamo” comes from the reflexive verb, “llamarse,” which means “to call oneself.”
- Me llamo (name)
- Meaning: My name is… (I call myself/I am called)
3) Soy (name)
This is a much more casual way to introduce yourself in Spanish. You just need the word “soy” which is “I am.”
- Meaning: I am (name)
On top of these basic Spanish phrases, you’ll also want to learn the question, “what’s your name” in Spanish. You’ll definitely be asked that.
4) ¿Cómo te llamas? (informal)
- ¿Cómo te llamas?
- Meaning: What’s your name? (informal)
You’ll want to know this question when dealing with friends and people of your age. By the way, note the “upside-down” question mark (¿). You must know that this is used at the beginning of every question in Spanish.
5) ¿Cómo se llamas? (formal)
- ¿Cómo se llamas?
- Meaning: What’s your name? (formal)
This phrase is for if you’re dealing with older people, of higher status, or just want to be polite. Just change the “te” into a “se.”
6) Hola, es un placer conocerte.
Do you know how to say hello in Spanish ? Use this phrase.
Hello (Hola) and Nice to meet you ( es un placer conocerte) are must-know phrases. And any introduction will probably will use these words.
- Hola, es un placer conocerte.
- Meaning: Hello, It’s nice to meet you.

7) Soy de México.
So, where are you from? America? Europe? Africa? Asia? Just stick the name of your country inside this phrase. We’ll use Mexico as an example.
- I am from (Mexico).
- Soy de México.
- I’m from Mexico.

Here are some common countries that you can stick into this Spanish sentence… and how to say them in Spanish.
- United States – Estados Unidos
- France – Francia
- Spain – España
- Italy – Italia
- China – China
- United Kingdom – Reino Unido
- Germany – Alemania
- Japan – Japón
- Australia – Australia
- Canada – Canadá
- Mexico – México
- Thailand – Tailandia
- Brazil – Brasil
- South Korea – Corea del Sur
- India – India
8) Yo vivo en la Ciudad de México.
What about now – where do you live? Just fill in the blank with the country or city (if famous) into this phrase. I’ll use Mexico City as an example since I used Mexico in the phrase before.
- I live in ______.
- Yo vivo en la Ciudad de México.
- I live in Mexico City

9) He estado aprendiendo español por un año.
Now, how long have you been learning Spanish for? A month? A year?
- He estado aprendiendo español por un año.
- I’ve been learning Spanish for a year.

10) Estoy aprendiendo español en SpanishPod101.com.
Where are you learning Spanish? At school? At home? This would be a great line to know and use when you’re introducing yourself. Here’s my example:
- Estoy aprendiendo español en SpanishPod101.com.
- I’m learning Spanish at SpanishPod101.com .

11) Tengo __ años de edad.
Here’s how to say how old you are in Spanish. You’ll need to know Spanish numbers, which are not that hard, for this.
- Tengo 27 años de edad.
- I’m 27 years old.

Of course, here you’ll need to know Spanish numbers . So, here are some examples. For the rest, check the numbers link above,
| # | Spanish | # | Spanish | # | Spanish |
| 10 | Diez | 20 | Veinte | 30 | Treinta |
| 11 | Once | 21 | Veintiuno | 40 | Cuarenta |
| 12 | Doce | 22 | Veintidós | 50 | Cincuenta |
| 13 | Trece | 23 | Veintitrés | 60 | Sesenta |
| 14 | Catorce | 24 | Veinticuatro | 70 | Setenta |
| 15 | Quince | 25 | Veinticinco | 80 | Ochenta |
| 16 | Dieciséis | 26 | Veintiséis | 90 | Noventa |
| 17 | Diecisiete | 27 | Veintisiete | 100 | Cien |
| 18 | Dieciocho | 28 | Veintiocho | ||
| 19 | Diecinueve | 29 | Veintinueve |
12) Soy ____.
What about your position? Are you a student? Yoga teacher? Lawyer for the potato industry? Potato salesman?
Super important question that people like to ask (and judge you about – Hey, I’m just a blogger! ). Just use “soy” meaning “I’m” and add your position.
- Soy maestro.
- I’m a teacher.

Here are some common jobs and occupations in Spanish:
- Estudiante – Student
- Profesor/a – Teacher
- Médico/a – Doctor
- Enfermero/a – Nurse
- Ingeniero/a – Engineer
- Abogado/a – Lawyer
- Cocinero/a – Cook/Chef
- Policía – Police Officer
- Programador/a – Programmer
- Contador/a – Accountant
13) Uno de mis pasatiempos es ___.
Now, let’s move onto personal interests – hobbies! My hobbies are languages, linguajunkieing and such. How about you? You’ll definitely need this line when introducing yourself in Spanish.
Here’s an example to use:
- Uno de mis pasatiempos es leer.
- One of my hobbies is reading.

14) Me gusta escuchar música.
Now, this is just another example line about your hobbies . You can use something else where.
- Me gusta escuchar música.
- I enjoy listening to music.

Now that you know some Spanish self-introduction phrases…
Let’s take a look at Spanish introduction examples.
Spanish Introduction Examples
While the above are just phrases…
Here are some Spanish introduction examples you can use to introduce yourself.
Sample scripts for Spanish introduction that you can use outright, depending on the situation.
Name, Age & Where You’re From
- Hola, mi nombre es [name]. Tengo [number] años y soy de [place].
- Hello, my name is [name]. I am [number] years old and I am from [place].
Longer Introduction & About Yourself
- Hola, soy [name]. Vivo en [place] y estudio/trabajo en [field]. Me encanta [hobby] y siempre estoy listo/a para una buena charla sobre [interest].
- Hi, I’m [name]. I live in [place] and study/work in [field]. I love [hobby] and I’m always up for a good chat about [interest].
Quick 1-Liner
- ¡Hola! Soy [name] y vivo en [place]. Hi! I’m [name] and I live in [place].
Conclusion — Back to You.
So now you know how to introduce yourself in Spanish .
Plus, you got some Spanish introduction examples that you can use for yourself.
I’m sure there’s a ton more you can say – but this is an easy, simple start that any beginner can put to use. It’s all about starting easy.
See if you can introduce yourself below.
Leave me a comment.
I read all comments!
Hope you enjoyed this!
– The Main Junkie
P.S. I highly recommend this for Spanish learners. If you REALLY want to learn to Spanish with effective lessons by real teachers – Sign up for free at SpanishPod101 (click here) and start learning!

[…] Introduce Yourself in Spanish […]

hi use google translator instead of using tons of websites but this one is way more specific and useful
You cannot copy content of this page
Learn Spanish with free, communicative lessons
How to Introduce Yourself and Someone in Spanish
Knowing how to introduce yourself in Spanish is always the first step to begin a good, simple conversation, especially with someone you just met. The expressions and questions for introductions (presentaciones ) are very similar to the ones in English. They are usually accompanied by one or more greetings, e.g. “Hola” . This lesson will cover some common ways to introduce yourself in the language, as well as expressions to introduce others . You will read and listen to several examples and practice with an interactive quiz. Once you finish, you can move on to the lesson about greetings.
The basics for Spanish Introductions – Las presentaciones
First, we will ask you to watch a short video explaining a few basic ways to introduce yourself in Spanish, plus some expressions that are really common in order to introduce someone else too. Please watch the video carefully, as it will be useful to understand and get the best out of this lesson. Please activate the subtitles if you need them. Once you have finished, solve the exercises in the interactive quiz.
How to introduce yourself in Spanish
Before introducing yourself in Spanish, you should use simple greeting like HOLA and then add an expression like MUCHO GUSTO or ask the other person politely ¿Cómo estás? . Here are two examples:
1. ¡Hola! ¡Mucho gusto conocerte! 2. ¡Hola! ¿Cómo estás?
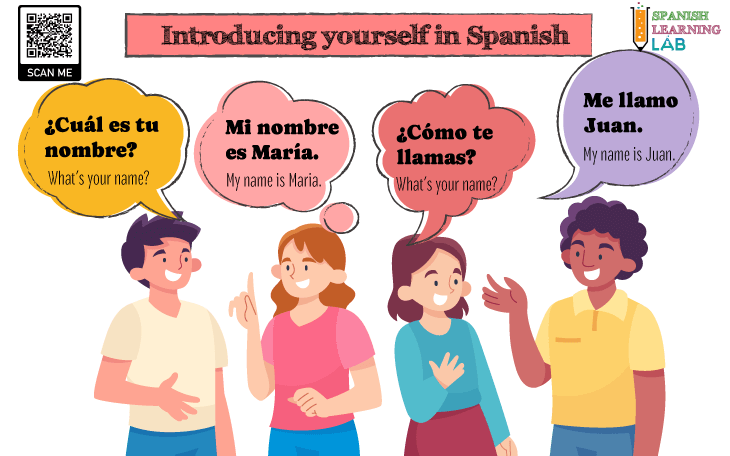
Question words like CÓMO (How) and CUÁL (Which) are essential to ask for names, just like in these two very common examples: ¿Cómo te llamas? and ¿Cuál es tu nombre? . In general, the subject pronoun TÚ is more informal than USTED, but it is also more common. Omitting the subject pronoun in a sentence is normal, but make sure you are using the right conjugation of the verb for the subject even if you leave it out. Here is a list of ways to introduce yourself in Spanish and get another person’s name:
| Introduce yourself in Spanish – Las presentaciones |
|---|
| (literal translation) |
| (I am called Jon. LLAMO is a conjugation of the verb LLAMAR) |
| SOY is a conjugation of the verb SER, to be |
| (TU is a for something that belongs to EL or ELLA) |
| (SU is a possesive adjective for something that belongs to USTED) |
| (a simple way to return a question) |
Let’s briefly analyze the structure of the Spanish introductions that we have covered so far. First, the word “tu” in TU NOMBRE and “su” in SU NOMBRE are possessive adjectives. Notice that the verb LLAMAR (to call) changes its form depending on the pronoun we use. Grammar is important but for now, we will ask you to focus on their meaning and pronunciation as we will develop more on grammar in future lessons.
How to introduce someone in Spanish
In order to introduce someone in Spanish, we will need the verb SER in its forms ES and SON. Basically, if we are referring to one person, we will use “ ES ” as in “ ÉL ES …” (he is ) and “ ERES “ for “ TÚ “ as in “ TÚ ERES …” , but if we are referring to several then we must use “ SON ” as in “ ELLOS SON …” (they are ) . Besides, when you introduce someone else in Spanish, it is important to mention if this person is your friend, relative or something else using possessive adjectives, e.g. “ Él es mi amigo ” (he is my friend ) .

Please mind the pronoun you choose so that you use a pronoun that corresponds properly in gender and number to the person you are introducing. Here are some more examples of Spanish introductions that you can read and listen to. Focus on pronunciation and try to find out grammatical patterns.
| Introduce someone in Spanish – Presentando a otros |
|---|
| (Introducing a woman – SU is a possessive adjective meaning HER) |
| (ES comes from the verb SER, to be) |
| (“su” = his) |
| (“sus” = their) |
| (“se” is the reflexive pronoun for “ella”) |
| (“se” is the reflexive pronoun for “ellos”) |
Listening Activity: Ways to introduce yourself and others in Spanish
Spanish introductions and greetings pdf worksheets.
- Greetings and farewells in Spanish – PDF Worksheet (Vocabulary)
- Getting to Know People in Spanish: PDF Worksheet (Speaking)
- Talking about Yourself in Spanish: PDF Worksheet (Speaking)
- Meeting People in Spanish – PDF Worksheet (Reading)
- Dialogues – Introductions and greetings in Spanish
- Practicing Spanish Introductions – PDF Worksheet
16 thoughts on “How to Introduce Yourself and Someone in Spanish”

Hi, am I right if I think “Les presento a la nueva maestra” should be translated as ” I introduce the new teachers to you”. I mean, “Les” refers to plural nouns, so it would be “teachers” not “teacher”?

Great question! The translation we provided is fine as “I introduce the new teacher to you (the students)”. The reason is that “LES” refers to the students, not the teacher in this sentence. If we want to introduce the new teacher to the principal of the school, then we would say “LE presento a la nueva maestra” (a usted). Similarly, if we were to introduce the teacher to a friend, then we could say “TE presento a la nueva maestra” (a ti). Hope it helps a little!

¿Cómo te llamas?

Hola! Me llama Mariah. ¿Y tu?
Just so you know, I came up with a fake name, because I don’t want people to know my personal info… That is not my real name! 🙂
¿Como estas?
My mother grew up in Mexico city and is teaching me, so I already knew a couple of those things, but I didn’t know some of the greetings. I really liked it! Thank you!
We’re glad you liked this article. Best of luck learning Spanish. ¡Hasta pronto! 🙂
¡Hasta pronto!:)

I love speaking Spanish! Thank you!
This fun yes:)

My name is Andrew and I am just learning spanish
¡Buena suerte aprendiendo español! Saludos

Why can’t question 5 be answered “mi hombre es Diana”?
Hola. Well, the question is “¿Cuál es el nombre de tu mamá?” (What is her mother’s name?) so we are asking about “HER”. HER/HIS are translated as “Su” into Spanish. Her name is Marta – Su nombre es Marta.
Leave a Reply Cancel reply
Your email address will not be published. Required fields are marked *
How to: Feel Comfortable Giving a Presentation in Spanish
Dear Esther,
Giving a presentation in any language can be scary, but when you have to present to people you don’t know, in a language you might not dominate (or even if you are fluent ), it can be downright terrifying. However, as an experienced presenter in Spanish—read here and here about how I did my entire degree abroad—I am here to tell you that you can do it! And it doesn’t have to be as scary as you initially think. Here are my top tips for getting through your presentations in a foreign language:
Prepare your notes:
Even if you are able to make things up as you go along in English, you should be aware that it is more difficult to control a topic in a non-native language. Therefore, take the extra hour or two to make sure you know what you want to say and how you want to say it. I know a lot of people—from all different backgrounds alike—who don’t bother to take the time to truly prepare their presentations and you can tell when they present. In addition, it will make life easier if you properly organize the content before you start preparing the presentation because then you will have you bases covered.
Pro-tip: If you’ve already prepared an assignment or paper around the topic, use this as your guide (even if it is in English). This will help you feel comfortable that you say what you have to say.
Prepare your slides:.
Once you know what you want to say and how you want to say it, you can start to prepare the visual part of your presentation (whether it be a PowerPoint, Prezi, or other tool). Make sure that the visual cues you give yourself help your words flow. My personal preference is to use a little bit of text and let your words speak for themselves (you don’t want people reading the slides instead of listening to you). Consider using keywords or photos that you can connect to your content instead of reading directly off the slide. At the same time, make sure you know what works for you and prepare accordingly.
Think about it this way: Your slides should act as an outline for what you want to say, helping your listeners follow along or jot down key points. However,if you need notes, consider bringing them along separately.
While you may feel stupid talking to yourself (maybe in front of a mirror) or practicing with your housemate, the first time through a presentation always feels harder than the second or third. If you have time to practice a time or two before you get in front of your final crowd, you can make sure you feel your way around words that you don’t feel comfortable with (potentially switching them out for others) and confirm that your presentation makes sense.
Pro-tip: if possible, try to rehearse with a native Spanish speaker who can help you figure out if what you say is clear or not. And remember that constructive criticism in your practice moments is a good option in comparison to your professor not understanding you during the presentation.
Relax and smile:.
A big part of the quality of the presentation is how comfortable you are with yourself. Even if you don’t feel like you really know the content or you are worried about presenting in front of your class, your attitude will affect the perception the audience has of your knowledge. If you are able to get up in front of everyone and act in a calm, collected way (despite the fact that you are shaking inside), that will go a long way towards a good presentation.
Try it: I found the video below that talks about about how body posture impacts our perception of a situation and I have never gone back—before every presentation you can find me in superhero pose!
It’s not the end of the world:
I just want to remind you that, at the end of the day, if your presentation is terrible it is not the end of the world. Honestly, as someone who has been there, it is commendable that you are potentially getting up in front of a whole class of native speakers to give a presentation in a language that you are only more or less comfortable with. Personally, the most important thing is to notice how you feel during the presentation and figure out ways that you can ‘do it better’ next time. Like anything, practice makes it easier, but sometimes we have to fall before we can fly.
We would love to hear about your presentation experiences while abroad. Are you a nervous presenter or are you as cool as a cucumber? Let us know!
Sincerely, Spain
P.S. I would just like you all to know that while I am a good presenter, I am not always (read almost never) comfortable when presenting, I am just good at hiding it. It has allowed me to ace presentations—not only at school but also in front of other crowds—and job interviews. Therefore, I believe it is a skill worth developing.

Related Posts

Confessions: That Three Month Feeling

Creating Meaningful Relationships in Random Places

My Top Resources for Writing in Spanish
Leave a reply cancel reply.
Your email address will not be published. Required fields are marked *
Save my name, email, and website in this browser for the next time I comment.
La presentación oral: 13 Ways to Teach it for AP Spanish Success
When my students first began giving oral presentations in my AP Spanish Language and Culture course, they had trouble for three reasons:
1. They had little knowledge of cultural practices in Spanish-speaking countries.
2. They struggled to finish within the two-minute limit.
3. Their presentations were completely disorganized.
In this blog post, I will explain how I addressed each issue so that my students were able to master the oral presentation section of the AP Spanish exam. Keep reading and get my F-R-E-E culture project on Spanish-speaking countries and famous hispanohablantes. Below are my best tips on how to teach la presentación oral.
1. STUDENT RESEARCH
Neither the teacher nor the students can predict what cultural practice will be mentioned in the presentational speaking section of the AP exam. Hence, the anxiety. However, just as those who live in Seattle must always have a raincoat within reach, students of AP Spanish must come equipped with knowledge of many traditions practiced in Spain and Latin America. Hence, the culture presentation. The more customs they are familiar with, the more likely it is that they will be able to answer the question with confidence. In order to fill their cultural knowledge bank, I assign a project.

At the beginning of the course, I hand out instructions for a culture project. Students must do a Google search to find cultural practices or traditions of a Spanish-speaking country. They can either choose from articles in the textbook or find their own. If they select a tradition not in the text, I must approve their choices.
I hand out and explain the instructions, so students know the requirements.
THE PRESENTATION MUST:
- Have a visual component.
- Be five minutes long.
- Include comprehension questions for the class.
- Include a quiz for the class.
- Include an additional two-minute oral presentation comparing the cultural practice with one in their own country.
While the student talks, the observers take notes. Whenever students give presentations, I also include a graded, listening component for the observers so no one is sitting idly; students are always practicing their Spanish language skills, either speaking or listening. In this case, the students must evaluate la presentación oral according to the rubric, and answer comprehension questions in the student-created quiz.
After the presentations, the observers ask the presenter questions about his or her speech, then take the quiz.
Want more details? Click the following link to access the culture project I use: LA PRESENTACIÓN ORAL CULTURE PROJECT . These instructions are for Triángulo aprobado, but you can use them with Vista Higher Learning or any other textbook or test-practice booklet. Just replace the titles where appropriate.
2. TELL STUDENTS THE LEARNING GOAL
When I was a new teacher, I would anxiously sit down to grade a project and then feel my disappointed heart sink to my toes as I read each submission. How did the students miss the target by so great a distance? Because I had assumed they knew what I expected. Surely they knew they needed to include what to me were obvious elements. But they didn’t.
Students need to know exactly what is required of them. With that goal in mind, I tell them, at the beginning, what the learning objectives are. Then I give them the rubric with even more details. Below is the learning goal I give my students for the presentación oral comparing the grading system in the U.S. to that of a Spanish-speaking country:
Given a rubric of the oral presentation, vocabulary of comparisons, a PowerPoint on the Oral Presentation, and information on grading systems, students will do a two-minute oral presentation comparing the grading system of one Spanish-speaking country to the grading system in the United States.
HERE IS ANOTHER LEARNING GOAL:
Given information on Cartagena and Macchu Picchu, students will do an oral presentation comparing an American tourist attraction to Machu Picchu or Cartagena.
These topics were in the cultural texts of our AP Spanish test-prep booklet.
3. STUDENTS PRACTICE VOCABULARY FOR COMPARISONS AND FOR THE WRITTEN TEXT
Before students attempt to discuss the differences and similarities of various cultures, they need to have the vocabulary to do so; they need to know how to make comparisons in Spanish, and they need to know the vocabulary specific to the given topic.
I hand out a list of words and phrases students need in order to make comparisons and also vocabulary of challenging words from the text we will be reading.
The words don’t automatically become part of the students’ working vocabulary just because I handed them the list of words. They need to practice the vocabulary, to see the words in context, and to let them percolate in their brains (recognition phase). Then they draw a representation of the words, write the definition, and use them in context themselves (productive).
Below is part of the list of comparisons I give my Spanish students.
Vocabulario para la comparación
- Por un lado On the one hand
- Por otro lado On the other hand
- En comparación con In comparison with
- Si se compara…con If one compares…with
- Es cada vez más It’s more and more
- Es cada vez menos It’s less and less
- Mientras que X… While X…
- Se parece a… It is similar to
- Se diferencia en It differs in that
- Mejor / peor queue Better / worse than
- Aunque… Although / even though
- A la inversa Conversely
- De manera different Differently
- Sin embargo However
For example, I might say the following: Escojan dos palabras del vocabulario en la página 112. Hagan los cuadros y escriban una oración para cada palabra.
Students draw a square with four boxes. Sometimes, instead of writing sentences in the last box, I tell them to write synonyms in Spanish. Below is the demonstration I show them before instructing them to practice with the vocabulary.

4. LA PRESENTACIÓN ORAL: LAS INSTRUCCIONES
LEARNING TARGET: Students will plan and produce spoken presentational communications.
After students practice the vocabulary, we read the instructions and the exam description together, in Spanish, so they understand the requirements:
- They will have four minutes to read the topic and prepare their presentation.
- They will have two minutes to record their presentation.
- They will need to use the formal register.
- They will be comparing cultural characteristics / practices, traditions of the community in which they live with those of a Spanish-speaking country or Spanish-speaking communities with which they are familiar.
- They can use any of the following examples: information they have read, heard, or seen, or personal experiences or observations.
5. STUDENTS MUST ORGANIZE THEIR ORAL PRESENTATION
It is essential that students learn to organize their presentations, or they will not succeed on the exam. Organizing helps them think better and it also helps them stay within the time constraints.
In order to organize their speech, they must:
- Begin with a thesis statement that answers the question.
- Include words of the question in their thesis statement.
- Include developing paragraphs and a conclusion.
- Use a graphic organizer to prepare: I show students how to use a Venn Diagram and also a T graphic. On one side, students put the differences, on the other side, the similarities.

6. RUBRIC FOR PRESENTATIONAL SPEAKING
I read the College Board rubric for AP Spanish Presentational Speaking with the students so they know how they will be evaluated.
7. SHOW THE POWERPOINT
Then, I show my PowerPoint, which repeats the instructions (once isn’t enough) and gives more details of what is required. Below are a few examples of what students learn when watching the PowerPoint.
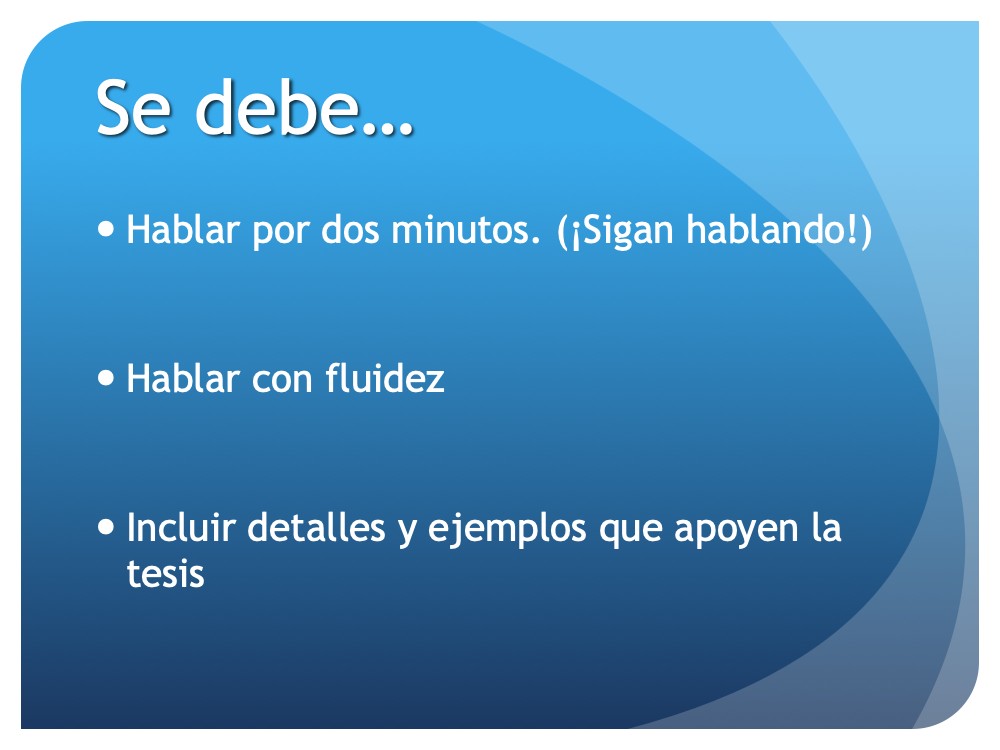
STUDENTS MUST:
- Demonstrate knowledge of the culture of a Spanish-speaking country.
- Speak fluidly.
- Provide details of the culture.
- Make themselves understood, speak with varied vocabulary and idiomatic expressions.
- Speak with good pronunciation.
- Correct themselves as they are speaking when they make mistakes.
- Commit few grammatical errors
- Read the question thoroughly.
- Use pausing or transition words to give them time to think such as, “así que, pues, entonces, además…”
The PowerPoint also shows several example introductions and thesis statements for a given cultural comparison including reasons number one and two. It also shows model text for developing paragraphs and a conclusion.
8. STUDENTS EVALUATE USING THE RUBRIC OR A CHECKLIST
After showing the PowerPoint, I give students a checklist of the required elements. After they read the model presentation, I check for understanding by asking students what the requirements are for a good presentation.
Then, students evaluate the model presentation according to the rubric or checklist using the college board grading system: They give an exam score of 1-5. (My checklist was created using the AP Spanish rubric for presentational speaking.)
An easy way to give students an idea of what a grade of 5 looks like is to have them listen to past exams and guess the score. Students hear presentations of scores ranging from 1 to 5. They then evaluate the presentation using a checklist. Once they guess, I show them what the real score was.
9. SELF-CORRECTING
I train students how to correct themselves during the presentation to improve fluidity and help them sound more like a native speaker. For example, I teach the vocabulary they will need when they misspeak, such as, “Es decir, mejor dicho, o sea, digo”.
10. READ THE CULTURAL NOTE
I read the cultural note in the textbook, test-practice booklet, or text I have provided. For example, I say: Lee la “Cápsula cultural: En las terrazas de Cuzco se puede cultivar más que hortalizas” en la página 111 en Triángulo aprobado.
Then I read the question. For example: Comparaciones: Compara la atracción turística de Machu Picchu con un sitio de tu país o comunidad.
11. SOLICIT DIFFERENCES AND SIMILARITIES USING THE GRAPHIC ORGANIZERS
I solicit “semejanzas y diferencias”. I write in students’ answers on a transparency (Boy am I old), smart board or whiteboard. Students take notes in their graphic organizer.
12. STUDENTS PRACTICE WITH A PARTNER
Working with a partner greatly decreases student anxiety and makes the task more fun. Also, students have the advantage of a peer tutor.
The first time students work on the oral presentation, I give them a full ten minutes to prepare. The more proficient they become in organizing their comparisons, the less time I give them. The last few months before the AP Spanish exam, students listen to the audio prompts which only allow four minutes to prepare.
13. STUDENTS PRESENT WITH PARTNERS AND EVALUATE EACH OTHER
Students now give their oral presentations using Google Voice, Audacity, or online using the publisher’s site. I time them for two minutes using a stopwatch.
One student at a time gives the presentation while the partner evaluates using the checklist. Students turn in the checklist.
I ask for two volunteers to present before the class for extra points. The entire class grades them according to the checklist.
14. BE EFFICIENT WITH TIME
Did I say 13 ways? Here is #14.
Time is always beating me with a whip as I prepare my students to pass the test. Therefore, I must find ways to use my time efficiently. A great way to save time is to work on two sections of the AP exam simultaneously. I instruct half the class to work on the oral presentation and the other half to work on the simulated conversation for the current AP Spanish theme, for example: Contemporary Life, or Global Challenges. Half the students are doing practice tests for presentational speaking while the other half works on interpersonal speaking. For example:
- Half the class does Conversación simulada p. 117 on Audacity or the Learning Site.
- The other half of the class does oral presentation on Google Voice or the Learning Site.
- Then they switch.
- The Spanish teacher times the oral presentation for two minutes. Remember to tell the test takers to say their name and let a few seconds pass first and to say who they are when using Google Voice.
If you would rather not do all the work yourself, you can use the Oral Presentation PowerPoint and Activities for AP Spanish Language and Culture to help students master la presentación oral portion of the AP Spanish exam. This valuable resource includes everything I have mentioned in this post.
These resources can be used with Triángulo aprobado Spanish Language books or Vista Higher Learning booklets or any AP Spanish Test-prep books. Google Slides digital versions are available, too.
The 28-slide Presentación Oral PowerPoint for AP Spanish includes the following:
- Instructions on how to do a cultural oral presentation for AP Spanish
- Required elements of an oral presentation
- A sample cultural question taken from Triángulo aprobado
- Two sample graphic organizers for the “presentación oral”
- Instructions on how to write the “oración de tesis” and how to organize the “presentación oral”
- A sample cultural oral presentation with the components labeled
- Expressions for self-correction
- Expressions for pausing and transition
- 24 words and expressions useful for making comparisons
- Four possible introductions
- Three possible “oraciones de tesis”
- Two sample developing paragraphs
- A sample conclusion
- Instructions for writing the conclusion
The printables include the following:
- a checklist for self-correction or partner correction
- a lesson plan for the oral presentation following the EDI format: the learning objective, attention-getter, tension, explain/model/demonstrate, checking for understanding, guided practice, closure, independent practice/homework, and items needed to present the lesson
- a graphic organizer
- a handout of vocabulary for making comparisons
- the password to open the PowerPoint YOU WILL NEED MICROSOFT OFFICE 2002 in order to access the password-protected PowerPoint.
This PowerPoint and Activities is included in the following bundle: A P SPANISH POWERPOINTS
How do AP Spanish students record their simulated conversations and oral presentations ?
So many of you have asked me what my students use to record their presentations. I will tell you what I used and also what other teachers use, so you have many options. BELOW ARE WAYS STUDENTS CAN RECORD:
- Google Voice (What I used)
- Vocaroo Online Voice Recorder (It’s free and I’ve heard great things about it.)
- Flip (Used to be FlipGrid.)
- Schoology, Canvas, or any LMS (Learning Management System) your school is using.
- Audacity (I have used this as well.)
- Vista Higher Learning SuperSite
- Student Phones (Voice Memo or Recording App)
- Google MP3 in Google Classroom
READY-MADE LESSON PLANS THAT DO EVERYTHING FOR YOU
If you don’t want to write the lesson plans yourself, use the ready-made lesson plans below. They do everything for you! And you can have confidence in them since all my students passed the AP Spanish Language and Culture Exam except one during the five years I taught AP Spanish.
AP Spanish Lesson Plans and Curriculum for Tríangulo apro bado
AP Spanish Lesson Plans and Curriculum for Vista Higher Learning
Would you like more free resources for AP Spanish? And more tips on how to teach it? Click on the links below.
F-R-E-E Lesson on the Argumentative Essay for Presentational Writing (Previously called the Persuasive Essay)
Simple Tips on How to Teach the AP Spanish Email Reply for Interpersonal Writing
How to Teach the Argumentative Essay
Why I Teac h AP Spanish the Way I Do
What do I Teach After the AP Spanish Language and Culture Exam?
I hope this post has given you some ideas to help your students master la presentación oral section of the AP Spanish exam. If you found this post helpful, send the link to a friend!
If you’d like to get more tips and f-r-e-e resources in your email, subscribe to my newsletter. Just click this link and scroll to the bottom to subscribe: Best PowerPoints for Spanish and French by Angie Torre. You’ll also get a F-R-E-E 122-slide PowerPoint on Spanish verbs and infinitives.
CONNECT WITH ME ON SOCIAL MEDIA:
- You are saving this new teacher countless hours of work!!! The preview showed great resources and examples for AP students can't wait to begin using! Worth every single penny. Gracias for all your time and energy spent on creating awesome curriculum! Angela A
- Such a lifesaver! Love the lessons! Creative and excellent resources. Thanks so much. You made my year much easier.
- My kids loved it and said it helped clarify this very difficult concept. Muchas gracias! Mrs. F's Room

Leave a Comment Cancel reply
I taught world language for 31 years and have created countless resources for Spanish and French during that time. I am a top seller on Teachers Pay Teachers and for the past 11 years I have devoted my time and energy to helping teachers save time, avoid burn-out, and bring their students to proficiency in the target language through the use of my proven resources. During the five years that I taught AP Spanish, all but one of my students (primarily non-native speakers) passed the AP exam most with fours and fives.
Privacy Policy Shipping Policy Refund Policy
Spanish One
Spanish Two
Spanish Three
Spanish Four
French Three
French Four
Start typing and press Enter to search
Privacy Overview
How to Translate Google Slides to Spanish: A Step-by-Step Guide
Discover how to effectively translate your Google Slides into Spanish with this comprehensive, step-by-step guide for broader audience reach.
Introduction to Google Slides Translation
Why translate slides into spanish.
- Reach a Wider Audience: Spanish is the second most spoken language by native speakers globally, making it essential for international communication.
- Educational Accessibility: For educators, translating slides can help accommodate students who are native Spanish speakers or are learning the language.
- Professional Appeal: Multilingual presentations can enhance your professional image and make your pitches or proposals more persuasive.
Preparing Your Google Slides for Translation
Simplify your text.
- Use Simple Language: Complex sentences can become convoluted when translated. Simple, clear language translates more effectively.
- Avoid Idioms and Jargon: These often do not translate well because they can be culturally specific.
Optimize Layout and Design
- Leave Space for Expanded Text: Some translated text might take up more space than the original.
- Use Universal Symbols and Images: These reduce the amount of text needing translation and are universally understood.
Automated Translation Using Google Slides
Step-by-step guide to using google translate in slides.
- Open Your Presentation: Navigate to Google Slides and open the presentation you wish to translate.
- Access the Translate Document Tool: Click on “File” in the top menu, then select “Language,” and finally “Translate document.”
- Choose Your Language: In the pop-up window, rename your file if desired, then select “Spanish” from the dropdown menu.
- Create Translated Copy: Click “Translate,” and Google Slides will create a new, translated version of your presentation in Spanish.
Pros and Cons of Automated Translation
- Pros: Quick and easy; good for translating simple text.
- Cons: May not handle nuanced language well; requires review and possible manual correction.
Manual Translation: Ensuring Accuracy and Cultural Relevance
Hiring professional translators.
- Finding the Right Translator: Look for professionals who are native speakers and understand the presentation's subject matter.
- Working with Translators: Provide context and clarify any ambiguous content to ensure the translation meets your needs.
DIY Translation Tips
- Use Translation Tools: Tools like DeepL or Google Translate can help, but always double-check their suggestions.
- Maintain Consistency: Keep terminology and tone consistent throughout your presentation.
Finalizing and Reviewing Your Spanish Presentation
Proofreading and cultural adaptation.
- Check for Errors: Review the translation for any grammatical or spelling mistakes.
- Cultural Sensitivity: Ensure that the content is culturally appropriate and relevant to your Spanish-speaking audience.
Testing Your Slides
- Seek Feedback: If possible, have a native Spanish speaker review your slides.
- Practice Your Presentation: Ensure the flow and timing of the translated slides align with your delivery.
Conclusion: Ready to Present
Create ppt using ai.
Just Enter Topic, Youtube URL, PDF, or Text to get a beautiful PPT in seconds. Use the bulb for AI suggestions.
character count: 0 / 6000 (we can fetch data from google)
upload pdf, docx, .png
less than 2 min
Ayan Ahmad Fareedi
writer at MagicSlides
Stunning presentations in seconds with AI
Install MagicSlides app now and start creating beautiful presentations. It's free!

Get AI-Generated Presentations Ready in Seconds
Free AI PPT Tools
How to Translate Google Slides to Spanish: A Step-by-Step Guide
Translating Google Slides to Spanish is a simple process that can be done in a few clicks. All you need is access to the internet and a Google account. Whether you’re preparing a presentation for a Spanish-speaking audience or collaborating with colleagues who prefer Spanish, following these steps will ensure your slides are translated accurately and efficiently.
Step by Step Tutorial on How to Translate Google Slides to Spanish
Before we dive into translating your Google Slides, let’s understand what we’re aiming for. Translating your presentation will help you reach a wider audience and ensure that your message is understood by Spanish speakers. Here’s how to do it:
Step 1: Open your Google Slides presentation
First things first, you’ll need to open the Google Slides presentation that you want to translate.
This step is pretty straightforward. Just sign in to your Google account, head to Google Slides, and open the presentation you wish to translate.
Step 2: Click on "File" in the top menu
Now that your presentation is open, click on "File" in the top menu to view more options.
This will open a dropdown menu with various options for managing your presentation.
Step 3: Select "Language" from the dropdown menu
In the dropdown menu, look for the "Language" option and click on it.
This will bring up a list of languages that you can translate your presentation into.
Step 4: Choose "Spanish" from the list of languages
Scroll through the list until you find "Spanish," then click on it to select it as your preferred language for the presentation.
Keep in mind that Google Slides may offer different variations of Spanish, such as European Spanish or Latin American Spanish. Choose the one that best suits your audience.
Step 5: Confirm the language change
After selecting Spanish, a pop-up may appear asking you to confirm the change. Click "OK" to proceed.
This step ensures that you’re aware of the language change and agree to it before it’s applied to your presentation.
After completing these steps, your Google Slides presentation will be in Spanish. Now, your audience can enjoy your presentation in their preferred language, and you can communicate your ideas more effectively.
Tips for Translating Google Slides to Spanish
Here are some tips to keep in mind when translating your Google Slides to Spanish:
- Double-check the translation for accuracy, as automated translations may not always capture the intended meaning.
- Use simple and clear language in your original presentation to make the translation process smoother.
- If you’re translating for a specific Spanish-speaking region, choose the appropriate variation of Spanish.
- Consider using images and visuals to complement the text and aid understanding.
- Test the translated presentation with a native Spanish speaker to ensure the quality of the translation.
Frequently Asked Questions
Will translating my google slides affect the formatting.
No, translating your Google Slides should not affect the formatting. The layout, fonts, and images will remain the same, only the text will change to Spanish.
Can I translate Google Slides to other languages besides Spanish?
Yes, you can translate Google Slides to a variety of languages. Just follow the same steps and choose your desired language from the list.
Can I undo the translation if I make a mistake?
Yes, you can undo the translation by following the same steps and selecting the original language of your presentation.
Will the translation work for text in images?
No, the translation feature in Google Slides only works for editable text. Text within images will not be translated.
Can I translate a shared presentation that someone else created?
Yes, as long as you have editing access to the shared presentation, you can translate it to Spanish or any other language.
- Open your Google Slides presentation.
- Click on "File" in the top menu.
- Select "Language" from the dropdown menu.
- Choose "Spanish" from the list of languages.
- Confirm the language change.
Translating Google Slides to Spanish is a handy feature that can make your presentations accessible to a broader audience. Whether you’re conducting business internationally, presenting at a conference, or sharing information with Spanish-speaking friends and colleagues, this feature ensures that language barriers are no longer an obstacle.
Remember, while the steps to translate your slides are simple, it’s vital to review the translated content for accuracy. Automated translations can sometimes miss the nuances of human language, so a quick double-check can go a long way in ensuring your message is conveyed correctly.
Also, consider cultural differences when presenting to a Spanish-speaking audience. Certain phrases, images, or references may not translate well culturally, so be mindful of these aspects to avoid misunderstandings.
In conclusion, the ability to translate Google Slides to Spanish opens up a world of opportunities for effective communication and collaboration. With a few simple clicks, you can break down language barriers and ensure that your ideas are understood and appreciated by all. Happy presenting!

Kermit Matthews is a freelance writer based in Philadelphia, Pennsylvania with more than a decade of experience writing technology guides. He has a Bachelor’s and Master’s degree in Computer Science and has spent much of his professional career in IT management.
He specializes in writing content about iPhones, Android devices, Microsoft Office, and many other popular applications and devices.
Read his full bio here .
Share this:
- Click to share on Twitter (Opens in new window)
- Click to share on Facebook (Opens in new window)
- Click to email a link to a friend (Opens in new window)
- Click to share on LinkedIn (Opens in new window)
- Click to share on Reddit (Opens in new window)
- Click to share on Pinterest (Opens in new window)
- Click to share on Tumblr (Opens in new window)
Related posts:
- How to Add Spanish Keyboard on iPhone 14: A Step-by-Step Guide
- iOS 17 – How to Add the Spanish Keyboard on an iPhone
- How to Change Slide Dimensions in Google Slides
- How to Hide a Slide in Google Slides
- How to Duplicate a Slide on Google Slides
- How to Translate to Another Language in Google Docs
- How to Delete Multiple Slides in Google Slides
- How to Put Canva Slides into Google Slides: A Step-by-Step Guide
- How to Add a Spanish Keyboard to an iPhone 7
- How to Change Language on Mac: A Step-by-Step Guide
- Changing Languages on Netflix: A Simple Guide
- Importing Keynote Presentations to Google Slides: A Step-by-Step Guide
- How to Make Columns in Google Slides
- How to Number Slides in Google Slides
- How to Delete a Slide on Google Slides
- How to Put YouTube Videos in Google Slides
- How to Write in Hindi in Microsoft Word: A Step-by-Step Guide
- How to Change Font on Google Slides Text Box
- How to make Google Slides automatically transition: A step-by-step guide
- How to Insert Videos in Google Docs
Start Learning Spanish in the next 30 Seconds with a Free Lifetime Account

Study Spanish abroad! Request more information.

Prepare a Spanish presentation with our Spanish lessons
- April 7, 2021

Prepare yourself with our Spanish courses to master the language and give a successful Spanish presentation.
Speaking a foreign language in front of a crowd can make you nervous, especially when the Spanish presentation is in front of native speakers. We recommend you to prepare yourself with Spanish courses until you complete your language training and reach a high level. In addition to having the language skills, it is important to show confidence, follow the structure of the information and speak clearly so that the audience understands the topic of your Spanish presentation.
Get all the tools of the Spanish language in one of the best Spanish schools in Cancun . Now, you can increase your language skills with Spanish online Cancun and the following tips for structuring a professional Spanish presentation.
How to prepare a Spanish presentation?
It is essential to structure a framework for your Spanish presentation where you will apply the knowledge and practice from your Spanish lessons . According to public speaking experts, it is recommended to prepare a conference in 3 steps:
- Open with something personal to capture the attention of your audience and announce what the presentation will be about.
- Name three important points and develop them with a story, examples, experience, etc.
- Summarize the key points briefly and concisely, mentioning the personal or audience impact.
The structure of a Spanish presentation is delimited by three phases: introduction, development and conclusion. Preparation is the key so you will need to study a presentation, we recommend you to learn the first 30 seconds verbatim, remember that it is important to have an interesting introduction to capture the audience’s attention from the beginning.
During the development incorporate information with multimedia material and the content that is in another language translate it or add subtitles in Spanish.
Learn Spanish in Mexico City
Key phrases for your Spanish presentation
During Spanish lessons you will learn how to communicate effectively in Spanish by developing the skills of reading, listening, writing and speaking in Spanish. Each is an integral part of mastering the language, but we will focus on the last one: speaking. Here are some useful phrases to use during your Spanish presentation:
Phrases to introduce your presentation
- ¡Buenos días/ tardes /noches a todos!
- Bienvenidos a la presentación acerca de…
- Soy ______ de la compañía ____ y el día de hoy les presentaré el tema…
- Mi nombre es______ y hablaré sobre ______.
- Las preguntas al público son una forma de llamar la atención de la audiencia, por lo que son una herramienta interesante y empática que sirve como una introducción ideal a presentaciones en español exitosas.
Spanish schools in Mexico
Phrases for the development of your conference in Spanish
During the development of the Spanish presentation it is important to pay attention to the correct pronunciation of the words, as well as the tone, rhythm and pauses. Remember that you can practice these aspects in Spanish courses to improve your Spanish speaking skills.
- Establish contact with the audience
To increase audience interest and engagement, it is important to establish contact with your audience. Use interactive elements such as polls to get them involved and express themselves on the topic, here are some examples. We remind you that you can learn Spanish while living an incredible experience in Mexico or at the Spanish school Bogota . You choose the school, we make sure you learn Spanish in an attractive way.
- Por favor levanten la mano si alguna vez ______…
- Alguien ha pensado en______?
- Por favor pregunten cualquier duda o tema.
- Comparando _____con_____, podemos notar que…
- Claramente, ______ tiene más sentido que______…
- Mientras que la Opción A es______, Option B se refiere a…
- Primeramente ______, en segundo lugar______…
- En la siguiente diapositiva…
- Asimismo, es importante mencionar que…
- Ahora pasaremos al siguiente tema…
- Preparé un video al respecto…
- Esta imagen explica perfectamente el concepto…
- Pongan atención en el video/imagen en donde …
- El promedio es…
- Los resultados demuestran que…
- De acuerdo con este párrafo, la atención debe de estar en…
- I want to stress the importance of…
- This is of high significance because…
- Moreover, it has to be said that…
Best Spanish school in Cancun
Finish your Spanish presentation successfully
In order to close your Spanish presentation correctly, here are some phrases to put your Spanish lessons into practice.
- En conclusión, podemos decir que…
- En resumen, los puntos principales son…
- Teniendo en cuenta los aspectos mencionados, podemos concluir que …
- Fue un honor estar con ustedes el día de hoy.
- Gracias por su tiempo y atención.
- Gracias por asistir al evento el día de hoy.
Remember to adapt body language to the presentation and practice in Spanish classes . Preparing a professional Spanish presentation or for personal purposes is probably one of the tests or objectives you will have when studying the language. Prepare yourself with Spanish lessons to develop your language skills and obtain an international Spanish certificate.
Enroll in one of the most important Spanish schools in Mexico and LATAM to live a language experience!

International House Riviera Maya is now a part of IALC!

Keys to converse in Spanish

Practice activities to learn the Spanish language

Basic Spanish skills

Comparative degrees of Spanish adjectives

- Luxury Experience
Our Destinations
- Mexico City
- Riviera Maya
Get personalized information of our services.
Copyright ©IH Mexico | All rights reserved
You are using an outdated browser. Please upgrade your browser or activate Google Chrome Frame to improve your experience.
12 Spanish Presentations to Use in Your Lessons
Presentations are amazing teaching resources ! We can’t deny it.
No matter your students’ learning style and no matter how much we try to incorporate the use of all the senses in our lessons, having a visual aid that keeps the students’ attention can really improve your instruction.
And let’s be honest, no other class will benefit more from visual aids than a language class full of beginners —especially when introducing vocabulary.
So check out these 12 pre-made presentations that you use in your classes!
What to Remember When Using These Presentations
12 spanish presentations to use in your classroom , 1. el clima/tiempo (the weather), 2. los animales (animals), 3. la familia (the family), 4. los colores (the colors), 5. las partes del cuerpo (parts of the body), 6. la cabeza (the head), 7. descripciones físicas (physical descriptions), 8. qué hora es (telling the time — o’clock).
- 9. Qué hora es? (Telling the time — quarter past, quarter to, half past)
10. Qué hora es? (Telling the time — remaining times)
11. la rutina diaria (daily routine), 12. los cuartos de la casa (the rooms of the house), the power of slides for spanish classes.
Download: This blog post is available as a convenient and portable PDF that you can take anywhere. Click here to get a copy. (Download)
Why reinvent the wheel? Here are 12 presentations already put together that you’re free to adapt to your lessons. If you don’t like a particular slide, just delete it or change it!
Most of these presentations come from a site called ¡Oye! , except for El clima , which comes from a site called Tpduggan . Both sites were created by teachers as resources for other educators.
To access the PowerPoints, click on the Spanish headings. You’ll be directed to the website where you can search for the title of the presentation. You can then choose and download the appropriate file.
You have several useful presentations to choose from, so let me give you a couple of notes before we start:
- ¡Oye! is a site that has presentations and exercises for each learning skill, divided into topics and school years. Many of the exercises can be used with an interactive whiteboard, although they also have a printed version. In order to use this site and download the presentations between the hours of 9 a.m. and 4 p.m. during the week, you need to be registered and pay a monthly fee . The rest of the time, access to the site is free. Keep this in mind when you’re preparing your lesson.
- Tpduggan is exclusively a site that collects PowerPoint presentations of all kinds: vocabulary, grammar, geography, exercises, etc. However, use them with caution because they use English a lot and have lots and lots of text . On the other hand, you can find lots of inspiration and ideas for creating your own presentations.
- Most of these presentations use drawings instead of pictures . Even though this may seem more appealing to children, it doesn’t mean older students or adults will mind them. However, you can always edit the presentations and change the pictures to something you consider more suitable for your class. After all, no one knows your students’ interests and needs better than you.
Description: This presentation teaches the names of the seasons and weather expressions that go with them. It’s perfect for introducing the vocabulary for the first time or reviewing it. Since all the pictures are drawings, it may be more appealing to younger children. If you feel real pictures may be better for older students, you can always edit the presentation and change the pictures.
Suggestions: One thing I do recommend you change is the first slide, ¿Qué tiempo hace? (What’s the weather like?), because beginners may get confused and think this is how we ask about the seasons. I’d change it to Las estaciones del año (The seasons of the year) or ¿Qué estación del año es? (What is the season?).
Description: This one contains vocabulary for animals (with drawings) and is under the section and title of “Pets.” It goes beyond the word and the picture and introduces structures to ask questions.
For example:
¿Es un gato? (Is it a cat?)
¿Qué es? (What is it?)
¡ Es un perro! (No! It’s a dog!)
In addition to that, it has animal sounds in the drill at the end—a definite plus and more fun for your students.
Suggestions: You can always change the drawings to real pictures or add more animals and questions according to your lesson or students.
Description: The presentation introduces the family members through an example of a family tree. It introduces new vocabulary while at the same time introducing basic sentence structures for discussing relationships.
Alicia es la madre de María. (Alicia is María’s mother.)
Luis es el hijo de Alicia. (Luis is Alicia’s son.)
Suggestions: My only suggestion here would be to ask your students to copy the family tree in their notebooks before you get to the true/false drill that tests their knowledge. Otherwise, they’ll be too focused on remembering who was who to remember the relationship between them. Let’s make it simple for them!
Description: This presentation introduces the colors. In the first slides, your students will learn how to ask ¿Qué color es? (What color is it?) and learn the correct term for each color. You’ll just need to edit a small mistake here: the word marrón (brown) is missing the accent.
In the last slides, your students will have to tell you which color results from the combination of two given colors.
negro + blanco = gris (black + white = gray)
Suggestions: This last part makes the color introduction a little more interesting since they’ll also have to think about color theory. They’ll love the fact that they’ll get drums as an anticipation sound before giving the answer and applause after giving the correct one. Make sure your computer has the sound on and the volume up.
Description: This one introduces and reviews the main parts of the body through a drawing of a girl. In the first slide, the body will slowly form part by part with each click, and you’ll see the name of the body part along with its proper article. The slides that follow are drills to review what students have learned.
Suggestions: In the first drill, students name the parts of the body that the arrows are pointing to and the answers are revealed with each click. The words are written on the slide to help students remember the correct spelling.
The final drill looks like a puzzle with random parts appearing. If you want to test their memory and spice it up a little bit, you can speed up how fast they appear.
The words won’t appear in this drill, just each part of the body. Because of that, another thing you can do to see if they remember the spelling of each word is to ask them to write down the name of each part as it appears (with their notes closed, of course).
Before this last drill, you have one slide that says: “Name the parts of the body as they appear on the screen.” My suggestion is to erase this English sentence. There’s no need for translated words in a language class, it’ll just distract them from the Spanish words.
Description: With a similar structure to the previous presentation, the head is formed part by part with each click and the name appears with its article. Afterward, there are a couple of practice drills to review them.
The drills also follow the same structure as with the presentation of the body. In the first drill, the parts of the face are indicated with arrows and the answer appears. In the second drill, the parts randomly appear without names.
Suggestions: Review them in the same way I suggested for the body.
Description: This presentation focuses on the description of the eyes and the hair. Your students will be able to answer the following questions:
¿De qué color son tus ojos? (What color are your eyes?)
¿Cómo es tu pelo? (What does your hair look like?)
They’ll also be given the proper vocabulary to answer:
Corto, largo, rizado, liso, rubio, pelirrojo (short, long, curly, straight, blond, red)
The first few slides are descriptions of different characters (in drawings) and the last ones are drills that ask your students to describe or answer specific questions about what other characters look like.
The task on the last slide is to draw a character according to the description. Because this last exercise can be really fun for them, you may want to consider adding a few more descriptions. Your students can then draw and compare their pictures.
Suggestions: One thing to consider: before you use this presentation in class, make sure you already taught them noun and adjective agreement.
And one small piece of advice. In this presentation, they’re referring to straight hair as liso but you could use the opportunity to teach your students about the language variations according to the place in which it is used. Many countries use lacio instead of liso when referring to straight hair. Here is a very interesting discussion on the topic. Hope it helps!
Description: The structures of all these presentations that have to do with time are quite similar: first there are examples on how to tell time, then there’s a drill where examples are mixed up for your students to practice. At the end, there’s the opportunity to add hands to the clock.
This first presentation shows students how to tell time to the hour, plus noon and midnight. You may need to add en punto (o’clock; sharp) to each slide or just write it on the board to emphasize that it’s another way to say it.
9. Qué hora es? (Telling the time — quarter past, quarter to, half past)
Description: This one shows students how to say y cuarto (quarter past), menos cuarto (quarter to) and y media (half past).
The hands of the clock aren’t always very clear, so you can either try to edit them or clarify to your students where the hands are supposed to be exactly.
Description: Students will learn how to tell times that are not on the hour, quarter-hour or half-hour.
I spotted an error that you’ll have to correct: on the eighth slide, instead of being la una y veinticinco (1:25) it actually shows la una y veinte (1:20), so make sure to edit it.
Description: This one shows a basic daily routine, as its name states. You should present it after teaching your students how to tell time since the last part of this presentation combines the activities of the routine with the time at which they happen.
At the end, you have the same activities and a clock next to each one that tells the exact time those activities happen. This allows them to practice the new daily routine vocabulary, telling time and the conjugation of the verbs.
Suggestions: The first part is the introduction of some basic activities such as despertarse (waking up), levantarse (getting up), vestirse (getting dressed), etc. They’re all in first person, but if you’ve already taught students the verbs in the present tense, ask students to conjugate the verbs in the third person.
So, one example shows a boy having breakfast with the slide saying Desayuno (I’m having breakfast). You’ll ask your students, “ ¿Qué hace él? ” (What is he doing?) They’ll then conjugate the verb correctly by telling you, “ Desayuna. ” (He’s having breakfast.)
Also, when combining the pictures with the times on the 13th slide, the second example may be confusing since the clock looks like it says siete menos veinte (6:40) instead of ocho menos veinte (7:40), so you may want to edit this one.
Description: The first part introduces each room. This will be drilled on the 12th and 13th slides. But on the 11th slide, you have pictures of objects (without their label) that you’ll find in these rooms like a bed, chair, lamp, etc. The question on this slide is ¿En qué habitación se encuentra…? (In which room is …?)
Suggestions: The goal is to practice the name of the room where these objects are, but since they have no label and your students probably won’t know their names, I suggest you print out the pictures of those objects with their names and distribute them randomly to your students before the lesson (or before the presentation).
Once you reach this slide, you can ask the student that has each object to either say the name, show the card or write it on the board to teach their classmates. This way you’re adding an interactive element in the middle of your presentation.
I’d also suggest you change the title to Los cuartos de la casa or add the article to En casa (at home) so that it becomes En la casa .
Another suggestion would be to either eliminate the last slide of the presentation or at least erase the English translation. I’d just keep the slide’s title ¿Cómo es tu casa? (What is your house like?) to encourage them to describe their own house (how many rooms, which floor they are on, etc.), but in the presentation, it’s unnecessary to have so much text. Just list any necessary vocabulary on the board.
Even though it’s been on the market for almost 30 years, PowerPoint is still a favorite when it comes to presentations.
It allows you to show pictures, graphics, charts and diagrams, or embed videos , songs and sounds. The possibilities are endless!
How about taking your students on a virtual tour with a photo presentation? Or teaching comparatives and superlatives through a set of slides of something your students can compare? Create a comic book , maybe? Or show them a sequence of events and encourage them to predict what will happen next when you’re teaching the future tense?
Even though it takes some time to create them, they’ll work for you for a very long time. You can easily adapt them to your lesson or to your students’ needs. If you prefer to create your own presentations, you can find plenty of tips and tricks online to make them awesome.
But don’t worry if you just don’t have the time. The internet has a ton of websites where teachers share their presentations and are free for you to download and use in your classroom. And you can still modify them to add your personal touch.
Now, I’m going to be brutally honest with you. In the world of Spanish presentations, finding good presentations to introduce vocabulary to beginners is not easy.
Here are some of the main problems I’ve encountered with Spanish presentations:
- The use of English to explain Spanish . These presentations may be appropriate for teachers but not for the students. We want them to get used to Spanish, and bombarding them with information in English won’t allow them to immerse themselves in the language we’re trying to teach.
- Lots of text . In any kind of presentation, this decreases the attention of the students and, therefore, the effectiveness of the message; either they listen to you or they read the presentation. But in a language class where you’re presenting new vocabulary, having lots of extra words is even worse.
- Not an absolute necessity. It’s important that you set your learning goals before you decide to use them and not the other way around. It’s important to be purposeful with PowerPoints and make sure it’s not the only way you introduce new vocabulary—the novelty will wear off and your students will get bored.
An ideal PowerPoint presentation for teaching vocabulary must be clear, concise, without paragraphs and with lots and lots of pictures—even more so when you are introducing words to beginners. And most importantly, they should only be in Spanish.
You want your students to associate the new word with an image (and maybe a sound), and you want them to remember it in Spanish.
Speaking of images and sounds, you may find great use in some of the fantastic learning material found on FluentU . With FluentU’s diverse and growing library of authentic content, students learn and live Spanish in an immersive fashion.
FluentU works for you as the educator as well! FluentU’s integrated teaching tools make it simple to monitor your students’ progress as they complete exercises and review the newly learned material. You’re sure to find content that can work wonderfully as a basis for PowerPoint presentations.
I hope you enjoy these resources and ideas for many (school) years to come.
And if at some point you decide to spend some time creating your own presentations, please share them online so you can help other teachers the same way they’re helping you now!
Related posts:
Enter your e-mail address to get your free pdf.
We hate SPAM and promise to keep your email address safe

- International
- Education Jobs
- Schools directory
- Resources Education Jobs Schools directory News Search

NEW AQA GCSE 1.1H_Personalidad y aspecto físico
Subject: Spanish
Age range: 14-16
Resource type: Lesson (complete)
Last updated
25 August 2024
- Share through email
- Share through twitter
- Share through linkedin
- Share through facebook
- Share through pinterest
A complete lesson that covers unit 1.1H of the new AQA GCSE textbook. This lesson contains a starter task and focuses on describing people. The grammar focus is the verb tener. There is a reading task as well as a listening task, though you will need to have a subscription to the textbook to be able to access the recording. There is a section on the pronunciation of the letter ñ. To finish, there is an exam 90 words essay with model answer.
Tes paid licence How can I reuse this?
Your rating is required to reflect your happiness.
It's good to leave some feedback.
Something went wrong, please try again later.
This resource hasn't been reviewed yet
To ensure quality for our reviews, only customers who have purchased this resource can review it
Report this resource to let us know if it violates our terms and conditions. Our customer service team will review your report and will be in touch.
Not quite what you were looking for? Search by keyword to find the right resource:
presentación
- Pronunciation
THE BEST SPANISH-ENGLISH DICTIONARY
Get more than a translation, written by experts, translate with confidence, spanish and english example sentences, examples for everything, regional translations, say it like a local.
Making educational experiences better for everyone.
Immersive learning for 25 languages
Marketplace for millions of educator-created resources
Fast, easy, reliable language certification
Fun educational games for kids
Comprehensive K-12 personalized learning
Trusted tutors for 300+ subjects
35,000+ worksheets, games, and lesson plans
Adaptive learning for English vocabulary
COMMENTS
Learn how to make a correct personal presentation for complete beginners.A1 Course Playlist: https://www.youtube.com/playlist?list=PLFtS2C6FSpWskQNcIJbeF-K88...
Translate My presentation. See authoritative translations of My presentation in Spanish with example sentences and audio pronunciations. Learn Spanish. Translation. Conjugation. ... Search millions of Spanish-English example sentences from our dictionary, TV shows, and the internet. REGIONAL TRANSLATIONS
2. Tell an Anecdote. 55% of our communication stems from non-verbal language; everything our audience reads through our expressions, mannerisms, tone, etc., while 38% of our communication is vocal and 7% is words. Hence, the importance of telling a story at the beginning of your presentation, so your audience connects with what you are going to ...
Luego, puedes decirle a la audiencia cuál es el tema general. Aquí hay dos frases que puedes usar: "Mi presentación es sobre…". "Hoy me gustaría hablarte de…". Siempre es una buena idea darle a la audiencia un resumen o una descripción general de su presentación. Recuerda dirigirte a tu público tratándoles de USTED ...
Download TONS of FREE PDF lessons to learn Spanish twice as fast, click here https://bit.ly/3n73piOIn this video, we will teach you How to Give a Presentatio...
3) Soy (name) This is a much more casual way to introduce yourself in Spanish. You just need the word "soy" which is "I am.". Soy (name) Meaning: I am (name) On top of these basic Spanish phrases, you'll also want to learn the question, "what's your name" in Spanish. You'll definitely be asked that.
In order to introduce someone in Spanish, we will need the verb SER in its forms ES and SON. Basically, if we are referring to one person, we will use "ES" as in "ÉL ES…" (he is) and "ERES" for "TÚ" as in "TÚ ERES…", but if we are referring to several then we must use "SON" as in "ELLOS SON…" (they are ...
Dear Esther, Giving a presentation in any language can be scary, but when you have to present to people you don't know, in a language you might not dominate (or even if you are fluent), it can be downright terrifying.However, as an experienced presenter in Spanish—read here and here about how I did my entire degree abroad—I am here to tell you that you can do it!
3. (aesthetic appearance) a. la presentación. (F) The chef told us that the presentation of the plate can be as important as the food itself.El chef nos dijo que la presentación del plato puede ser tan importante como la comida misma. 4. (formal act of offering) a. la entrega. (F) A Peruvian singer will take part in the presentation of the ...
https://bit.ly/2PhGK4K Are you're looking to become fluent and conversational in Spanish? Click here to start learning Spanish with the best free online reso...
In this blog post, I will explain how I addressed each issue so that my students were able to master the oral presentation section of the AP Spanish exam. Keep reading and get my F-R-E-E culture project on Spanish-speaking countries and famous hispanohablantes. Below are my best tips on how to teach la presentación oral. 1. STUDENT RESEARCH
Open Your Presentation: Navigate to Google Slides and open the presentation you wish to translate. Access the Translate Document Tool: Click on "File" in the top menu, then select "Language," and finally "Translate document.". Choose Your Language: In the pop-up window, rename your file if desired, then select "Spanish" from the ...
Step 4: Choose "Spanish" from the list of languages. Scroll through the list until you find "Spanish," then click on it to select it as your preferred language for the presentation. Keep in mind that Google Slides may offer different variations of Spanish, such as European Spanish or Latin American Spanish. Choose the one that best suits your ...
Permítanme dar más detalles sobre este punto. Let me elaborate on this point. Learn Mexican Spanish vocabulary you can use for preparing a presentation. In this FREE SpanishPod101.com lesson, you learn the words and get translations and audio lessons.
2. Give your name. Telling someone your name is the next thing you'll want to do after saying hello. You can do this in a few different ways, including: "Me llamo John" — My name is John. "Soy John" — I am John. "Mi nombre es John" — My name is John. Here is an example of someone giving their name using "me llamo.".
According to public speaking experts, it is recommended to prepare a conference in 3 steps: Open with something personal to capture the attention of your audience and announce what the presentation will be about. Name three important points and develop them with a story, examples, experience, etc. Summarize the key points briefly and concisely ...
la arena. show translation. Get the Word of the Day Email. Translate This is my presentation in spanish. See Spanish-English translations with audio pronunciations, examples, and word-by-word explanations.
There's no need for translated words in a language class, it'll just distract them from the Spanish words. 6. La cabeza (The head) Description: With a similar structure to the previous presentation, the head is formed part by part with each click and the name appears with its article.
Translation of "my presentation" in Spanish. Let me start my presentation, which is actually about that. Déjenme iniciar mi presentación, que de hecho, trata sobre eso. Because the basis of my presentation in this book is faith. Porque la base de mi presentación en este libro es la fe. That message, I think, brings my presentation to a ...
Free Spanish Powerpoint Presentations to Teach - Spanish4Teachers.org. This page compiles free to. teach different themes and units. They are ready to download. We offer our own Powerpoints (labeled. as such), as well as a collection of Powerpoint from other. sources. There are Spanish presentations for every level.
This video covers a series of useful phrases and words for when you are starting to learn Spanish! You can use the crash vocabulary videos we have on the ins...
phrase. 1. (general) a. mi presentación es acerca de. Thank you for coming here today. My presentation is about the effect of climate change on our coast.Agradezco que hayan venido hoy. Mi presentación es acerca del efecto del cambio climático en nuestra costa. b. mi presentación es sobre.
A complete lesson that covers unit 1.1H of the new AQA GCSE textbook. This lesson contains a starter task and focuses on describing people. The grammar focus is the verb tener.
syohn. ) feminine noun. 1. (talk) a. presentation. En su presentación sobre psicología clínica, Pepe habló de la situación de un amigo.In his presentation on clinical psychology, Pepe spoke about a friend's situation. 2. (act of introducing) a. presentation. Surgieron muchas dudas durante la presentación del informe anual.