- Our Mission

How a Simple Presentation Framework Helps Students Learn
Explaining concepts to their peers helps students shore up their content knowledge and improve their communication skills.

A few years ago, my colleague and I were awarded a Hawai‘i Innovation Fund Grant. The joy of being awarded the grant was met with dread and despair when we were informed that we would have to deliver a 15-minute presentation on our grant write-up to a room full of educational leaders. If that wasn’t intimidating enough, my colleague informed me that he was not going to be in Hawai‘i at the time of the presentation. I had “one shot,” just a 15-minute presentation to encapsulate all of the 17 pages of the grant I had cowritten, but how?
I worked hard to construct and deliver a presentation that was concise yet explicit. I was clear on the big picture of what the grant was composed of and provided a visual of it in practice. I made sure the audience understood the “why” behind the grant. I showed how it worked, the concrete elements of it, and how they made it successful. I finished with a scaffold that would help others know how to initiate it within their context, giving them the freedom to make it authentically their own.
I received good feedback from the presentation, and more important, what was shared positively impacted student learning in other classrooms across the state.
A Simple Framework for Presentations
That first presentation took me over a month to prepare, but afterward I noticed that my prep time for presentations shrank exponentially from a few months to a few (uninterrupted) days. Interestingly enough, as a by-product of creating the original presentation, I created an abstract framework that I have used for every professional learning presentation I have delivered since then. The “What, Why, How, and How-To” framework goes as follows:
- What? What can the audience easily connect to and know as a bridge to the unknown for the rest of the experience?
- Why? Why should they care to listen to (and learn from) the rest of the presentation? What’s in it for them to shift from passive listeners to actively engaged? The audience needs to know why you believe in this so much that you are compelled to share it.
- How? What are the key elements that make it unique? How is it effective in doing what it does? What are the intricacies of how it works?
- How-to? How could they start doing this on their own? How could this knowledge serve as a foundational springboard? Connect it to “why.”
Benefits for Students
One of the best parts of presentations is that they help the presenter to improve their communication skills. The presenter is learning how to give a presentation by doing it. To prepare a presentation, the presenter must know the intricate elements of what they are presenting and the rationale for their importance. In the presentation delivery, the presenter must be articulate and meticulous to ensure that everyone in the audience is able (and willing) to process the information provided.
It didn’t take long for me to realize that preparing and delivering presentations could provide a valuable learning opportunity for my students.
I recall teaching mathematical concepts whereby students would immediately apply knowledge learned to accomplish the task in silence and without any deeper questioning. Only after I asked them to provide presentations on these concepts did they regularly ask me, “Why is this important, again?” or “What makes this so special?” My students’ mathematical literacy grew through preparing presentations with the “What, Why, How, and How-To” framework, which supported them in their ability to demonstrate content knowledge through mathematical rigor (balancing conceptual understanding, skills and procedural fluency, and real-world application).
- The “what” served as the mathematical concept.
- The “why” demonstrated the real-world application of the concept.
- “The “how” demonstrated conceptual understanding of the concept.
- The “how-to” demonstrated skills and procedures of the concept.
In addition to content knowledge, the sequential competencies of clarity, cohesiveness, and captivation ensured that the presenter could successfully share the information with their audience. When combined, these framed a rubric that supported students in optimizing their presentation deliveries. The competencies are as follows:
1. Content knowledge. The presenter must display a deep understanding of what they are delivering in order to share the “what, why, how, and how-to” of the topic.
2. Clarity. The presenter must be clear with precise, academic language. As the content they deliver may be new to the audience, any lack of clarity will alienate the audience. Providing multiple modes of representation greatly addresses a variety of processing needs of a diverse audience.
3. Cohesiveness. When making clear connections, the presenter bridges gaps between each discrete component in how they all work together as integral elements of the topic. Any gaps too large may make the elements look disjointed or, worse, the audience feel lost.
4. Captivation. The presenter must captivate the audience through any combination of audience engagement or storytelling . They make the presentation flow with the energy of a song , and in the end, they leave the audience with a delicate balance of feeling fulfilled and inspired to learn more.
Anyone can build an effective presentation with the “What, Why, How, and How-To” framework, along with competencies of content knowledge, clarity, cohesiveness, and captivation. The better we teach and coach others on how to create and deliver presentations, the more we learn from these individuals through their work.
In my class, one multilingual learner responded to the prompt “What are the non-math (life lessons) you have found valuable from this class?” with “I learn what is learning and teaching... I truly understood how teaching is actually learning when I had presentation. I found a bit of desire to being a teacher. I hope you also learned something from this class.” I always learn from my students when they present.
Home Blog Education Presentation Skills 101: A Guide to Presentation Success
Presentation Skills 101: A Guide to Presentation Success
Getting the perfect presentation design is just a step toward a successful presentation. For the experienced user, building presentation skills is the answer to elevating the power of your message and showing expertise on any subject. Still, one can ask: is it the same set of skills, or are they dependable on the type of presentation?
In this article, we will introduce the different types of presentations accompanied by the skillset required to master them. The purpose, as always, is to retain the audience’s interest for a long-lasting and convincing message.

Table of Contents
The Importance of Presentation Skills
Persuasive presentations, instructional presentations, informative presentations, inspirational presentations, basic presentation skills, what are the main difficulties when giving a presentation, recommendations to improve your presentation skills, closing statement.
Effective communication is the answer to reaching business and academic goals. The scenarios in which we can be required to deliver a presentation are as diverse as one can imagine. Still, some core concepts apply to all presentations.
We define presentation skills as a compendium of soft skills that directly affect your presentation performance and contribute to creating a great presentation. These are not qualities acquired by birth but skills you ought to train and master to delve into professional environments.
You may ask: is it really that evident when a presenter is not prepared? Here are some common signs people can experience during presentations:
- Evasive body language: Not making eye contact with the audience, arms closed tightly to the body, hands in pockets all the time.
- Lack of interest in the presenter’s voice: dull tone, not putting an effort to articulate the topics.
- Doubting when asked to answer a question
- Irksome mood
The list can go on about common presenter mistakes , and most certainly, it will affect the performance of any presented data if the lack of interest by the presenter is blatantly obvious. Another element to consider is anxiety, and according to research by the National Institute of Mental Health, 73% of the population in the USA is affected by glossophobia , which is the fear of public speaking, judgment, or negative evaluation by other people.
Therefore, presentation skills training is essential for any business professional who wants to achieve effective communication . It will remove the anxiety from presentation performance and help users effectively deliver their message and connect with the audience.
Archetypes of presentations
Persuasive presentations aim to convince the audience – often in short periods – to acquire a product or service, adhere to a cause, or invest in a company. For business entrepreneurs or politicians, persuasive presentations are their tool for the trade.
Unless you aim to be perceived as an imposter, a proper persuasive presentation has the elements of facts, empathy, and logic, balanced under a well-crafted narrative. The central pillar of these presentations is to identify the single factor that gathered your audience: it could be a market need, a social cause, or a revolutionary concept for today’s society. It has to be something with enough power to gather critiques – both good and bad.
That single factor has to be backed up by facts. Research that builds your hypothesis on how to solve that problem. A deep understanding of the target audience’s needs , concerns, and social position regarding the solution your means can offer. When those elements are in place, building a pitch becomes an easy task.
Graphics can help you introduce information in a compelling format, lowering the need for lengthy presentations. Good presentation skills for persuasive presentations go by the hand of filtering relevant data and creating the visual cues that resonate with what your audience demands.
One powerful example of a persuasive presentation is the technique known as the elevator pitch . You must introduce your idea or product convincingly to the audience in a timeframe between 30 seconds and less than 2 minutes. You have to expose:
- What do you do
- What’s the problem to solve
- Why is your solution different from others
- Why should the audience care about your expertise

For that very purpose, using engaging graphics with contrasting colors elevates the potential power of your message. It speaks professionalism, care for details, and out-of-the-box thinking. Knowing how to end a presentation is also critical, as your CTAs should be placed with care.
Therefore, let’s resume the requirements of persuasive presentations in terms of good presentation skills:
- Identifying problems and needs
- Elaborating “the hook” (the element that grabs the audience’s attention)
- Knowing how to “tie” your audience (introducing a piece of information related to the hook that causes an emotional impact)
- Broad knowledge of body language and hand gestures to quickly convey your message
- Being prepared to argue a defense of your point of view
- Handling rejection
- Having a proactive attitude to convert opportunities into new projects
- Using humor, surprise, or personal anecdotes as elements to sympathize with the audience
- Having confidence
- Be able to summarize facts and information in visually appealing ways

You can learn more about persuasive presentation techniques by clicking here .
In the case of instructional presentations, we ought to differentiate two distinctive types:
- Lecture Presentations : Presentations being held at universities or any other educative institution. Those presentations cover, topic by topic, and the contents of a syllabus and are created by the team of teachers in charge of the course.
- Training Presentations : These presentations take place during in-company training sessions and usually comprise a good amount of content that is resumed into easy-to-take solutions. They are aimed to coach employees over certain topics relevant to their work performance. The 70-20-10 Model is frequently used to address these training situations.
Lecture presentations appeal to the gradual introduction of complex concepts, following a structure set in the course’s syllabus. These presentations often have a similar aesthetic as a group of professors or researchers created to share their knowledge about a topic. Personal experience does tell that course presentations often rely on factual data, adequately documented, and on the theoretical side.
An example of a presentation that lies under this concept is a Syllabus Presentation, used by the teaching team to introduce the subject to new students, evaluation methods, concepts to be learned, and expectations to pass the course.

On the other hand, training presentations are slide decks designed to meet an organization’s specific needs in the formal education of their personnel. Commonly known as “continuous education,” plenty of companies invest resources in coaching their employees to achieve higher performance results. These presentations have the trademark of being concise since their idea is to introduce the concepts that shall be applied in practice sessions.
Ideally, the training presentations are introduced with little text and easy-to-recognize visual cues. Since the idea is to summarize as much as possible, these are visually appealing for the audience. They must be dynamic enough to allow the presenter to convey the message.

Those key takeaways remind employees when they revisit their learning resources and allow them to ruminate on questions that fellow workers raise.
To sum up this point, building presentation skills for instructional presentations requires:
- Ability to put complex concepts into simpler words
- Patience and a constant learning mindset
- Voice training to deliver lengthy speeches without being too dense
- Ability to summarize points and note the key takeaways
- Empathizing with the audience to understand their challenges in the learning process

The informative presentations take place in business situations, such as when to present project reports from different departments to the management. Another potential usage of these presentations is in SCRUM or other Agile methodologies, when a sprint is completed, to discuss the advance of the project with the Product Owner.
As they are presentations heavily dependent on data insights, it’s common to see the usage of infographics and charts to express usually dense data in simpler terms and easy to remember.

Informative presentations don’t just fall into the business category. Ph.D. Dissertation and Thesis presentations are topics that belong to the informative presentations category as they condense countless research hours into manageable reports for the academic jury.

Since these informational presentations can be perceived as lengthy and data-filled, it is important to learn the following professional presentation skills:
- Attention to detail
- Be able to explain complex information in simpler terms
- Creative thinking
- Powerful diction
- Working on pauses and transitions
- Pacing the presentation, so not too much information is divulged per slide

The leading inspirational platform, TEDx, comes to mind when talking about inspirational presentations. This presentation format has the peculiarity of maximizing the engagement with the audience to divulge a message, and due to that, it has specific requirements any presenter must meet.
This presentation format usually involves a speaker on a stage, either sitting or better standing, in which the presenter engages with the audience with a storytelling format about a life experience, a job done that provided a remarkable improvement for society, etc.

Empathizing with the audience is the key ingredient for these inspirational presentations. Still, creativity is what shapes the outcome of your performance as people are constantly looking for different experiences – not the same recipe rephrased with personal touches. The human factor is what matters here, way above data and research. What has your experience to offer to others? How can it motivate another human being to pursue a similar path or discover their true calling?
To achieve success in terms of communication skills presentation, these inspirational presentations have the following requirements:
- Focus on the audience (engage, consider their interests, and make them a part of your story)
- Putting ego aside
- Creative communication skills
- Storytelling skills
- Body language knowledge to apply the correct gestures to accompany your story
- Voice training
- Using powerful words

After discussing the different kinds of presentations we can come across at any stage of our lives, a group of presentation skills is standard in any type of presentation. See below what makes a good presentation and which skills you must count on to succeed as a presenter.
Punctuality
Punctuality is a crucial aspect of giving an effective presentation. Nothing says more about respect for your audience and the organization you represent than delivering the presentation on time . Arriving last minute puts pressure on the tech team behind audiovisuals, as they don’t have enough preparation to test microphones, stage lights, and projector settings, which can lead to a less powerful presentation Even when discussing presentations hosted in small rooms for a reduced audience, testing the equipment becomes essential for an effective presentation.
A solution for this is to arrive at least 30 minutes early. Ideally, one hour is a sweet spot since the AV crew has time to check the gear and requirements for your presentation. Another benefit of this, for example, in inspirational presentations, is measuring the previous presenter’s impact on the audience. This gives insights about how to resonate with the public, and their interest, and how to accommodate your presentation for maximum impact.
Body Language
Our bodies can make emotions transparent for others, even when we are unaware of such a fact. Proper training for body language skills reduces performance anxiety, giving the audience a sense of expertise about the presented topic.
Give your presentation and the audience the respect they deserve by watching over these potential mistakes:
- Turning your back to the audience for extended periods : It’s okay to do so when introducing an important piece of information or explaining a graph, but it is considered rude to give your back to the audience constantly.
- Fidgeting : We are all nervous in the presence of strangers, even more, if we are the center of attention for that moment. Instead of playing with your hair or making weird hand gestures, take a deep breath to center yourself before the presentation and remember that everything you could do to prepare is already done. Trust your instincts and give your best.
- Intense eye contact : Have you watched a video where the presenter stared at the camera the entire time? That’s the feeling you transmit to spectators through intense eye contact. It’s a practice often used by politicians to persuade.
- Swearing : This is a no-brainer. Even when you see influencers swearing on camera or in podcasts or live presentations, it is considered an informal and lousy practice for business and academic situations. If you have a habit to break when it comes to this point, find the humor in these situations and replace your swear words with funny alternatives (if the presentation allows for it).
Voice Tone plays a crucial role in delivering effective presentations and knowing how to give a good presentation. Your voice is a powerful tool for exposing your ideas and feelings . Your voice can articulate the message you are telling, briefing the audience if you feel excited about what you are sharing or, in contrast, if you feel the presentation is a burden you ought to complete.
Remember, passion is a primary ingredient in convincing people. Therefore, transmitting such passion with a vibrant voice may help gather potential business partners’ interest.
But what if you feel sick prior to the presentation? If, by chance, your throat is sore minutes before setting foot on the stage, try this: when introducing yourself, mention that you are feeling a bit under the weather. This resonates with the audience to pay more attention to your efforts. In case you don’t feel comfortable about that, ask the organizers for a cup of tea, as it will settle your throat and relax your nerves.
Tech Skills
Believe it or not, people still feel challenged by technology these days. Maybe that’s the reason why presentation giants like Tony Robbins opt not to use PowerPoint presentations . The reality is that there are plenty of elements involved in a presentation that can go wrong from the tech side:
- A PDF not opening
- Saving your presentation in a too-recent PowerPoint version
- A computer not booting up
- Mac laptops and their never-ending compatibility nightmare
- Not knowing how to change between slides
- Not knowing how to use a laser pointer
- Internet not working
- Audio not working
We can come up with a pretty long list of potential tech pitfalls, and yet more than half of them fall in presenters not being knowledgeable about technology.
If computers aren’t your thing, let the organization know about this beforehand. There is always a crew member available to help presenters switch between slides or configure the presentation for streaming. This takes the pressure off your shoulders, allowing you to concentrate on the content to present. Remember, even Bill Gates can get a BSOD during a presentation .
Presentations, while valuable for conveying information and ideas, can be daunting for many individuals. Here are some common difficulties people encounter when giving presentations:
Public Speaking Anxiety
Glossophobia, the fear of public speaking, affects a significant portion of the population. This anxiety can lead to nervousness, trembling, and forgetfulness during a presentation.
Lack of Confidence
Many presenters struggle with self-doubt, fearing that they may not be knowledgeable or skilled enough to engage their audience effectively.
Content Organization
Organizing information in a coherent and engaging manner can be challenging. Presenters often grapple with how to structure their content to make it easily digestible for the audience. Artificial Intelligence can help us significantly reduce the content arrangement time when you work with tools like our AI Presentation Maker (made for presenters by experts in presentation design).
Audience Engagement
Keeping the audience’s attention and interest throughout the presentation can be difficult. Distractions, disengaged attendees, or lack of interaction can pose challenges.
Technical Issues
Technology glitches, such as malfunctioning equipment, incompatible file formats, or poor internet connectivity, can disrupt presentations and increase stress.
Time Management
Striking the right balance between providing enough information and staying within time limits is a common challenge. Going over or under the allotted time can affect the effectiveness of the presentation.
Handling Questions and Challenges
Responding to unexpected questions, criticism, or challenges from the audience can be difficult, especially when presenters are unprepared or lack confidence in their subject matter.
Visual Aids and Technology
Creating and effectively using visual aids like slides or multimedia can be a struggle for some presenters. Technical competence is essential in this aspect.
Language and Articulation
Poor language skills or unclear articulation can hinder effective communication. Presenters may worry about stumbling over words or failing to convey their message clearly.
Maintaining appropriate and confident body language can be challenging. Avoiding nervous habits, maintaining eye contact, and using gestures effectively requires practice.
Overcoming Impersonal Delivery
In virtual presentations, maintaining a personal connection with the audience can be difficult. The absence of face-to-face interaction can make it challenging to engage and read the audience.
Cultural and Diversity Awareness
Presenting to diverse audiences requires sensitivity to cultural differences and varying levels of familiarity with the topic.
In this section, we gathered some tips on how to improve presentation skills that can certainly make an impact if applied to your presentation skills. We believe these skills can be cultivated to transform into habits for your work routine.
Tip #1: Build a narrative
One memorable way to guarantee presentation success is by writing a story of all the points you desire to cover. This statement is based on the logic behind storytelling and its power to connect with people .
Don’t waste time memorizing slides or reading your presentation to the audience. It feels unnatural, and any question that diverts from the topic in discussion certainly puts you in jeopardy or, worse, exposes you as a fraud in the eyes of the audience. And before you ask, it is really evident when a presenter has a memorized speech.
Build and rehearse the presentation as if telling a story to a group of interested people. Lower the language barrier by avoiding complex terms that maybe even you aren’t fully aware of their meaning. Consider the ramifications of that story, what it could lead to, and which are the opportunities to explore. Then, visualize yourself giving the presentation in a natural way.
Applying this technique makes the presentation feel like second nature to you. It broadens the spectrum in which you can show expertise over a topic or even build the basis for new interesting points of view about the project.
Tip #2: Don’t talk for more than 3 minutes per slide
It is a common practice of presenters to bombard the audience with facts and information whilst retaining the same slide on the screen. Why can this happen? It could be because the presenter condensed the talk into very few slides and preferred to talk. The reality is that your spectators won’t retain the information you are giving unless you give visual cues to help that process.
Opt to prepare more slides and pace your speech to match the topics shown on each slide. Don’t spend more than 3 minutes per slide unless you have to introduce a complex piece of data. Use visual cues to direct the spectators about what you talk about, and summarize the principal concepts discussed at the end of each section.
Tip #3: Practice meditation daily
Anxiety is the number one enemy of professional presenters. It slowly builds without you being aware of your doubts and can hinder your performance in multiple ways: making you feel paralyzed, fidgeting, making you forget language skills or concepts, affecting your health, etc.
Meditation is an ancient practice taken from Buddhist teachings that train your mind to be here in the present. We often see the concepts of meditation and mindfulness as synonyms, whereas you should be aware that meditation is a practice that sets the blocks to reach a state of mindfulness. For presenters, being in the here and now is essential to retain focus, but meditation techniques also teach us to control our breathing and be in touch with our body signals when stress builds up.
The customary practice of meditation has an impact on imagination and creativity but also helps to build patience – a skill much needed for connecting with your audience in instructional presentations.
Having the proper set of presentation skills can be quite subjective. It goes beyond presentation tips and deepens into how flexible we can be in our ability to communicate ideas.
Different presentations and different audiences shape the outcome of our efforts. Therefore, having a basic understanding of how to connect, raise awareness, and empathize with people can be key ingredients for your career as a presenter. A word of advice: success doesn’t happen overnight. It takes dedication and patience to build communication skills . Don’t condition your work to believe you will be ready “someday”; it’s best to practice and experience failure as part of the learning process.
Like this article? Please share
Business Presentations, Presentation Approaches, Presentation Skills Filed under Education
Related Articles

Filed under Presentation Ideas • August 29th, 2024
How to Make a Presentation Longer: 7 Strategies to Master
Extend your talk in style. Join us to discover how to make a presentation longer while providing a high-end experience to your audience.

Filed under Presentation Ideas • August 22nd, 2024
How to Write a Presentation Script
The script of a speech is a vital aspect for a presentation’s success. Join us here to learn the process of writing a presentation script.

Filed under Design • August 14th, 2024
Creating Custom Themes for PowerPoint and Google Slides
Do you want your slides to go beyond the average result from a template? If so, learn how to create custom themes for presentations with this guide.
Leave a Reply
PowerPoint 101: The Ultimate Guide for Beginners

Are you struggling with PowerPoint? You need a quick design in PowerPoint but don't know where to start? Don't worry, you have nothing to be ashamed of.
In this article, we're going to refresh the most important PowerPoint basics so you can take advantage of this Microsoft software and create high-impact presentations at any time!
Millions of users worldwide use Microsoft 365 services , making PowerPoint the presentation design software with the highest market share. And with good reason! PowerPoint's features stand out for its usability and originality . We can tell you that PowerPoint is pretty intuitive software, and it's a great option to choose when working with presentations on a daily basis. So, are you ready for a quick PowerPoint 101 class?
Let ' s see what you ' re going to learn today with this PowerPoint Guide :
What is PowerPoint?
What are the best uses of powerpoint, powerpoint basics: what are the components of powerpoint workspace, mastering powerpoint: what are the main features of powerpoint, what are powerpoint templates and where to find them, time to practice how to make a presentation in powerpoint.

Microsoft PowerPoint is a presentation design software that is part of Microsoft 365 . This software allows you to design presentations by combining text, images, graphics, video, and animation on slides in a simple and intuitive way.
Over time, PowerPoint has evolved and improved its accessibility to users. For this reason, it has been adapted to the main operating systems and modalities:
- PowerPoint Online
Additionally, you can use Word and Excel in this online version. That way, you'll be able to make real-time changes in the cloud without fearing losing your files. Sounds great, right?
PowerPoint has a versatile range of uses. Here's a list of the different tasks you can complete with this presentation design software:
- Business presentations or Pitch decks.
- Marketing, Sales and HR plans.
- Project briefs and timelines.
- Inductions to new employees.
- Seminars and educational classes.
- Professional portfolio of photos or designs.
- Presentations of a research summary.
- Presentations for special occasions.
These are just a few examples of the multiple possibilities this Microsoft software offers. Your imagination is the only limit!
Stay tuned as we continue with this PowerPoint 101 Guide...

In order to deeply understand this presentation design software, you need to recognize its main components. Now it's time to learn about the PowerPoint basics!
A quick note before going any further: when opening PowerPoint, some of the commands in the ribbons will look grayish and won't be highlighted when you hover the mouse over them.
This happens since some commands need to be selected in order to function. For example, if you want to change the color of a text, you first need to select it.
That being said, let's start with this Guide for PowerPoint beginners:
PowerPoint Main Window
The first aspect to learn is PowerPoint Main Window. To facilitate the explanation, we've organized its main elements with numbers from 1 to 10:

Based on that, the main components of PowerPoint window are the following:
1. Quick Access Toolbar: allows you to customize commands to have them at hand. You only have to select it and go to "More commands."
2. Title Bar: shows you the name of your file and other "Suggested options" like Slide Master View . These options will vary depending on the use you give to the commands.
3. File Tab: you will see the Home Menu (PowerPoint backstage) by selecting it. There, you can create a new presentation, save it, print it, export it, and many other options.
4. The Ribbon: it's where PowerPoint tabs and tools are. These tools can also be called "commands" or “features.”
5. More Button or Down Arrow: these arrows allow you to view more tools or layout options in PowerPoint.
6. Slides Pane: shows your slides in thumbnail size. By right-clicking, you can access additional options for customizing each slide. Perfect for PowerPoint beginners!
7. Slide: PowerPoint's blank canvas and the frame to be seen when presenting the file.
8. Placeholders: they are dotted boxes that will store your content.
9. Status Bar: allows you to view the slide number, grammatical errors, speaker notes, and the comments on your file.
10. Zoom: allows you to enlarge or minimize your PowerPoint workspace. The range goes from 10 to 400%.
PowerPoint Tabs
The PowerPoint tabs are the control desk of your presentation . Since PowerPoint's features are too many, they're organized in tabs.
You can come and go between tabs as you need. Once you click on a tab, it will open its ribbon, and there, you'll be able to see all the tools related to that particular category.
This PowerPoint tutorial for beginners will give you an overview of all PowerPoint tabs . Pay attention to the following list:
- Transitions Tab
- Animations Tab
- Slide Show Tab
- Recording Tab
1. Home Tab
The Home tab is the most common tab of PowerPoint. This is the tab you'll probably use the most if you're designing a presentation deck from scratch.

It allows you to add new slides and change the text characteristics : font, size, boldness, underlining, alignment, etc. If you've ever used Microsoft Word, these features will be familiar to you.
Also, you will find commands to edit the characteristics of the geometric shapes you insert. This includes: fill color, line color, sharpe effects, among others.
2. Insert Tab
The Insert tab is exactly what its name says it is. In this ribbon, you'll find all the options concerning adding a new element to your PowerPoint presentation .

You can insert a picture, some geometric shapes, icons, WordArt graphics, among others. We can tell you that this tab is really helpful for PowerPoint beginners!
For example, if you have a lot of data in PowerPoint , you could add a chart or diagram to show your information in a more visual way. Also, you can embed videos or music into PowerPoint really easily.
- PowerPoint tip for beginners: To be able to write text on your slides, you need a text box. So, if you're designing your presentation from scratch, remember to go first to the Insert tab and add a text box to start writing.
3. Design Tab
If you are one of those people who enjoy choosing the design of a PowerPoint presentation, this tab will be your favorite.

The Design tab offers a wide range of premade designs , allowing you to get more polished slides. Even better, if you explore its ribbon, you can adjust the color palette and change the overall style of your PowerPoint deck.
The PowerPoint interface, as this basic PowerPoint Tutorial, is really intuitive. We believe that you won't have any problem with this tab!
4. Transitions Tab
Using transitions in PowerPoint is a dynamic way to move from one slide to the next during a presentation. This feature is PowerPoint's stamp, so don ' t miss it!

Some PowerPoint transitions are really classic, like wiping the old slide to present the new one. Others are somewhat over the top, like the “Vortex” or the “Airplane” effect.
If you click on each kind of transition, you'll see a preview on how it would look when presenting. Really cool, right?
5. Animations Tab
In case you want to add special effects for certain elements in your slides , the Animations tab in PowerPoint will interest you.

Like the Transitions tab, you will find various animation effects in this ribbon. It's a matter of trying and choosing the best one according to your needs!
6. Slide Show Tab
As its name says, the Slide Show tab is about presenting your slides . We really like that it gives you several options to show up your presentation!

Considering that you're a PowerPoint beginner, you're not likely to use the Slide Show tab very much.
But if you're curious about this command, you must read our article: How to Make a PowerPoint Slideshow that Runs Automatically?
7. Review Tab
The Review tab is not often used by PowerPoint beginners either.
However, if your job is related to writing or if you work at an international company, this tool can be extremely useful!

With this tab, you can check the slide's spelling, translate the text in real-time, and add comments to your slides . This last function can be helpful to give feedback to a colleague.
8. View Tab
This View tab allows you to change the view of your PowerPoint slides and make handouts from them, among other things.

As you can see, the majority of its commands are really specific. So you won't have any issues while designing, test and see!
In this section, our favorite command for PowerPoint beginners is Slide Master . Explore more about this tool in our guide!
9. Recording Tab
In the last versions of this design presentation software, PowerPoint added the Recording tab. As its name says, it allows you to record all your presentation slides .

This ribbon has advanced commands, so the most common action for a PowerPoint beginner is to take a screenshot or record the screen sequentially .
10. Help Tab
Finally, there is the Help tab. If you have any problem or question concerning how to use PowerPoint, you may go here to look for a solution.
In the latest versions, Windows has added a “Show Training” option. You can click this command to practice the PowerPoint basics since it will download training templates.

As a beginner in PowerPoint, you must recognize the objective of each PowerPoint tab to be able to master the software . But, in order to conduct an outstanding presentation deck, you also need to dominate its most important features. Let's see some of them in the next section!
If you feel ready to delve deeper into PowerPoint's tools, this section is for you.
As you may know , 24Slides specializes in creating outstanding presentations for any Design Project . So, we asked one of our experts about her favorite PowerPoint features, and we want to share them all with you!
Carmen Navarrete , Graphic Designer at 24Slides, highlighted the following features that will make your presentations stand out from the crowd:
PowerPoint Feature #1: Crop to Shape
This first PowerPoint feature is simple but effective!
Let's see how to use it:
- First, choose an image you want to cut and insert it into your workspace.
- Once inserted, select it with the mouse.
- Go to the "Picture Format" tab.
- Press the arrow of the "Crop" button (right side of the screen).
- Select "Crop to Shape."
- Choose your favorite shape and customize your PowerPoint presentation!

PowerPoint Feature #2: Merge Shapes
If you don't like any figure enough, you can create one from scratch!
This is possible thanks to the "Merge Shapes" option. Follow these steps to unleash your creativity:
- First choose an image you want to cut.
- Check the list of PowerPoint shapes (Insert tab > Shapes).
- Choose two or three figures you want to merge (they can be the same figure).
- Select the figures you are going to merge (see the image).
- Once selected, go to the "Shape Format" tab.
- Press the "Merge Shapes" option and the type of merge you want (test and choose!).

- A new figure will appear, and you must fill it with the image from the first step.
- Stay on the Shape Format tab and go to "Shape Fill" (button in the middle of the ribbon).
- Select "Picture Fill" and browse for your image.
- Select the image to fill your new figure, and that's it!

- PowerPoint tip for beginners: When your merged figure is ready, paste the image to the background of your slide to achieve a better result. This way, you can use your image as a canvas and see if both elements fit well.
PowerPoint Feature #3: Insert Icons
This PowerPoint feature is quite easy to follow for PowerPoint beginners!
Just follow these steps:
- Go to the Insert tab.
- Select the "Icons" option.
- A Microsoft 365 library will open, where you can search for the required icon.
- Now, you must insert it into your presentation and adapt it to your design.
- If you have an active Microsoft 365 subscription, you'll have access to a larger number of icons in PowerPoint.
- PowerPoint tip for beginners: If you want to learn more about icons in PowerPoint, read our article on How to Use Icons to Make Amazing PowerPoint Presentations .
PowerPoint Feature #4: Insert SmartArt
PowerPoint's SmartArt is one of the most popular and accessible tools to dominate while learning about PowerPoint basics.
To use it in your slide deck, you must:
- Select SmartArt.
- See all SmartArt categories and choose your favorite based on your needs.
- Add the text you have prepared and adapt it to your presentation.

We want to give you some ideas to master this SmartArt tool in PowerPoint: you can make timelines , flowcharts , and even a Venn diagram in just a few seconds. Try and see!
PowerPoint Feature #5: Remove Background
If you don't know how to use Photoshop and want to remove the background from an image, in this PowerPoint 101 Guide, we show you how:
- First choose the image you want to remove the background from.
- Insert the image in the PowerPoint workspace.
- Select the image and go to the "Picture Format" tab.
- Select "Remove Background" (first option on the left).
- You can keep and remove parts of the image with the first two tools of the ribbon (see image).
- Keep in mind that all the sections highlighted in purple will be deleted.

- We recommend zooming in to keep or remove parts of the image with more detail.
- Once you're done, press the "Keep Changes" button.
- Finally, adapt the new image to your PowerPoint presentation.

- PowerPoint tip for beginners: Choose a high-contrast photo or image for best results. In other words, the outline of the person or object you want to cut out must have clear edges and cannot blend with the image's background color.
PowerPoint Feature #6: Add Speaker Notes
The latest PowerPoint feature is a command you can use to prepare your speech before presenting to an audience.
Learning how to add speaker notes in PowerPoint is simple:
- Select the slide that needs some notes.
- Usually, there is a footer below the slide, but if not, you will have to activate it.
- Go to the View tab and select "Notes."
- The Speaker Notes section will appear, and you can add whatever you want!

- PowerPoint tip for beginners: In case you want to practice your entire presentation and have a lot of notes, go to the View tab and select "Notes Page" (fourth command). You'll be able to see all your Speaker Notes faster!
PowerPoint Feature #7: PowerPoint Translator
If you've ever wondered how to translate your PowerPoint Slides, we'll explain the step by step here:
- Go to the Review tab.
- Select the text you want to translate.
- Press the “Translate” button.
- A panel will open on the right side of the screen.
- Choose the language you need and you'll see the translation in real-time.
- If you press Insert, the text will change to the new translation!
PowerPoint Feature #8: Screen Recording
The process of recording your screen in PowerPoint is straightforward and intuitive. Let's see:
- Go to the “Record” or “Recording” tab.
- Press the "Record Slide Show" button or the “From Beginning” button (depending on your PPT version).
- A new window will open.
- Select the red record button and start recording!
- When you're done, select “Export.”
- By default, the video will be 1080p. If you want to lower the video quality, go to "Customize export."
- Name the video, save it to a folder and that's it!
As you may have noticed, this software has endless PowerPoint design options for beginners. We encourage you to try and test each functionality!
However, we're clear that PowerPoint has different features, so it can be hard to know where to start. That's why understanding PowerPoint basics is crucial if you truly want to master this software!
Our PowerPoint 101 Guide continues; stay tuned to discover more great stuff about this Microsoft software. Keep reading!
A PowerPoint template is a pre-made design that you can use for your own means, and that will save you a lot of time!
Templates in PowerPoint are a great resource for designing since all the structure is already done, and you only have to update the content . We can tell you they're the perfect resource for PowerPoint beginners!
They can be incredibly specific. For example, there are templates for a SWOT analysis or a complete Marketing report. Otherwise, templates can also be very general, with several slides with a similar design.
If you struggle with the artistic part of designing presentations, downloading PowerPoint templates will be a life changer!

How to download PowerPoint templates for free?
If you didn't know, 24Slides has an extensive repository of PowerPoint templates. But how to obtain them? It's really simple:
- First, create an account on our Free Templates Website with the button “Register” (that way, you can download everything without problems!).
- Think about the graphics you need and the ideal structure for your presentation deck (you can also change the color palette later!).
- Download it in PowerPoint format (if you prefer it in Google Slides format, you'll also find this type in our repository).
- Edit and change everything you need for your PowerPoint presentation!
24Slides Designers specialize in business and corporate PowerPoints, but you'll also find other types of templates on our website: Data templates, Timelines, Roadmaps, Matrixes, Diagrams, and more.
Keep in mind that a well-designed PowerPoint deck helps you communicate stronger messages to your audience . Don't waste this opportunity to make your presentation shine!

If you want to learn more about how to master PowerPoint, do not miss the last section. We'll show you some PowerPoint basics from the software itself!
A PowerPoint 101 Guide wouldn't be that useful with no examples. So, if you enjoy the step-by-step guides, this section is for you.
Below, we'll show you how to make a simple PowerPoint presentation. But first, here are some tips to be more efficient in the process:
- Be clear about what type of presentation you're going to create (is it corporate, playful, or more creative?).
- Make a draft with the most important information you need to add and, thus, generate a good structure in your presentation .
- Get inspired by examples on the internet , but adapt them to your needs and audience.
- If you will create a business presentation, keep in mind your brand identity .
- Make sure your PowerPoint works , you may need to update to the latest version or pay for the subscription.
Step 1: Make a draft to structure your presentation
As we said before, writing a draft or script of your content will be vital to start on the right foot as a PowerPoint beginner.
This advice is so important that we choose it as the first step to learning how to make a PowerPoint presentation. Remember: Planning is key!

Regarding the process of planning, we share some good practices:
- If your presentation will be very long , write down all subtitles and content in a Word document. This will help you organize your ideas and give a correct sequence to your narrative. In addition to avoiding redundancies in the message you want to communicate.
- If your presentation will use many visual resources , we recommend choosing high-quality images. This will help you have a starting graphic base. Some good free image repositories are Freepick , Unsplash , and Adobe Stock .
- If your presentation is based on data , have all your results summarized or your most relevant conclusions at hand. The idea of making a PowerPoint presentation is to show your information in the simplest way possible for your audience.
Step 2: Create a new document in PowerPoint
Once you check that all the functions are working fine with the software, please open it and go to the File tab. If you've ever used Word or Excel, you'll probably find this Home Menu familiar.
In short, this is the main page of PowerPoint, where you can create a new presentation or open an older one. Let's see:

In order to follow this part of our PowerPoint Tutorial correctly, take into consideration the following points:
- On the lower side of the screen, you'll find your recently opened PowerPoint files. This option is great for saving some time.
- If you don't find the presentation you're looking for, click on the “Open” option at the left bar and find older files.
- Don't forget to save your presentation with a relatable name so you won't lose sight of it!
Step 3: Choose the perfect design for your presentation
With your information ready in a draft, it's time to choose the design of your PowerPoint slide deck. You must imagine that the available design options are endless!
For practical reasons, you have three options regarding the design:
- Start a design from scratch (very difficult for a PowerPoint beginner).
- Choose an established PowerPoint design or layout.
- Download a PowerPoint template and modify some details.
Don't worry if you don't know how to continue! In this PowerPoint 101 class, we're going to explain step by step the second option:
How do you set a default design in PowerPoint?
- First, go to the Design tab.
- Open the list of options by clicking on the third arrow.
- Choose the design you like the most for your PowerPoint presentation.

If you want to explore more PowerPoint designs, there is a way to research online. For that, you only need to:
- Go to the File tab (first tab, next to the Home tab).
- Select "More themes" (see image).

- Use the search engine and write the keyword you want (it can be related to your business or it can be a color).
- Check the list of PowerPoint themes and choose your favorite.
- Wait a few minutes while it loads and keep designing in PowerPoint!

How do you change the layout of one slide in PowerPoint?
In this PowerPoint 101 Guide, you will also learn how to configure the layout of each slide.
Keep in mind that to have a high-impact presentation, you must adapt your slides' design to the type of content you'll add. And using layouts is perfect for this purpose.
To change the layout type in PowerPoint, follow these steps:
- Right-click on the slide you want to change.
- Select the "Layout" option.
- You will find more than ten layout models.
- Choose the one that best suits your content.
- Repeat these steps for each slide (if you wish or require).

How do you customize your slides in PowerPoint?
The design process in this PowerPoint 101 Guide doesn't stop there.
You also can customize your presentation's color palette , font style, background format , and graphics effects .
Just go to:
- Design tab > Variants.
- Select Colors, Fonts, Effects or Background Styles (as you need).
- If you're inspired and want to create your own background in PowerPoint, select Background Styles > Format Background.
- Finally, custom your slides as you want!

Step 4: Add all your information to your presentation
Now, it's time to add all your information to your slides. If your script is long, take your time to copy each part of it.
In this PowerPoint Tutorial, we're going to show how our design is going so far. We design at your side!

Step 5: Add transitions or animations to your presentation
The stamp of PowerPoint is its transitions and animations! Naturally, our PowerPoint 101 has considered these essential commands.
If you want to add them to your presentation and make your speech more fluid, follow these steps:
- Go to the tabs section of PowerPoint.
- Select "Transitions" or "Animations" and try your favorite effects.
- Remember that if you select Transitions, these will modify the entire slide, while Animations can be added to each element individually.
When choosing one Animation, you can eliminate it if you aren't 100% convinced. You only need to:
- Select the Animation number that appears on the corner.
- Press the "Delete" or "Backspace" button on your keyboard.
- Choose another Animation in PowerPoint if you want!

This “PowerPoint for dummies” is full of tips and tricks! So here is one more: Don't overuse transitions or animations in PowerPoint ; they can make your presentation slower and unprofessional . Use this tool in a subtle way!
Step 6: Refine the final details
As always, every final product must be reviewed. Especially if you're learning the PowerPoint fundamentals with us.
We recommend reviewing each slide of your PowerPoint presentation one final time. In this process, you will be able to:
- Add icons if your presentation requires it.
- Change any image or illustration if they don't convince you.
- Change transitions or animations.
- Customize your presentation's color palette .
- Proofread your slides' text or add more information.
- Add speaker notes to your presentation.

Step 7: Slideshow your presentation
When your presentation is finished, it's essential to know how to make a PowerPoint slideshow. This way, you can see your slides from the exact same perspective your audience will see them.
To slideshow your presentation in PowerPoint, follow these simple steps for PowerPoint beginners:
- Position yourself on your first slide.
- Go to the bottom right of the software.
- Select the "Slide Show" button (see image).
- Have a look of your presentation by clicking on each slide or pressing the right arrow on your keyboard.
- To go out from the Slide Show mode, you have to press the ESC key.

Now you can present your slides like an expert!
When you master this presentation design software, you'll be able to create amazing things in PowerPoint : infographics, diagrams, charts, pitch decks, business cards, calendars, you name it!
This was our PowerPoint Guide for beginners. We hope that our compilation today will be useful for conducting more professional presentations in the future and, why not, achieve all your goals!
Don't forget to share this PowerPoint 101 Guide with your co-workers or whoever you want!

Want to boost your beginner PowerPoint skills? Check out this content:
- How to Work with Multiple Images in PowerPoint
- How to Add a Timer to Your Powerpoint Presentations
- PowerPoint Charts, Graphs, & Tables Made Easy | Tips & Tricks
- How To Use PowerPoint Design Ideas - All Questions Answered!
- 36 Fun Icebreakers for Your Next Presentation
- The Cost of PowerPoint Presentations: Discover the hidden expenses you might overlook!
Create professional presentations online
Other people also read

Tutorial: Save your PowerPoint as a Video
How To Convert Google Slides To PowerPoint and Vice Versa

How To Add Animations To PowerPoint
Effective Communication in the Classroom

Why is It Important?
In a student-centered classroom, the instructor should not be speaking all of the time. However, when you are speaking, students count on you to: provide clarity by highlighting key ideas; elaborate on difficult concepts; and provide clear instructions for in-class activities. These messages should be backed up by appropriate visual aids that reinforce what you are talking about: board work, slides, and/or handouts.
In-class communication can be thought of as consisting of verbal, vocal, and visual channels.
Verbal channel
The verbal channel relates to word choice: the same content or point can be delivered in different ways using different words. Those differences in delivery affect how students comprehend and engage with the material.
The verbal channel can clarify and reinforce course content by:
- Defining and using discipline-specific vocabulary.
- Verbally outlining your presentation. Verbal indicators can signal transitions between ideas, helping students make connections to their prior knowledge and experiences, follow along, and organize their notes.
The verbal channel can also be used to send growth messages and create an inclusive classroom. For example, the way you respond to students’ questions and incorrect answers can be an opportunity to create a warm classroom climate but are often not something we consider rehearsing.
When a student asks a question:
- Try to call on them by name. This will help to create a sense of belonging.
- Thank them for their question to motivate them to ask questions again in the future.
- If a question is common, say so. This will help the student see that others’ have needed clarification on this point as well.
If you pose a question and a student responds with an incorrect answer:
- Thank the student for responding.
- If the student’s response is in line with a common error, say so, so they do not feel alone in their misunderstanding.
- Ask the student about the process that they used to come up with the answer to better understand where they made a misstep. This emphasizes process over product and also teaches good troubleshooting strategies.
- If a student’s answer is partially correct, ask another student to add on or clarify the response.
Certain verbal phrases can detract from a presentation by being distracting, signaling a lack of instructor preparation, or by making students feel insecure in their ability to succeed in the course.
| Filler Phrase to Avoid | Potential Student Interpretation | Potential Replacement |
|---|---|---|
| “Um”, “you know”, “uh”, “like” | When overused, can be distracting or signal a lack of preparation. | Silence. Take time to think about what comes next. Your students can also use that silence to reflect on what they’re learning. |
| “I’ll tell you quickly…” “Details are not important, but…” | Improper planning “This isn’t important. The instructor is wasting my time.” | Consider removing this content, sharing it as an optional reading outside of class, or preparing and delivering it at an appropriate level of detail with sufficient time. |
| “This is easy.” “You should already know this.” | Students could be embarrassed or insecure if they don’t know something or think it’s easy. | Learning takes time and practice, so it’s best to avoid judgments of difficulty. When building on prior knowledge is necessary, suggest resources students can use for additional practice. |
We all use some filler phrases habitually, and we should strive to minimize them. However, over-focusing on avoiding filler phrases can distract from a clear presentation. The best strategy is to practice avoiding filler phrases when rehearsing a lecture, but when actually teaching to focus on communicating with the students.
Vocal channel
The vocal channel includes aspects of speech such as volume, pacing, and tone. The vocal channel can be used to draw students attention and convey enthusiasm.
| Effective Use | Things to Avoid | Suggestions |
|---|---|---|
| Speak loudly enough that students throughout the room can hear you. | Sound is directional, so when turned towards a projector screen or writing on the board, speak louder or wait to speak until done gesturing or writing. Sometimes our volume decreases as we near the end of a sentence. Be mindful of this. | If you have trouble speaking loud enough to reach the back of your classroom, consider asking your students on the first day to sit near the front, or see if a microphone is available for your classroom. |
| Speak at a speed which allows students to hear and process what you’re saying. You adjust your rate and use pauses to emphasize key points or when transitioning between ideas. | Speaking too fast is overwhelming and makes it hard for students to process information. “Too fast” refers to both quantity of words and quantity of ideas. Constant speech, without pausing between ideas, doesn’t give students time to think about what they’re hearing. If you are using slides in your teaching, be particularly mindful about pacing. | It can be hard to judge appropriate pacing by yourself. Have a friend or colleague give you feedback and help you identify an appropriate speaking rate. If no one else is available, you can record yourself speaking and listen to it later to try to self-evaluate whether or not your speaking rate is appropriate. |
| Emphasize nouns and verbs, which contain the meaning in a sentence. | Not varying your tone can cause students to tune out. |
Visual channel
The visual channel includes all visual aids that support your message, including you (!), anything that you write on the board, project on the projector, or distribute as a handout.
Your physical appearance—posture, attire, expressions—are all part of your presentation and affect how students listen to you and receive your message. Here are some ways your appearance affects your presentation:
- Presence/Position/Posture : standing up straight conveys confidence and authority.
- Eye contact : helps you connect with your audience and keep your students engaged. You may tend to focus your gaze on a particular side of the classroom. Consciously make eye contact in a “W” pattern across the room.
- Movement : too much movement can be distracting, but well-timed movements emphasize key points or physically signal a transition between points – reinforce the information you’re presenting.
Plan what you will actually write on the board so you can make sure it’s organized, large, and legible. If you have limited experience writing on the board, try to practice in the room in which you will be teaching. You may be surprised at how large you have to write so that it is legible from the back of the room.
At MIT, most classrooms are outfitted with multiple, movable boards. Visit your classroom in advance to know the layout of the boards and use this information in your planning. For example, with movable boards, consider the order in which you will fill them to maximize the amount of information students can see at any given point. Students will want to write down everything that you write on the board.
Practice drawing important schematics. If a schematic is necessary but challenging to draw, consider supplementing your board work with a slide, which can also be distributed to students as a handout. Consider using color to highlight ideas, group items, or add clarity to diagrams.
Slide design
The digital nature of slides makes it easy to include more information than students can process on them. In general, try to keep the mantra of “less is more” in mind to reduce the likelihood of cognitive overload and including extraneous information.
When creating slides, words and images are better than words alone. Relevant images can help to support and clarify your message. That said, there are times when images may not be appropriate and you just need to use text. In these cases, summarize the ideas using phrases and avoid full sentences on your slide.
Simple animations of having bullets appear in a synchronized manner with your oration will help to reduce cognitive overload and help students stay focused on what you are saying. Key ideas can also be highlighted by using bolding and color.
Managing Nerves
Stage fright is natural. Almost everyone gets some degree of stage fright. Below are some things you can do at different stages of your preparation to minimize the effects of stage fright.
While preparing for class
- Acknowledge your fears by writing them down or sharing them with a friend or a trusted colleague. This will help you identify specific things you can practice to reduce your nerves.
- Practice your presentation. Try to make your practice as realistic as possible: practice in your assigned classroom with an audience of friends, colleagues, or a video camera.
Shortly before class
- Warm up your body by stretching, walking around, and standing up straight.
- Do breathing exercises to warm up your vocal cords and to regulate your breathing.
- Drink water to stay hydrated.
- Use relaxation or meditation resources to reduce nerves, like the MIT Community Wellness Relaxation Line, 617-253-2256 (CALM)
During class
- Use pauses to give yourself a chance to breathe and think. You can use longer pauses between major ideas or during active learning exercises to get a drink of water from your water bottle.
- If you find your speech rushing, try taking a longer pause after your next point. Take a couple of deep breaths and get comfortable with silence to reset your rate of speech.
- If you find yourself pacing or moving a lot, try planting your feet or putting your hands on a table or podium (if it doesn’t ruin your posture) to ground yourself. Once you’ve reset, give yourself more freedom to move around the room and interact with your students.
Additional resources
Mit school of engineering communication lab.
The Communication Lab is a discipline-specific peer-coaching program for MIT’s School of Engineering that helps graduate students with their scientific writing, speaking, and visual design.
MIT Writing and Communication Center
MIT Comparative Media Studies/Writing offers innovative programs that apply critical analysis, collaborative research, and design across a variety of media arts, forms, and practices.
Ideas and insights from Harvard Business Publishing Corporate Learning

Powerful and Effective Presentation Skills: More in Demand Now Than Ever

When we talk with our L&D colleagues from around the globe, we often hear that presentation skills training is one of the top opportunities they’re looking to provide their learners. And this holds true whether their learners are individual contributors, people managers, or senior leaders. This is not surprising.
Effective communications skills are a powerful career activator, and most of us are called upon to communicate in some type of formal presentation mode at some point along the way.
For instance, you might be asked to brief management on market research results, walk your team through a new process, lay out the new budget, or explain a new product to a client or prospect. Or you may want to build support for a new idea, bring a new employee into the fold, or even just present your achievements to your manager during your performance review.
And now, with so many employees working from home or in hybrid mode, and business travel in decline, there’s a growing need to find new ways to make effective presentations when the audience may be fully virtual or a combination of in person and remote attendees.
Whether you’re making a standup presentation to a large live audience, or a sit-down one-on-one, whether you’re delivering your presentation face to face or virtually, solid presentation skills matter.
Even the most seasoned and accomplished presenters may need to fine-tune or update their skills. Expectations have changed over the last decade or so. Yesterday’s PowerPoint which primarily relied on bulleted points, broken up by the occasional clip-art image, won’t cut it with today’s audience.
The digital revolution has revolutionized the way people want to receive information. People expect presentations that are more visually interesting. They expect to see data, metrics that support assertions. And now, with so many previously in-person meetings occurring virtually, there’s an entirely new level of technical preparedness required.
The leadership development tools and the individual learning opportunities you’re providing should include presentation skills training that covers both the evergreen fundamentals and the up-to-date capabilities that can make or break a presentation.
So, just what should be included in solid presentation skills training? Here’s what I think.
The fundamentals will always apply When it comes to making a powerful and effective presentation, the fundamentals will always apply. You need to understand your objective. Is it strictly to convey information, so that your audience’s knowledge is increased? Is it to persuade your audience to take some action? Is it to convince people to support your idea? Once you understand what your objective is, you need to define your central message. There may be a lot of things you want to share with your audience during your presentation, but find – and stick with – the core, the most important point you want them to walk away with. And make sure that your message is clear and compelling.
You also need to tailor your presentation to your audience. Who are they and what might they be expecting? Say you’re giving a product pitch to a client. A technical team may be interested in a lot of nitty-gritty product detail. The business side will no doubt be more interested in what returns they can expect on their investment.
Another consideration is the setting: is this a formal presentation to a large audience with questions reserved for the end, or a presentation in a smaller setting where there’s the possibility for conversation throughout? Is your presentation virtual or in-person? To be delivered individually or as a group? What time of the day will you be speaking? Will there be others speaking before you and might that impact how your message will be received?
Once these fundamentals are established, you’re in building mode. What are the specific points you want to share that will help you best meet your objective and get across your core message? Now figure out how to convey those points in the clearest, most straightforward, and succinct way. This doesn’t mean that your presentation has to be a series of clipped bullet points. No one wants to sit through a presentation in which the presenter reads through what’s on the slide. You can get your points across using stories, fact, diagrams, videos, props, and other types of media.
Visual design matters While you don’t want to clutter up your presentation with too many visual elements that don’t serve your objective and can be distracting, using a variety of visual formats to convey your core message will make your presentation more memorable than slides filled with text. A couple of tips: avoid images that are cliched and overdone. Be careful not to mix up too many different types of images. If you’re using photos, stick with photos. If you’re using drawn images, keep the style consistent. When data are presented, stay consistent with colors and fonts from one type of chart to the next. Keep things clear and simple, using data to support key points without overwhelming your audience with too much information. And don’t assume that your audience is composed of statisticians (unless, of course, it is).
When presenting qualitative data, brief videos provide a way to engage your audience and create emotional connection and impact. Word clouds are another way to get qualitative data across.
Practice makes perfect You’ve pulled together a perfect presentation. But it likely won’t be perfect unless it’s well delivered. So don’t forget to practice your presentation ahead of time. Pro tip: record yourself as you practice out loud. This will force you to think through what you’re going to say for each element of your presentation. And watching your recording will help you identify your mistakes—such as fidgeting, using too many fillers (such as “umm,” or “like”), or speaking too fast.
A key element of your preparation should involve anticipating any technical difficulties. If you’ve embedded videos, make sure they work. If you’re presenting virtually, make sure that the lighting is good, and that your speaker and camera are working. Whether presenting in person or virtually, get there early enough to work out any technical glitches before your presentation is scheduled to begin. Few things are a bigger audience turn-off than sitting there watching the presenter struggle with the delivery mechanisms!
Finally, be kind to yourself. Despite thorough preparation and practice, sometimes, things go wrong, and you need to recover in the moment, adapt, and carry on. It’s unlikely that you’ll have caused any lasting damage and the important thing is to learn from your experience, so your next presentation is stronger.
How are you providing presentation skills training for your learners?
Manika Gandhi is Senior Learning Design Manager at Harvard Business Publishing Corporate Learning. Email her at [email protected] .
Let’s talk
Change isn’t easy, but we can help. Together we’ll create informed and inspired leaders ready to shape the future of your business.
© 2024 Harvard Business School Publishing. All rights reserved. Harvard Business Publishing is an affiliate of Harvard Business School.
- Privacy Policy
- Copyright Information
- Terms of Use
- About Harvard Business Publishing
- Higher Education
- Harvard Business Review
- Harvard Business School
We use cookies to understand how you use our site and to improve your experience. By continuing to use our site, you accept our use of cookies and revised Privacy Policy .
Cookie and Privacy Settings
We may request cookies to be set on your device. We use cookies to let us know when you visit our websites, how you interact with us, to enrich your user experience, and to customize your relationship with our website.
Click on the different category headings to find out more. You can also change some of your preferences. Note that blocking some types of cookies may impact your experience on our websites and the services we are able to offer.
These cookies are strictly necessary to provide you with services available through our website and to use some of its features.
Because these cookies are strictly necessary to deliver the website, refusing them will have impact how our site functions. You always can block or delete cookies by changing your browser settings and force blocking all cookies on this website. But this will always prompt you to accept/refuse cookies when revisiting our site.
We fully respect if you want to refuse cookies but to avoid asking you again and again kindly allow us to store a cookie for that. You are free to opt out any time or opt in for other cookies to get a better experience. If you refuse cookies we will remove all set cookies in our domain.
We provide you with a list of stored cookies on your computer in our domain so you can check what we stored. Due to security reasons we are not able to show or modify cookies from other domains. You can check these in your browser security settings.
We also use different external services like Google Webfonts, Google Maps, and external Video providers. Since these providers may collect personal data like your IP address we allow you to block them here. Please be aware that this might heavily reduce the functionality and appearance of our site. Changes will take effect once you reload the page.
Google Webfont Settings:
Google Map Settings:
Google reCaptcha Settings:
Vimeo and Youtube video embeds:
You can read about our cookies and privacy settings in detail on our Privacy Policy Page.
Center for Teaching
Making better powerpoint presentations.
Print Version
Baddeley and Hitch’s model of working memory.
Research about student preferences for powerpoint, resources for making better powerpoint presentations, bibliography.
We have all experienced the pain of a bad PowerPoint presentation. And even though we promise ourselves never to make the same mistakes, we can still fall prey to common design pitfalls. The good news is that your PowerPoint presentation doesn’t have to be ordinary. By keeping in mind a few guidelines, your classroom presentations can stand above the crowd!
“It is easy to dismiss design – to relegate it to mere ornament, the prettifying of places and objects to disguise their banality. But that is a serious misunderstanding of what design is and why it matters.” Daniel Pink
One framework that can be useful when making design decisions about your PowerPoint slide design is Baddeley and Hitch’s model of working memory .
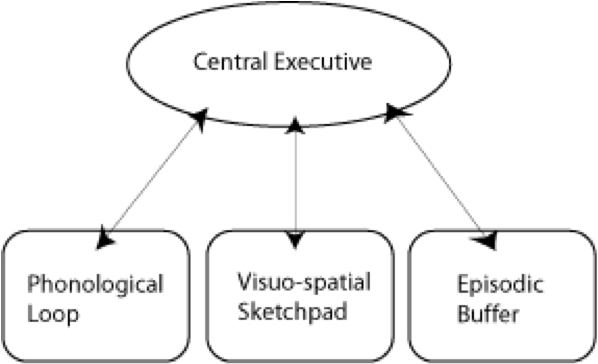
As illustrated in the diagram above, the Central Executive coordinates the work of three systems by organizing the information we hear, see, and store into working memory.
The Phonological Loop deals with any auditory information. Students in a classroom are potentially listening to a variety of things: the instructor, questions from their peers, sound effects or audio from the PowerPoint presentation, and their own “inner voice.”
The Visuo-Spatial Sketchpad deals with information we see. This involves such aspects as form, color, size, space between objects, and their movement. For students this would include: the size and color of fonts, the relationship between images and text on the screen, the motion path of text animation and slide transitions, as well as any hand gestures, facial expressions, or classroom demonstrations made by the instructor.
The Episodic Buffer integrates the information across these sensory domains and communicates with long-term memory. All of these elements are being deposited into a holding tank called the “episodic buffer.” This buffer has a limited capacity and can become “overloaded” thereby, setting limits on how much information students can take in at once.
Laura Edelman and Kathleen Harring from Muhlenberg College , Allentown, Pennsylvania have developed an approach to PowerPoint design using Baddeley and Hitch’s model. During the course of their work, they conducted a survey of students at the college asking what they liked and didn’t like about their professor’s PowerPoint presentations. They discovered the following:
Characteristics students don’t like about professors’ PowerPoint slides
- Too many words on a slide
- Movement (slide transitions or word animations)
- Templates with too many colors
Characteristics students like like about professors’ PowerPoint slides
- Graphs increase understanding of content
- Bulleted lists help them organize ideas
- PowerPoint can help to structure lectures
- Verbal explanations of pictures/graphs help more than written clarifications
According to Edelman and Harring, some conclusions from the research at Muhlenberg are that students learn more when:
- material is presented in short phrases rather than full paragraphs.
- the professor talks about the information on the slide rather than having students read it on their own.
- relevant pictures are used. Irrelevant pictures decrease learning compared to PowerPoint slides with no picture
- they take notes (if the professor is not talking). But if the professor is lecturing, note-taking and listening decreased learning.
- they are given the PowerPoint slides before the class.
Advice from Edelman and Harring on leveraging the working memory with PowerPoint:
- Leverage the working memory by dividing the information between the visual and auditory modality. Doing this reduces the likelihood of one system becoming overloaded. For instance, spoken words with pictures are better than pictures with text, as integrating an image and narration takes less cognitive effort than integrating an image and text.
- Minimize the opportunity for distraction by removing any irrelevant material such as music, sound effects, animations, and background images.
- Use simple cues to direct learners to important points or content. Using text size, bolding, italics, or placing content in a highlighted or shaded text box is all that is required to convey the significance of key ideas in your presentation.
- Don’t put every word you intend to speak on your PowerPoint slide. Instead, keep information displayed in short chunks that are easily read and comprehended.
- One of the mostly widely accessed websites about PowerPoint design is Garr Reynolds’ blog, Presentation Zen . In his blog entry: “ What is Good PowerPoint Design? ” Reynolds explains how to keep the slide design simple, yet not simplistic, and includes a few slide examples that he has ‘made-over’ to demonstrate how to improve its readability and effectiveness. He also includes sample slides from his own presentation about PowerPoint slide design.
- Another presentation guru, David Paradi, author of “ The Visual Slide Revolution: Transforming Overloaded Text Slides into Persuasive Presentations ” maintains a video podcast series called “ Think Outside the Slide ” where he also demonstrates PowerPoint slide makeovers. Examples on this site are typically from the corporate perspective, but the process by which content decisions are made is still relevant for higher education. Paradi has also developed a five step method, called KWICK , that can be used as a simple guide when designing PowerPoint presentations.
- In the video clip below, Comedian Don McMillan talks about some of the common misuses of PowerPoint in his routine called “Life After Death by PowerPoint.”
- This article from The Chronicle of Higher Education highlights a blog moderated by Microsoft’s Doug Thomas that compiles practical PowerPoint advice gathered from presentation masters like Seth Godin , Guy Kawasaki , and Garr Reynolds .
Presenting to Win: The Art of Telling Your Story , by Jerry Weissman, Prentice Hall, 2006
Presentation Zen: Simple Ideas on Presentation Design and Delivery , by Garr Reynolds, New Riders Press, 2008
Solving the PowerPoint Predicament: using digital media for effective communication , by Tom Bunzel , Que, 2006
The Cognitive Style of Power Point , by Edward R. Tufte, Graphics Pr, 2003
The Visual Slide Revolution: Transforming Overloaded Text Slides into Persuasive Presentations , by Dave Paradi, Communications Skills Press, 2000
Why Most PowerPoint Presentations Suck: And How You Can Make Them Better , by Rick Altman, Harvest Books, 2007

Teaching Guides
Quick Links
- Services for Departments and Schools
- Examples of Online Instructional Modules
- Center for Innovative Teaching and Learning
- Instructional Guide
Teaching with PowerPoint
When effectively planned and used, PowerPoint (or similar tools, like Google Slides) can enhance instruction. People are divided on the effectiveness of this ubiquitous presentation program—some say that PowerPoint is wonderful while others bemoan its pervasiveness. No matter which side you take, PowerPoint does offer effective ways to enhance instruction when used and designed appropriately.
PowerPoint can be an effective tool to present material in the classroom and encourage student learning. You can use PowerPoint to project visuals that would otherwise be difficult to bring to class. For example, in an anthropology class, a single PowerPoint presentation could project images of an anthropological dig from a remote area, questions asking students about the topic, a chart of related statistics, and a mini quiz about what was just discussed that provides students with information that is visual, challenging, and engaging.
PowerPoint can be an effective tool to present material in the classroom and encourage student learning.
This section is organized in three major segments: Part I will help faculty identify and use basic but important design elements, Part II will cover ways to enhance teaching and learning with PowerPoint, and Part III will list ways to engage students with PowerPoint.
PART I: Designing the PowerPoint Presentation
Accessibility.
- Student accessibility—students with visual or hearing impairments may not be able to fully access a PowerPoint presentation, especially those with graphics, images, and sound.
- Use an accessible layout. Built-in slide template layouts were designed to be accessible: “the reading order is the same for people with vision and for people who use assistive technology such as screen readers” (University of Washington, n.d.). If you want to alter the layout of a theme, use the Slide Master; this will ensure your slides will retain accessibility.
- Use unique and specific slide titles so students can access the material they need.
- Consider how you display hyperlinks. Since screen readers read what is on the page, you may want to consider creating a hyperlink using a descriptive title instead of displaying the URL.
- All visuals and tables should include alt text. Alt text should describe the visual or table in detail so that students with visual impairments can “read” the images with their screen readers. Avoid using too many decorative visuals.
- All video and audio content should be captioned for students with hearing impairments. Transcripts can also be useful as an additional resource, but captioning ensures students can follow along with what is on the screen in real-time.
- Simplify your tables. If you use tables on your slides, ensure they are not overly complex and do not include blank cells. Screen readers may have difficulty providing information about the table if there are too many columns and rows, and they may “think” the table is complete if they come to a blank cell.
- Set a reading order for text on your slides. The order that text appears on the slide may not be the reading order of the text. Check that your reading order is correct by using the Selection Pane (organized bottom-up).
- Use Microsoft’s Accessibility Checker to identify potential accessibility issues in your completed PowerPoint. Use the feedback to improve your PowerPoint’s accessibility. You could also send your file to the Disability Resource Center to have them assess its accessibility (send it far in advance of when you will need to use it).
- Save your PowerPoint presentation as a PDF file to distribute to students with visual impairments.
Preparing for the presentation
- Consider time and effort in preparing a PowerPoint presentation; give yourself plenty of lead time for design and development.
- PowerPoint is especially useful when providing course material online. Consider student technology compatibility with PowerPoint material put on the web; ensure images and graphics have been compressed for access by computers using dial-up connection.
PowerPoint is especially useful when providing course material online.
- Be aware of copyright law when displaying course materials, and properly cite source material. This is especially important when using visuals obtained from the internet or other sources. This also models proper citation for your students.
- Think about message interpretation for PowerPoint use online: will students be able to understand material in a PowerPoint presentation outside of the classroom? Will you need to provide notes and/or other material to help students understand complex information, data, or graphics?
- If you will be using your own laptop, make sure the classroom is equipped with the proper cables, drivers, and other means to display your presentation the way you have intended.
Slide content
- Avoid text-dense slides. It’s better to have more slides than trying to place too much text on one slide. Use brief points instead of long sentences or paragraphs and outline key points rather than transcribing your lecture. Use PowerPoint to cue and guide the presentation.
- Use the Notes feature to add content to your presentation that the audience will not see. You can access the Notes section for each slide by sliding the bottom of the slide window up to reveal the notes section or by clicking “View” and choosing “Notes Page” from the Presentation Views options.
- Relate PowerPoint material to course objectives to reinforce their purpose for students.
Number of slides
- As a rule of thumb, plan to show one slide per minute to account for discussion and time and for students to absorb the material.
- Reduce redundant or text-heavy sentences or bullets to ensure a more professional appearance.
- Incorporate active learning throughout the presentation to hold students’ interest and reinforce learning.
Emphasizing content
- Use italics, bold, and color for emphasizing content.
- Use of a light background (white, beige, yellow) with dark typeface or a dark background (blue, purple, brown) with a light typeface is easy to read in a large room.
- Avoid using too many colors or shifting colors too many times within the presentation, which can be distracting to students.
- Avoid using underlines for emphasis; underlining typically signifies hypertext in digital media.
Use of a light background with dark typeface or a dark background with a light typeface is easy to read in a large room.
- Limit the number of typeface styles to no more than two per slide. Try to keep typeface consistent throughout your presentation so it does not become a distraction.
- Avoid overly ornate or specialty fonts that may be harder for students to read. Stick to basic fonts so as not to distract students from the content.
- Ensure the typeface is large enough to read from anywhere in the room: titles and headings should be no less than 36-40-point font. The subtext should be no less than 32-point font.
Clip art and graphics
- Use clip art and graphics sparingly. Research shows that it’s best to use graphics only when they support the content. Irrelevant graphics and images have been proven to hinder student learning.
- Photographs can be used to add realism. Again, only use photographs that are relevant to the content and serve a pedagogical purpose. Images for decorative purposes are distracting.
- Size and place graphics appropriately on the slide—consider wrapping text around a graphic.
- Use two-dimensional pie and bar graphs rather than 3D styles which can interfere with the intended message.
Use clip art and graphics sparingly. Research shows that it’s best to use graphics only when they support the content.
Animation and sound
- Add motion, sound, or music only when necessary. When in doubt, do without.
- Avoid distracting animations and transitions. Excessive movement within or between slides can interfere with the message and students find them distracting. Avoid them or use only simple screen transitions.
Final check
- Check for spelling, correct word usage, flow of material, and overall appearance of the presentation.
- Colleagues can be helpful to check your presentation for accuracy and appeal. Note: Errors are more obvious when they are projected.
- Schedule at least one practice session to check for timing and flow.
- PowerPoint’s Slide Sorter View is especially helpful to check slides for proper sequencing as well as information gaps and redundancy. You can also use the preview pane on the left of the screen when you are editing the PowerPoint in “Normal” view.
- Prepare for plan “B” in case you have trouble with the technology in the classroom: how will you provide material located on your flash drive or computer? Have an alternate method of instruction ready (printing a copy of your PowerPoint with notes is one idea).
PowerPoint’s Slide Sorter View is especially helpful to check slides for proper sequencing and information gaps and redundancy.
PowerPoint Handouts
PowerPoint provides multiple options for print-based handouts that can be distributed at various points in the class.
Before class: students might like having materials available to help them prepare and formulate questions before the class period.
During class: you could distribute a handout with three slides and lines for notes to encourage students to take notes on the details of your lecture so they have notes alongside the slide material (and aren’t just taking notes on the slide content).
After class: some instructors wait to make the presentation available after the class period so that students concentrate on the presentation rather than reading ahead on the handout.
Never: Some instructors do not distribute the PowerPoint to students so that students don’t rely on access to the presentation and neglect to pay attention in class as a result.
- PowerPoint slides can be printed in the form of handouts—with one, two, three, four, six, or nine slides on a page—that can be given to students for reference during and after the presentation. The three-slides-per-page handout includes lined space to assist in note-taking.
- Notes Pages. Detailed notes can be printed and used during the presentation, or if they are notes intended for students, they can be distributed before the presentation.
- Outline View. PowerPoint presentations can be printed as an outline, which provides all the text from each slide. Outlines offer a welcome alternative to slide handouts and can be modified from the original presentation to provide more or less information than the projected presentation.
The Presentation
Alley, Schreiber, Ramsdell, and Muffo (2006) suggest that PowerPoint slide headline design “affects audience retention,” and they conclude that “succinct sentence headlines are more effective” in information recall than headlines of short phrases or single words (p. 233). In other words, create slide titles with as much information as is used for newspapers and journals to help students better understand the content of the slide.
- PowerPoint should provide key words, concepts, and images to enhance your presentation (but PowerPoint should not replace you as the presenter).
- Avoid reading from the slide—reading the material can be perceived as though you don’t know the material. If you must read the material, provide it in a handout instead of a projected PowerPoint slide.
- Avoid moving a laser pointer across the slide rapidly. If using a laser pointer, use one with a dot large enough to be seen from all areas of the room and move it slowly and intentionally.
Avoid reading from the slide—reading the material can be perceived as though you don’t know the material.
- Use a blank screen to allow students to reflect on what has just been discussed or to gain their attention (Press B for a black screen or W for a white screen while delivering your slide show; press these keys again to return to the live presentation). This pause can also be used for a break period or when transitioning to new content.
- Stand to one side of the screen and face the audience while presenting. Using Presenter View will display your slide notes to you on the computer monitor while projecting only the slides to students on the projector screen.
- Leave classroom lights on and turn off lights directly over the projection screen if possible. A completely dark or dim classroom will impede notetaking (and may encourage nap-taking).
- Learn to use PowerPoint efficiently and have a back-up plan in case of technical failure.
- Give yourself enough time to finish the presentation. Trying to rush through slides can give the impression of an unorganized presentation and may be difficult for students to follow or learn.
PART II: Enhancing Teaching and Learning with PowerPoint
Class preparation.
PowerPoint can be used to prepare lectures and presentations by helping instructors refine their material to salient points and content. Class lectures can be typed in outline format, which can then be refined as slides. Lecture notes can be printed as notes pages (notes pages: Printed pages that display author notes beneath the slide that the notes accompany.) and could also be given as handouts to accompany the presentation.
Multimodal Learning
Using PowerPoint can help you present information in multiple ways (a multimodal approach) through the projection of color, images, and video for the visual mode; sound and music for the auditory mode; text and writing prompts for the reading/writing mode; and interactive slides that ask students to do something, e.g. a group or class activity in which students practice concepts, for the kinesthetic mode (see Part III: Engaging Students with PowerPoint for more details). Providing information in multiple modalities helps improve comprehension and recall for all students.
Providing information in multiple modalities helps improve comprehension and recall for all students.
Type-on Live Slides
PowerPoint allows users to type directly during the slide show, which provides another form of interaction. These write-on slides can be used to project students’ comments and ideas for the entire class to see. When the presentation is over, the new material can be saved to the original file and posted electronically. This feature requires advanced preparation in the PowerPoint file while creating your presentation. For instructions on how to set up your type-on slide text box, visit this tutorial from AddictiveTips .
Write or Highlight on Slides
PowerPoint also allows users to use tools to highlight or write directly onto a presentation while it is live. When you are presenting your PowerPoint, move your cursor over the slide to reveal tools in the lower-left corner. One of the tools is a pen icon. Click this icon to choose either a laser pointer, pen, or highlighter. You can use your cursor for these options, or you can use the stylus for your smart podium computer monitor or touch-screen laptop monitor (if applicable).
Just-In-Time Course Material
You can make your PowerPoint slides, outline, and/or notes pages available online 24/7 through Blackboard, OneDrive, other websites. Students can review the material before class, bring printouts to class, and better prepare themselves for listening rather than taking a lot of notes during the class period. They can also come to class prepared with questions about the material so you can address their comprehension of the concepts.
PART III: Engaging Students with PowerPoint
The following techniques can be incorporated into PowerPoint presentations to increase interactivity and engagement between students and between students and the instructor. Each technique can be projected as a separate PowerPoint slide.
Running Slide Show as Students Arrive in the Classroom
This technique provides visual interest and can include a series of questions for students to answer as they sit waiting for class to begin. These questions could be on future texts or quizzes.
- Opening Question : project an opening question, e.g. “Take a moment to reflect on ___.”
- Think of what you know about ___.
- Turn to a partner and share your knowledge about ___.
- Share with the class what you have discussed with your partner.
- Focused Listing helps with recall of pertinent information, e.g. “list as many characteristics of ___, or write down as many words related to ___ as you can think of.”
- Brainstorming stretches the mind and promotes deep thinking and recall of prior knowledge, e.g. “What do you know about ___? Start with your clearest thoughts and then move on to those what are kind of ‘out there.’”
- Questions : ask students if they have any questions roughly every 15 minutes. This technique provides time for students to reflect and is also a good time for a scheduled break or for the instructor to interact with students.
- Note Check : ask students to “take a few minutes to compare notes with a partner,” or “…summarize the most important information,” or “…identify and clarify any sticking points,” etc.
- Questions and Answer Pairs : have students “take a minute to come with one question then see if you can stump your partner!”
- The Two-Minute Paper allows the instructor to check the class progress, e.g. “summarize the most important points of today’s lecture.” Have students submit the paper at the end of class.
- “If You Could Ask One Last Question—What Would It Be?” This technique allows for students to think more deeply about the topic and apply what they have learned in a question format.
- A Classroom Opinion Poll provides a sense of where students stand on certain topics, e.g. “do you believe in ___,” or “what are your thoughts on ___?”
- Muddiest Point allows anonymous feedback to inform the instructor if changes and or additions need to be made to the class, e.g. “What parts of today’s material still confuse you?”
- Most Useful Point can tell the instructor where the course is on track, e.g. “What is the most useful point in today’s material, and how can you illustrate its use in a practical setting?”
Positive Features of PowerPoint
- PowerPoint saves time and energy—once the presentation has been created, it is easy to update or modify for other courses.
- PowerPoint is portable and can be shared easily with students and colleagues.
- PowerPoint supports multimedia, such as video, audio, images, and
PowerPoint supports multimedia, such as video, audio, images, and animation.
Potential Drawbacks of PowerPoint
- PowerPoint could reduce the opportunity for classroom interaction by being the primary method of information dissemination or designed without built-in opportunities for interaction.
- PowerPoint could lead to information overload, especially with the inclusion of long sentences and paragraphs or lecture-heavy presentations with little opportunity for practical application or active learning.
- PowerPoint could “drive” the instruction and minimize the opportunity for spontaneity and creative teaching unless the instructor incorporates the potential for ingenuity into the presentation.
As with any technology, the way PowerPoint is used will determine its pedagogical effectiveness. By strategically using the points described above, PowerPoint can be used to enhance instruction and engage students.
Alley, M., Schreiber, M., Ramsdell, K., & Muffo, J. (2006). How the design of headlines in presentation slides affects audience retention. Technical Communication, 53 (2), 225-234. Retrieved from https://www.jstor.org/stable/43090718
University of Washington, Accessible Technology. (n.d.). Creating accessible presentations in Microsoft PowerPoint. Retrieved from https://www.washington.edu/accessibility/documents/powerpoint/
Selected Resources
Brill, F. (2016). PowerPoint for teachers: Creating interactive lessons. LinkedIn Learning . Retrieved from https://www.lynda.com/PowerPoint-tutorials/PowerPoint-Teachers-Create-Interactive-Lessons/472427-2.html
Huston, S. (2011). Active learning with PowerPoint [PDF file]. DE Oracle @ UMUC . Retrieved from http://contentdm.umuc.edu/digital/api/collection/p16240coll5/id/78/download
Microsoft Office Support. (n.d.). Make your PowerPoint presentations accessible to people with disabilities. Retrieved from https://support.office.com/en-us/article/make-your-powerpoint-presentations-accessible-to-people-with-disabilities-6f7772b2-2f33-4bd2-8ca7-ae3b2b3ef25
Tufte, E. R. (2006). The cognitive style of PowerPoint: Pitching out corrupts within. Cheshire, CT: Graphics Press LLC.
University of Nebraska Medical Center, College of Medicine. (n.d.). Active Learning with a PowerPoint. Retrieved from https://www.unmc.edu/com/_documents/active-learning-ppt.pdf
University of Washington, Department of English. (n.d.). Teaching with PowerPoint. Retrieved from https://english.washington.edu/teaching/teaching-powerpoint
Vanderbilt University, Center for Teaching. (n.d.). Making better PowerPoint presentations. Retrieved from https://cft.vanderbilt.edu/guides-sub-pages/making-better-powerpoint-presentations/

Suggested citation
Northern Illinois University Center for Innovative Teaching and Learning. (2020). Teaching with PowerPoint. In Instructional guide for university faculty and teaching assistants. Retrieved from https://www.niu.edu/citl/resources/guides/instructional-guide
Phone: 815-753-0595 Email: [email protected]
Connect with us on
Facebook page Twitter page YouTube page Instagram page LinkedIn page
Blog > Interactive PowerPoint presentations in class
Interactive PowerPoint presentations in class
03.08.2023 • #powerpoint #tips.
Presentations can be a great way to make your lessons exciting and informative and to informative and to better communicate information to your students. Many students do not feel engaged and integrated enough with normal presentations. To increase the attention span and arouse enthusiasm, interactive elements such as quizzes, word clouds or feedback rounds can help, to significantly increase learning success.
Common problems that arise during presentations in class
Presentations are a central element of the learning process, but they often involve challenges that need to be overcome. We have highlighted four common problems that often accompany presentations in class:
1. Lack of interaction
Standard PowerPoint presentations offer limited opportunities for audience interaction and engagement. They lack features to gather feedback or answer questions in real time and respond to requests.
2. Student passivity
Students are often forced into a passive role when the focus is only on the slides and the presenter simply delivers them in a heavy-handed manner.
3. Time managementt
Creating good presentations can take a lot of time and can be a difficult task for some.
4. Information Overload
Too much information at once, without a break can overwhelm and scare away younger students in particular. It's hard to focus on what's important and grasp the key messages.
4 ideas for interactive presentations in classes
Interactive presentations demonstrably increase learning success and retention. This is also confirmed by a study of the Keele University . The results here show very clearly to what extent involving the audience increases attention as well as knowledge transfer. It was found that the grades of the participants improved by 3.7%, as well as and the failure rate was reduced by 4.4% over the whole school year. were reduced.
1. Interactive classroom engagement
Students can ask questions anonymously and provide interactive feedback. This encourages active participation in the classroom and creates an open learning environment. Teachers could respond spontaneously to questions or interesting discussion points and customize lessons.
Here are some ways to better engage students in the classroom:
- Voting on the desired teaching material : Teachers can include an interactive survey where students choose from a variety of topics they would like to learn more about in class. This allows students to help shape the lesson and contribute their interests.
- Surveys in which subject areas the students need more support : Teachers can start a survey to identify areas where students are having difficulty or need more explanation. This can help to tailor the lessons to the needs of the students.
- Anonymous questions about ambiguities in specific subject areas : For example, students can use SlideLizard to anonymously ask questions about topics they didn't fully understand. These questions can then be discussed in class to clarify misunderstandings and deepen understanding.
2. Brainstorming and unleashing creativity
Interactive slides enable teachers and students to collaboratively brainstorming sessions into the presentation, and to create a presentation. The feature allows ideas to be collected and structured on virtual pinboards. and structure them. The result is an interactive collaboration that unleashes creativity and promotes the exchange of ideas. encourages.
Here are some ideas on how to incorporate brainstorming in the classroom:
- Brainstorming for possible solutions : When addressing complex problems or challenges, teachers can ask students to brainstorm different solutions together on an interactive slide. This encourages teamwork and creative thinking.
- Collection of ideas for projects : Teachers can use an interactive slide where students can collect creative ideas for upcoming projects. These ideas can then be discussed and developed together.
- Solutions for social challenges : Students can brainstorm and discuss ideas for addressing real-world social problems such as poverty, inequality, or pollution.
3. Learning with quizzes
Interactive quizzes are a highlight of PowerPoint presentations. Teachers can check what students have already learned in a playful way and track the learning success. The students in turn experience a motivating sense of achievement when they answer the quiz questions correctly. This makes the learning process not only entertaining, but also effective.
Here are some concrete ideas for how teachers can use quizzes in a meaningful way in the classroom:
- Short knowledge tests during the presentation : Teachers can include a short quiz after each section of a presentation to ensure that students understand the key concepts before moving on to the next section.
- Preparation for exams : Teachers can create more comprehensive quizzes that cover the entire subject matter and help students prepare for upcoming exams.
- Continuous knowledge checks : Teachers can create regular, short quizzes to ensure that knowledge learned builds and deepens consistently over time.
4. Flexibility in teaching through discussions
Additional slides can also be used or set aside to be be flexible to the needs of the students. Teachers can react spontaneously to respond spontaneously to questions or interesting discussion points and individually.
Here are some ways teachers can use discussions to engage students more fully in the classroom:
- Small group discussions : Teachers can divide students into small groups and have them discuss on different slides. Each group can then present their findings or conclusions.
- Feedback and reflexion : After a presentation or lecture, teachers can ask questions on a slide that encourage students to reflect on what they have heard. These questions can then be discussed together.
- Visualize discussions as a word cloud : The students' contributions and thoughts from a discussion can be visualized on a slide as a word cloud. Frequently mentioned words are displayed larger, which draws the focus to dominant topics or trends. This provides a visual summary of the discussion and encourages analysis of the most important aspects.
Tips: Create interactive presentations
One tool that can help you create interactive presentations is SlideLizard. SlideLizard offers a wide range of interactive features, such as word clouds, polls, quizzes or feedback rounds for your teaching. You can integrate the interactive slides directly into your PowerPoint presentation and the results of polls or word clouds during the lesson are automatically visualized in real time. Learn more about interactive teaching with SlideLizard here.
Using interactive PowerPoint presentations with SlideLizard allows teachers to take teaching to a new level and overcome these problems. By combining word clouds, quizzes, interactive feedback sessions, and brainstorming sessions, SlideLizard creates an inspiring learning environment where students can actively participate in the classroom and unlock their potential. Let's use this creative and innovative approach to unleash the potential of visual connection and take teaching in schools to a new level. Learning can be so much fun!
Related articles
About the author.

Annika Fachberger
Annika is dedicated to graphics and videos. At SlideLizard she supports the design team with her creative ideas.

Get 1 Month for free!
Do you want to make your presentations more interactive.
With SlideLizard you can engage your audience with live polls, questions and feedback . Directly within your PowerPoint Presentation. Learn more
Top blog articles More posts

How to convert PPT to a Video Format

Top 10 Tools for increasing Audience Engagement

Get started with Live Polls, Q&A and slides
for your PowerPoint Presentations
The big SlideLizard presentation glossary
Formal communication.
formal communication should be used for speeches or at work
Hybrid Event
When an event consist of both virtual and in-person parts, this is called a hybrid event. This type of event is popular as it combines the benefits of both online and live events.
Social Events
Social events in companys can be to celebrate an anniversary or to bond better as a team. They should address the personal interests of employees and revolve around things like entertainment and food.
.ppsm file extension
A .ppsm file includes one or more macro-enabled slides. They are used to show presentations with embedded macros, but not for editing them.
Be the first to know!
The latest SlideLizard news, articles, and resources, sent straight to your inbox.
- or follow us on -
We use cookies to personalize content and analyze traffic to our website. You can choose to accept only cookies that are necessary for the website to function or to also allow tracking cookies. For more information, please see our privacy policy .
Cookie Settings
Necessary cookies are required for the proper functioning of the website. These cookies ensure basic functionalities and security features of the website.
Analytical cookies are used to understand how visitors interact with the website. These cookies help provide information about the number of visitors, etc.
- Google Classroom
- Google Workspace Admin
- Google Cloud
Google Classroom is turning 10. Find out what we’ve learned and what we’re doing next. 🎉
Get started with google slides.
Learn how to use Google Slides to create engaging presentations, make fewer class copies, and more.
Find tips and tricks from teachers like you
Explore topics one-by-one.
- What is Google Slides
- Accessing Google Slides
- Creating a presentation in Google Slides
- Adding and editing content
- Presenting Google Slides
- Sharing Google Slides
Discover training lessons and related resources to accelerate your learning
Error loading content :( Please try again later
- {[ item.label ]}
{[ collectionContentCtrl.activeTopic.label ]} All resources ({[ collectionContentCtrl.totalItemsCount ]})
{[ item.eyebrow ]}
{[ item.name ]}
{[ item.description ]}
{[ item.featured_text ]}
No results matching your selection :( Clear filters to show all results
Begin your training with Google Slides
Get support from our help center, you're now viewing content for united states..
For content more relevant to your region, choose a different location:

- Covid-19 SYL Resources
- Student Led Conference
- Presentation of Learning
- SYL Stories
What is a Presentation of Learning and Why Do We Do It?
Alec patton.
A Presentation of Learning (POL) requires students to present their learning to an audience, in order to prove that they are ready to progress. Effective POLs include both academic content and the student’s reflection on their social and personal growth. They are important rituals – literally “rites of passage” for students.
At my school, every student gives two POLs per year – one at the end of fall semester, and one at the end of the year. They happen at the same time that most schools have their final exams, and serve a similar function. However, unlike exams, POLs happen in front of an audience that includes their teachers, parents, and peers. By requiring students to present to an audience, reflect on their learning, and answer probing questions on the spot, we are helping students build skills that they will use for the rest of their life. Taking an exam, on the other hand, is a skill that students will rarely, if ever, need to utilize after they finish college.
Every team’s POL expectations are slightly different, but they all fall into one of two broad categories: “presentation” or “discussion”.
Presentation
The presentation is the “classic” version of the POL. A student gives a prepared presentation on their own, and takes questions. Designing a POL structure is a balancing act for the teacher: require students to cover too much material, and every one of your students will march in and recite a near-identical list of assignments completed and skills learned. On the other hand, make the requirements too open-ended and the POL can become an empty facsimile of reflection – or, as students have described it to me, “BS-ing”!
I once saw a POL assignment that included the phrase “it has to have some magic”, which students were free to interpret as they saw fit. It led to unpredictable and delightful presentations, and inspired more thought and extra work than any rubric could have.
The “Discussion of Learning” trades the presentation structure for a seminar structure: a small group of students facilitates their own hour-long discussion, with the teachers initially just listening, then adding questions to enrich and drive the discussion. The parents are invited in for the final fifteen minutes, when the students summarize the discussion thus far and invite the parents to participate.
In my experience, this format tends to lead to meatier, more honest reflection than presentations. Especially when students are allowed to choose their own groups, they tend to make themselves more vulnerable than in other contexts. This format also opens up a space for students whose voices aren’t always heard in the classroom. The most memorable POL I’ve ever been a part of was a discussion by a group of girls, all them native Spanish speakers, who talked about having been made uncomfortably aware of their accents by peers, and struggling to make their voices heard within our team. It was powerful, effective, thoughtful – everything I would have wanted from a POL, but it never would have happened if the structure had been different.
Which format should I choose, and when?
Students will be best-served by experiencing both the “presentation” and “discussion” format at some point in their academic careers.
I like to end fall semester with a presentation, because individual presentations give me the clearest sense of which skills a student has successfully developed, and what they will need more help with in the coming semester. I then end the year with a discussion, because at this point I know the students very well, and in a small-group setting we can speak frankly both about their successes, and the potential problems they will face in the coming year. I end this discussion with every student setting goals for the summer and coming year that I record and email to the student and their parents, so that they leave my class with the best possible trajectory into the future.
Related Projects

The Missing Person in Traditional Parent-Teacher Conferences by Krista Gypton

“Fish Tank” at Lake Travis High School

Trigg County Shares Their Learning, What About Your County? By Michelle Sadrena Pledger

Montgomery Middle Banner Design Exhibition

Students as Teachers: A Senior Reflects on her Final Exhibitions Evening at Meridian Academy
- Create a presentation Article
- Save Article
- Design Article
- Share and collaborate Article
- Give a presentation Article
- Set up your mobile apps Article
- Learn more Article

Create a presentation
Create a presentation in PowerPoint

Create presentations from scratch or start with a professionally designed, fully customizable template from Microsoft Create .
Tip: If you have Microsoft Copilot it can help you create a presentation, add slides or images, and more. To learn more see Create a new presentation with Copilot in PowerPoint.
Open PowerPoint.
In the left pane, select New .
Select an option:
To create a presentation from scratch, select Blank Presentation .
To use a prepared design, select one of the templates.
To see tips for using PowerPoint, select Take a Tour , and then select Create , .

Add a slide
In the thumbnails on the left pane, select the slide you want your new slide to follow.
In the Home tab, in the Slides section, select New Slide .
In the Slides section, select Layout , and then select the layout you want from the menu.

Add and format text
Place the cursor inside a text box, and then type something.
Select the text, and then select one or more options from the Font section of the Home tab, such as Font , Increase Font Size , Decrease Font Size , Bold , Italic , Underline , etc.
To create bulleted or numbered lists, select the text, and then select Bullets or Numbering .

Add a picture, shape, and more
Go to the Insert tab.
To add a picture:
In the Images section, select Pictures .
In the Insert Picture From menu, select the source you want.
Browse for the picture you want, select it, and then select Insert .
To add illustrations:
In the Illustrations section, select Shapes , Icons , 3D Models , SmartArt , or Chart .
In the dialog box that opens when you click one of the illustration types, select the item you want and follow the prompts to insert it.

Need more help?
Want more options.
Explore subscription benefits, browse training courses, learn how to secure your device, and more.

Microsoft 365 subscription benefits

Microsoft 365 training

Microsoft security

Accessibility center
Communities help you ask and answer questions, give feedback, and hear from experts with rich knowledge.

Ask the Microsoft Community

Microsoft Tech Community

Windows Insiders
Microsoft 365 Insiders
Find solutions to common problems or get help from a support agent.

Online support
Was this information helpful?
Thank you for your feedback.
Free Shipping and Fast Delivery Within 2-3 Days
Best Practices for Online Presentations:The Ultimate Guide

Online presentations have become an integral part of our professional and personal lives, especially in today's digital age. Whether you're presenting to colleagues, clients, or a virtual audience, delivering a flawless online presentation requires careful planning, preparation, and execution. In this comprehensive guide, we'll explore the best practices for online presentations, covering crafting engaging content, essential tips, mastering virtual presentation technology, overcoming challenges, and advanced techniques to take your presentations to the next level.
Crafting Engaging Virtual Presentation Content
- Simplify Your Slides : Keep your slides concise, visually appealing, and easy to read. Use a clear, legible font size (at least 24 points) and limit the amount of text on each slide. Opt for high-quality images, charts, and graphics to support your key points and maintain audience interest.
- Use Visual Aids : Incorporate relevant images, videos, and graphs to break up text and make your slides more engaging. Ensure that all visuals are high-resolution and clearly visible to your audience. Use animations and transitions sparingly to avoid distracting from your core message.
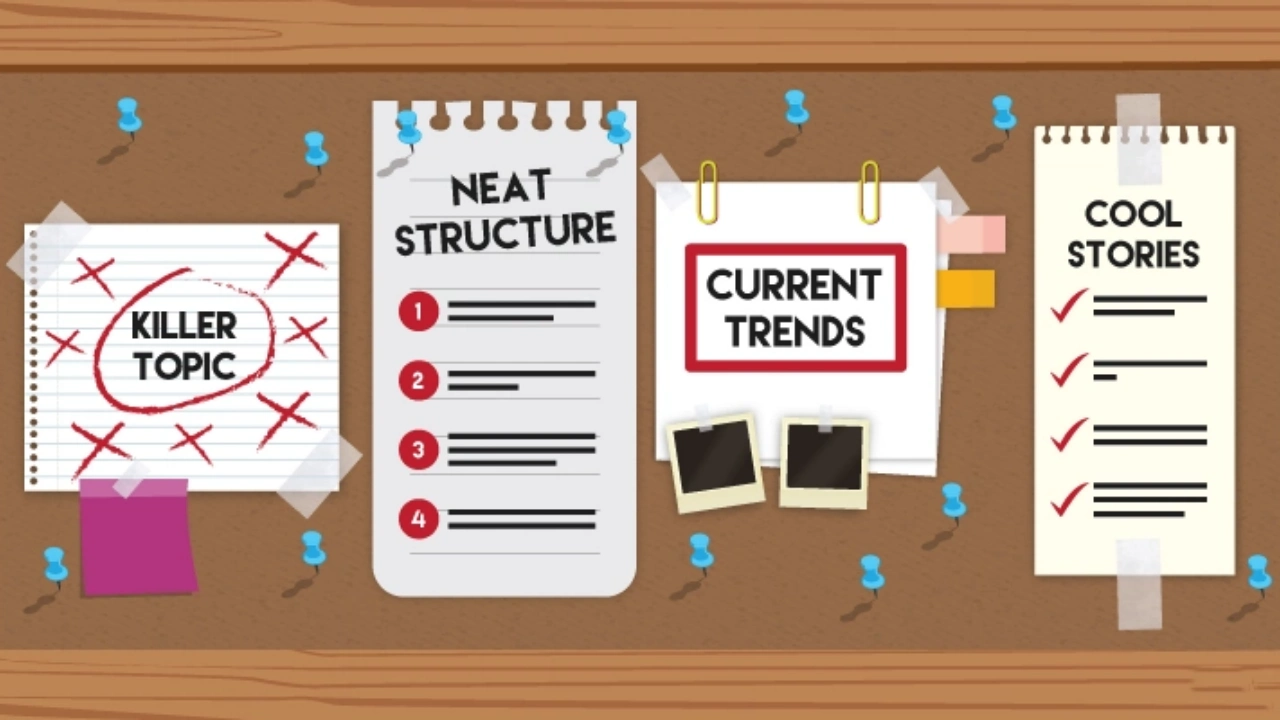
Essential Tips before Deliver a Flawless Virtual Presentation
- Proper Webcam & Lighting : Invest in a high-quality webcam and ensure that your lighting is optimal to make a great first impression on your audience. Position your webcam at eye level and use soft, natural light to illuminate your face evenly, avoiding harsh shadows or back lighting. Proper lighting can significantly enhance the quality of your video feed. In addition, Position yourself facing a window for natural light or use a ring light or desk lamp to illuminate your face. Avoid sitting with a window behind you, as it can create a silhouette effect.
- Check Internet Connection : A stable and fast internet connection is crucial for a smooth virtual presentation. Test your connection speed beforehand and consider using a wired connection instead of Wi-Fi for better reliability. Have a backup plan, such as a mobile hotspot, in case of connectivity issues.
- Dress Professionally : Even though you're presenting virtually, dressing professionally can boost your confidence and make a positive impression on your audience. Choose attire that is appropriate for the occasion and avoid busy patterns or distracting accessories.
- Eliminate Distractions : Minimize background noise and distractions to keep your audience focused on your presentation. Close unnecessary applications, silence notifications, and inform others in your household about your presentation to avoid interruptions.
- Present in a Quiet Space : Find a quiet, dedicated space for your virtual presentation to minimize background noise and interruptions. If possible, use a room with a door that you can close and consider using a noise-canceling headset or microphone for better audio quality.
Mastering Virtual Presentation Technology
- Master the virtual presentation platform : Take the time to learn the features and capabilities of the virtual presentation platform you'll be using. Explore options such as screen sharing, chat, polls, and breakout rooms to engage your audience effectively.
- Test equipment : Before the presentation, thoroughly test your audio, video, and screen sharing capabilities to ensure a seamless experience. Check your microphone and webcam settings, and practice using the virtual presentation platform to avoid technical hiccups during the live event.
- Use Audience Engagement Tools : Incorporate interactive elements like live polls, Q&A sessions, and chat to keep your audience engaged throughout the presentation. Encourage participation by asking questions, seeking feedback, and fostering discussions.
Overcoming Virtual Presentation Challenges
- Managing Nerves and Anxiety : To manage nerves and anxiety, practice deep breathing exercises before your presentation. Take slow, deep breaths to calm your mind and reduce stress. Use positive self-talk and visualize a successful presentation to boost your confidence.
- Handling Technical Issues : Despite thorough preparation, technical issues can still arise. Have a backup plan in place, such as sharing your slides or notes with the audience in advance. Remain calm and communicate with your audience if you experience technical difficulties, and have a co-host or technical support on standby to assist if needed.
- Encouraging Audience Participation : To encourage audience participation, start by setting expectations and providing clear instructions on how to engage. Use icebreakers or polls to initiate interaction and create a welcoming atmosphere. Allocate dedicated time for Q&A and actively monitor the chat for questions and comments.
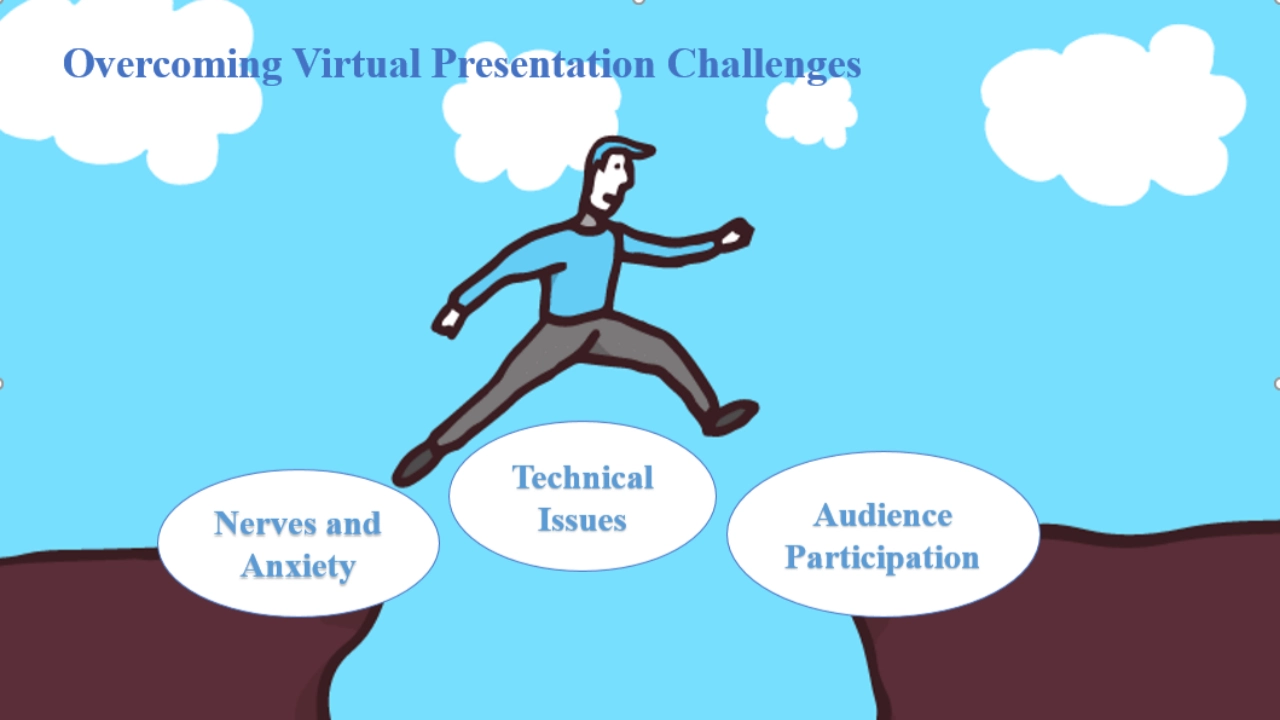
Advanced Virtual Presentation Techniques
- Using Body Language : Even in a virtual setting, body language plays a crucial role in effective communication. Maintain good posture, make eye contact with the camera, and use appropriate hand gestures to emphasize key points. Avoid fidgeting or making distracting movements.
- Varying Tone and Pace : Keep your audience engaged by varying your tone and pace throughout the presentation. Use vocal inflections to convey enthusiasm and emphasize important information. Adjust your speaking pace to allow for pauses and give your audience time to process the content.
Summarize the strengths and weaknesses of the presentation
- Collect feedback : Actively seek feedback from the audience through post-presentation surveys or sending follow-up emails. Let the audience share their thoughts, ask questions, and provide suggestions.
- Summarize and improve : Analyze the collected feedback. Summarize the strengths and weaknesses of the presentation. Incorporate valuable insights into future presentations to continuously improve your online presentation skills.
Delivering a successful online presentation requires a combination of technical proficiency, engaging content, and effective communication skills. By following the best practices outlined in this guide, you'll be well-equipped to navigate the challenges of virtual presentations and captivate your audience. Remember to invest in quality equipment, master the virtual presentation platform, craft compelling content, and engage your audience through interactive elements and storytelling. With practice and persistence, you'll become a confident and impactful virtual presenter, ready to tackle any online presentation with ease. If you have any other questions regarding online presentations, feel free to leave a message. Additionally, you are welcome to share the online presentation skills. Meanwhile, if you find this article useful, please share it with your friends or on social media.
What are the most important technical considerations for online presentations?
The most important technical considerations for online presentations include:
Ensuring a stable and fast internet connection
Investing in a high-quality webcam and microphone
Familiarizing yourself with the virtual presentation platform
Testing your audio, video, and screen sharing capabilities before the presentation
Having a backup plan in case of technical issues
How can I make my virtual presentation content more engaging?
To make your virtual presentation content more engaging, consider the following:
Keep your slides concise and visually appealing
Use high-quality images, charts, and graphics to support your key points
Incorporate storytelling techniques to make your content more relatable and memorable
Use interactive elements like polls, Q&A sessions, and chat to encourage audience participation
Vary your tone and pace to maintain audience interest
What should I do if I experience technical issues during my online presentation?
If you experience technical issues during your online presentation, remain calm and take the following steps:
Communicate with your audience and inform them of the issue
Have a backup plan, such as sharing your slides or notes in advance
Seek assistance from a co-host or technical support team
If the issue persists, consider rescheduling the presentation or providing alternative means of accessing the content
How can I manage nerves and anxiety before an online presentation?
To manage nerves and anxiety before an online presentation, try the following techniques:
Practice deep breathing exercises to calm your mind and reduce stress
Use positive self-talk and visualize a successful presentation
Rehearse your presentation multiple times to build confidence
Ensure that you are well-prepared and familiar with the virtual presentation platform
Create a comfortable and distraction-free environment for your presentation
What are some advanced techniques for delivering impactful virtual presentations?
Advanced techniques for delivering impactful virtual presentations include:
Using appropriate body language, such as maintaining good posture and making eye contact with the camera
Varying your tone and pace to keep your audience engaged
Encouraging feedback and actively seeking audience input
Incorporating storytelling techniques to create an emotional connection with your audience
Leveraging advanced features of the virtual presentation platform, such as breakout rooms or whiteboarding tools, to enhance interaction and collaboration.
RELATED ARTICLES

What is MicroLED: The Ultimate Guide to the Future of Display Technology

SideTrak Swivel vs. Other Portable Monitors: Which One Reigns Supreme?

The Ultimate Guide to Gifts for Students Away at College

The Ultimate Guide to Graphic Design Tools and Equipment

OLED vs LED Screen: Ultimate Guide for Display Technology Selection

Ultimate Guide to Tech Gifts for Travelers: 2024 Edition

Do Laptop Monitor Extenders Work: The Ultimate Guide

What Is Ghosting on a Monitor and How to Fix It Instantly
Leave a comment.
Your email address will not be published. Required fields are marked *
Please note, comments must be approved before they are published
- Choosing a selection results in a full page refresh.
Got any suggestions?
We want to hear from you! Send us a message and help improve Slidesgo
Top searches
Trending searches

hispanic heritage month
21 templates

109 templates

17 templates

35 templates

suicide prevention
9 templates

It seems that you like this template!
E-learning presentation, premium google slides theme, powerpoint template, and canva presentation template.
New and interesting technologies are being used for teaching. This means that you don’t need to be at school or at the university to take courses. If you need to prepare a webinar or you must give a presentation to talk about e-learning and these kind of advances in education, this new template by Slidesgo is the way to go!
If you’re a teacher, connecting with your students is what’s important, and you can achieve this with a professional design. To begin with, you’ll find some flat linear bicolor illustrations with wavy backgrounds, a style that is always trendy in design. As pictures and images are worth a thousand words, try to make the most of them. However, text is also essential, so let’s talk about the typography. Titles use a sans-serif typeface that works very well for digital screens. Body text also uses a sans-serif font, but this one has a modern look, which is a good added value for your presentation. But that’s not all. We know that numeric data is also key to stating your point, and that’s why we’ve decided to add graphs, timelines, maps and icons. Everything in this template is editable, making it the perfect choice for a custom presentation to suit your needs. What are you waiting for to download it?
Features of this template
- 100% editable and easy to modify
- 17 different slides to impress your audience
- Available in five colors: orange, blue, yellow, purple, and green
- Contains easy-to-edit graphics and maps
- Includes 1000+ icons and Flaticon's extension for customizing your slides
- Uses illustrated concepts from Storyset : editable color, different backgrounds, animated illustrations
- Designed to be used in Google Slides, Canva, and Microsoft PowerPoint
- 16:9 widescreen format suitable for all types of screens
- Includes information about fonts, colors, and credits of the free and premium resources used
What are the benefits of having a Premium account?
What Premium plans do you have?
What can I do to have unlimited downloads?
Combines with:
This template can be combined with this other one to create the perfect presentation:

Don’t want to attribute Slidesgo?
Gain access to over 29900 templates & presentations with premium from 1.67€/month.
Are you already Premium? Log in
Create your presentation Create personalized presentation content
Writing tone, number of slides, available colors.
Original Color

Register for free and start downloading now
Related posts on our blog.

How to Add, Duplicate, Move, Delete or Hide Slides in Google Slides

How to Change Layouts in PowerPoint

How to Change the Slide Size in Google Slides
Related presentations.

Premium template
Unlock this template and gain unlimited access

Register for free and start editing online
- Cocktail of the Week
- Artist of the Week
- Movers & Shakers
- Fashion & Beauty
- Bachelor Nation
- Elevated Experiences
- Work With Us
- Advertise With Us

Learning to sail is a breeze with Sail Sand Point on Lake Washington

It's hard not to smile when you step aboard a boat. The water, the breeze — it inspires a sense of joy.
And just about anyone can experience the magic of sailing at Sail Sand Point .
"Sail Sand Point is a 501c3 non-profit community sailing center. We have a mission of making sailing and small boats accessible to people of all ages, background and abilities," said Seth Muir, executive director of Sail Sand Point.
Located in Magnuson Park, on the north end of Lake Washington, Sail Sand Point offers a myriad of different programs, from youth camps to racing teams, rentals to boat storage. They also work with 25 different community partners to get as many folks as possible out on the water.
"All of this is done at the lowest cost in Seattle," said Muir. "There's an opportunity to trade volunteer hours for any of our services. We give away $50,000 in scholarships every year. So, there's no reason why anyone who wants to learn how to sail and get involved in what I believe is the best game in town can't do it here."
One of Sail Sand Point's most popular offerings is its Adult 101 class. It's designed for nautical newbies, like me, to learn the basics.
"Usually, in two days, somebody can learn how to sail, and in as little as two hours, if they're experienced and have some water skills. The concepts you're going to learn are pretty simple. With good equipment, some patience and some balance, anyone can learn how to sail," said Muir.
During my visit, I headed out on the water with Nora Gallogly, the sailing director at Sail Sand Point. A native of Rhode Island, Gallogly has worked on boats on both the east and west coast. She tells me the stretch of water where Sail Sand Point is located is perfectly suited for new sailors.
"The water gets warmer in the summer. It's a 70-degree water in the summer. The breeze likes to fill in during the afternoon from the north. So, it's a really consistent place, and it's just a really great community. We've got kids hanging out on the pier and lots of renters coming through. People like to come back," said Gallogly.
On our voyage, Gallogly did most of the heavy lifting, but I did help with steering a pair of maneuvers called tacks and jibes, where the sail switches sides, allowing the boat to move in a different direction. More than anything, though, what I noticed was just how peaceful it was on the water. The wind kicked up just in time to push us along the water at a steady clip.
Sailing is a sensory experience. It's relaxing and requires focus, and though I would certainly need to take some actual classes before feeling comfortable on my own, it wasn't hard to see why people fall in love with this sport.
"Sailing is empowering because you're operating a machine. Kids as young as eight years old will be sailing across the lake here. They're not going to be able to drive anything else for a very long time. So, there's that empowering sense of I can control this thing, but there's also so many dynamic factors that are out of your control," said Muir. "You need to be able to adjust and those soft skills, that adaptability, that flexibility, that problem solving, there's no other laboratory like a boat for developing those skills. And it's fun."
Click on the video above for more on my sailing experience and Sail Sand Point.

- Do Not Sell or Share
- Cookie Preferences
- Best free video editing software of 2024
Best 20 Free Video Editing Software in 2024
Try Movavi Video Editor !
Edit and enhance videos easily
Add stylish transitions, titles, and filters
Stabilize and reverse video, equalize sound, and more
By clicking the download button, you're downloading a free version of the program.*

Video editing software can be really useful for cropping, trimming, merging, and editing your video files. This guide will look at the best free video editing software.
Quick summary
For editing and adjusting videos with ease: Movavi Video Editor
Really easy to use and with lots of great editing features, it's perfect for beginners and advanced users alike who want to trim, cut, join, and enhance their clips with countless effects like titles, filters, transitions, and chroma key.
For video editing your screencasts and recordings: ActivePresenter
A screen recorder and video editor applicable for making screencast videos, manuals, presentations, documentation, and interactive training demonstrations.
The perfect online software to edit your clips in your browser: Video Grabber
You can utilize this tool to crop, trim, add watermark to your videos, alter the volume and play speed, and trigger video effects.
If you want a different take on what’s the best video-editing software, check out the article by our friends at Shotkit. Here’s the top-10 apps they recommend:
Best video editing software tools for movie making by Shotkit
Disclaimer: The apps with #CommissionsEarned in the description have affiliate links. When you click an affiliate link and make a purchase, we receive commissions. If you want to support our portal, you can use the links. Otherwise, you can find the recommended programs using a search engine.
Top 20 best free video editors
You can get several free video editing programs in the market. However, many of them stain your video with watermarks. Nonetheless, there are some of the best free video editing software that you can work with; they are not the regular ‘no trial’ versions. However, getting the most value of software may require you to purchase the full version, which is always better than the freeware.
Movavi Video Editor
Users who want to be able to edit and adjust videos with ease
VSDC Video Editor Pro
Users who are looking for a full-featured yet cheap video editor
ActivePresenter
Quick screen recordings
Users working with HD, 60FPS videos
Making professional-grade movies
DaVinci Resolve
Advanced users with lots of experience
Video Grabber
Online video editing
Apple device users
Mobile device users
3D video editing
Video conversions
Icecream Video Editor
Users on low-end devices
Amateur or professional film-makers
VideoPad Video Editor
Beginners who want to get used to video editing
HitFilm Express
Users looking for a budget-friendly editor
Making short social media clips
Movavi Clips
Editing videos on your phone or tablet
Adobe ® Premiere ® Rush
Feature-rich mobile video editing
Microsoft Photos
Basic video editing for free
Professional graphic designers and beginners

Windows 7,8,10,11
Free trial version, $19.99 for the full version
Motion tracking and text animation
AI-powered art filters
Layout and workflow are far from standard
#CommissionsEarned
If you are savvy in video making and don't mind if the program has a less intuitive interface, VSDC Video Editor Pro can offer a wide variety of tools to change your videos. The most noticeable features are: picture-in-picture, transparency, and the effect filters. You can export edited videos in a variety of formats, with pre-made profiles for popular devices. VSDC can also burn your project onto DVD if you wish to do so.
Powerful features: chroma key, 4K, color wheel, 360 VR, and PiP
Non-linear editing
Interface lacks polish
Most of the functions are hidden in submenus
The program lacks full-screen video preview

Windows, Mac
4.7/5 stars, 30 reviews
Free version adds a watermark to output videos, paid version costs $199
Designed with eLearning in mind
Built-in screen recording and webcam recording
Edit audio and video
Intuitive and easy-to-use software
Advanced features like green screen effects and text animations
ActivePresenter is a screen recorder and video editor. It is applicable for making screencast videos, manuals, presentations, documentation, and interactive training demonstrations. With the full-featured editor, the software permits you to edit audio and video, modify the look and feel of content, and decide the branched scenarios basically and adequately. The content created with ActivePresenter can be offered for all intents and purposes to any device and platform because it supports HTML5 and can integrate with Learning Management Systems.
Download ActivePresenter
The app can support numerous file formats
Built-in screen recording to make videos directly from your device
Great for educational content like lectures and presentations
Well-suited to intermediate and advanced users
Average users may not find the application easy to understand and utilize

Windows, Mac, Linux
Users working with HD, 60 FPS videos
Support for the latest audio and video formats
Works with 4K videos
Native timeline editing with no imports needed
Webcam capture and audio capture
Multi-format timeline for mix and match projects
Shotcut video editor is an open-source, cross-platform editor with a brilliantly smooth and intuitive interface. It provides you with various panels that can be docked and undocked as you deem fit. Viewable information includes details about media properties, an encoding panel, filter panel, and a jobs’ queue. You can likewise see recent files, see playlists with a thumbnail view and see recent search history. It has the 'drag-and-drop' function from your file manager.
Shotcut supports several audio and video formats and codecs, thanks to FFmpeg. Working with Shotcut is very easy; you have all the information, tools, and functions needed to create quality materials. It supports native editing of media files and has multi-format timelines.
Download Shotcut
The interface is intuitive and easy to use
Allows the exportation of videos in all formats with up to 60fps and full HD quality
Works across all three major platforms
Lots of useful UI features that will appeal to beginners and advanced users alike
The specifications are high for a computer system
It may seem too technical for first-timers. For example, there are no ready-made profiles for exporting.

4.4/5 stars, 24 reviews
Cross-platform video editing on Windows, Mac, and Linux
Supports most video and audio formats
Keyframe animations
Essential editing features like cut, resize, trim, snap, and rotate
Transitions, titles, animations, and more
OpenShot is a free and flexible software, which will enable you to make and edit videos. The software allows you to make professional-looking movies from your photographs, videos, and music files. You can also easily add subtitles, special effects, and transitions. The created movies can be exported to DVD, Xbox 360, Vimeo, YouTube, and other numerous formats.
A collection of incredible features accompanies OpenShot, for example, sorting and trimming videos, transition effects between video files, adjusting audio levels, chroma key or green-screen effects, and some more. The program likewise supports the most common codecs and formats.
OpenShot features a spotless, easy, and simple to utilize interface, which makes video creation and editing quick and straightforward. Also, the application enables you to create 3D animated title sequences that will impress the viewers.
Download OpenShot
100% free, open-source software
The program gets regular updates
Export to many devices or straight to DVD
Lots of advanced features like chroma key, transitions, and more
Some users claim that the editor is buggy
The program isn’t as fast as some of the competitors

Features of Canva Video Editor :
Real-time collaboration
Pre-licensed audio tracks
Self-recording and screen recording
Content planner and publisher
Brand kit and colors
Canva, one of the best and most popular graphic design tools we use now, has a user-friendly video editor compatible with any platform and device. You can enjoy plenty of templates and tailor them to suit your ideas. Whether you are a video newbie or a pro, you can create amazing videos for any platform you wish such as YouTube, TikTok, Instagram Reels and Facebook Stories.
Download Canva
Intuitive interface
Rich selection of templates
Available team access
Limited output format options

Free version, $295.00 for the paid version with extra tools
Professional and advanced editing features like 3D audio workflows and smart reframing
Customizable user interface
Custom effects, titles, and transitions
Basic features like cut, trim, copy, etc.
Advanced color corrector
DaVinci Resolve is a program that mixes an advanced color corrector with professional multi-track editing ability. It enables you to correct color, edit, finish, and distribute from a single system. The application is resolution independent and scalable, being perfect for use on set or in a little studio. DaVinci Resolve offers increased compatibility, a collection of creative tools, high speed, and extraordinary picture quality you will ever need.
DaVinci Resolve is also ready to sync sound, edit metadata, and sort out the footage for color-grading editing or visual effects. By utilizing this application, you will be able to manage media files on your local drive or over the network. The program supports every camera and video format. All of the above is the reason why this program also made it into our list of top video editors for YouTube.
Download DaVinci Resolve
"This is software that many TV and movie studios use on their productions. That’s how good it is."

Kevin Stratvert
The software provides advanced color correction capabilities
The program has a rich editing interface
Perfect for advanced users and professional editors
Supports all camera and video formats for total compatibility
The software does not support multi-camera editing
The program has a steep learning curve

Any browser (works online)
Runs in the browser
Works with most popular video formats, such as AVI and MP4
Can grab online videos from URLs
Can be used for converting videos
Built-in screen recorder
Video Grabber is an across-the-board online service that enables you to convert videos, edit them, do screen recording, and grab online videos. You can utilize it to crop, trim, add watermark to your videos, alter the volume and play speed, and trigger video effects. Also, it offers you the capacity to modify video resolutions, frame rates, and audio channels. It is effortless to utilize and can give video outputs in several formats.
Go to Video Grabber
The interface is easy to use
The software outputs videos in AVI, WMV, MP4, VOB, WEBM, FLV, etc.
It offers diverse essential video editing functions
Works online in your browser
Runs on any platform with no limitations for any OS
It does not support timeline editing
No real-time video effect preview

4.5/5 stars
Cross-platform editing across Apple devices
Filters, themes, transitions, etc.
Supports 4K editing
Plenty of essential editing features like trimming and rotating
100+ smart soundtracks for custom audio
This free video editing program with specifics for Mac and iOS clients. With it, you can undoubtedly make Hollywood-style trailers and dazzling films in 4K resolutions. You can begin video editing on your hand-held device and complete the editing on your Mac PC.
Download iMovie
The software supports clips with 4K quality and MOV format
It provides vast options for filters, themes, and credits
Works across the Mac family of devices
Create Hollywood-grade movies with ease on your own home computer
It is difficult to use the color correction function for clips
There’s no version for Windows 10, 7, etc., or Android
KineMaster (iOS & Android)

Android, iOS
Free version, $3.99/month for the full version
Designed for mobile devices
Basic editing tools like text, rotations, and trimming
Built-in recorder
Add effects and transitions
Offers instant upload to social media sites and YouTube
KineMaster is a video-editing kit with a well-designed interface with incredible user experience and a broad scope of robust features. You can make the videos you need in your manner of choice.
Utilizing KineMaster is very simple: You simply have to pick the contents you need to add to your video in the order that you need them and add a title to the final composition. After this, you can pick a general subject for your video, which will likewise include an introduction. Be that as it may; obviously, you can also edit your content in greater depth if you want to.
When you complete the editing process, KineMaster gives you a chance to save your project directly to your device in various qualities. What's more? It provides you with the option to transfer the video directly to your Facebook or YouTube accounts.
Download KineMaster for Android
Download KineMaster for iOS
"KineMaster balances an impressive range of features with an intuitive interface. Though not as in-depth as some desktop software, it achieves impressive results for a mobile app."

Kieron Moore
4K video editing
The app has a stock of music, fonts, stickers, etc
Simple user interface for beginners
Direct upload to social media and YouTube
You need to get a premium account to get rid of the watermark
Users say that not every update brings positive changes: occasionally, updates make the app harder to use

Rendering, modeling, and sculpting functionality
3D animation development and editing
Customizable interface
Basic and advanced editing features
Blender is a 3D video editor that’s totally free. If you were going to try your hand in 3D modeling, this is the right app for you. Sure, it has some video-editing features like cutting and trimming, but it’s much more suitable for VFX, digital sculpting, and animation.
Download Blender
One of the top apps for digital 3D animation
To trial, no demo version – you’re getting the full version for free
Basic video editing tools like trimming and cutting
Advanced animation effects for designers and developers
It is free professional software. So, if you’re not an expert, you may struggle with the features and the interface.

Trial version with restricted functionality, $37.95 for the full version
Can be used for editing, recording, and converting
Hardware acceleration
Basic editing tools to cut, trim, copy, etc.
Convert into many formats
Record screen video and device audio
The VideoProc software includes not only a video editor but also a built-in converter and screen recorder. It prides itself on full hardware acceleration that allows VideoProc to not compromise quality. The app has support for Windows 7, which is rare for advanced video editors.
Download VideoProc
Good-quality video thanks to full hardware acceleration
Plenty of video-editing options, even in the free trial version
Built-in video converter for easy conversions into different formats
Screen recording functionality
The trial version has a 5-minute time limit

5/5 stars, 2 reviews
Free version with limited timeline scenes and a watermark, $29.95 for the Pro version
Lightweight and doesn't use many system resources
Various effects, filters, and transitions
Beginner-friendly UI
Cut, trim, rotate, blur, etc.
Supports most popular video and image formats like MP4, MOV, and AVI
The Icecream studio is well-known for its apps: from PDF-managing software to a screen recorder. All of the programs are free to download and easy to work with for beginners. Icecream Video Editor is no exception. If you’re looking for free video editing software for Windows 10, with which you can make clips with effects, filters, and transitions without much effort, this should be an excellent pick.
Download Icecream Video Editor
The program is suitable for laptops and weak computers
The website has a lot of tutorials
Special effects, filters, and transitions to customize your clips
Beginner-friendly interface
If you want the resulting video to be longer than 10 minutes, you’ll have to get the PRO version.

3.5/5 stars, 27 reviews
Free version with less tools and features, from $9.99 per month for the paid version
Amateur or professional filmmakers and content creators
Drag and drop interface
Effects, transitions, chroma key, etc.
Basing editing like trimming and cutting
Support for almost all file types
Local back-up and archiving
Lightworks is one of the best free video editing software options you can choose if you want to make and edit films on an amateur or professional level. It works well for aspiring filmmakers, YouTubers, and content creators, offering Hollywood-level editing and effects and being trusted by professionals throughout the film industry.
There's a lot you can do with this free video editing software, without having to hand over your credit card details or sign up for recurring payments. It offers ready-made titles and transitions, cloud storage, an advanced editing timeline, and support for a huge range of formats.
Download Lightworks
"The software has a strong heritage in filmmaking, with Pulp Fiction, Jerry Maguire and The Wolf of Wall Street just a few of the many movies that have been edited on it. But don't go thinking that long list of award-winning film credits means it's for professionals only: the free version of Lightworks is generally consumer friendly and will be more than enough for most basic editing tasks."

Theano Nikitas
Beginner-friendly drag and drop
Professional-level results with a simple interface
Works with almost any kind of video file
Trusted by film professionals
Only supports 720p exports
Needs to be re-activated every 90 days

3.5/5 stars
Free for non-commercial use
50+ effects and transitions
Support for 60+ formats
3D and 360 video editing
Burn to disc or export to device
Built-in audio editing
VideoPad Video Editor is an example of well-made free video editing software that almost anyone can download, install, and start using. You don't need years of technical experience or advanced understanding of video editing programs to use this best free video editing software, as it has been built from the ground up to be highly accessible and beginner-friendly.
Supporting more than 60 video formats and also working with 3D and 360 videos, too, VideoPad Video Editor is highly versatile and comes with more than 50 different effects and transitions to enhance your videos. You can export your edited clips to your device or straight to disc, and the program also features impressive audio editing tools, as well, placing it among the best free video editing software in terms of all-around usefulness.
Download VideoPad Video Editor
Rapid processing times
Lots of useful tools and effects
Works with most video formats
Lacking in terms of advanced features

4.4/5 stars, 25 reviews
Free, with paid add-ons
Students or content creators looking for a budget-friendly film editor
Huge VFX toolkit
Support for 4K videos and many formats
Pro-level editing tools and animation features
100+ hours of tutorials
If you're a young student or content creator on a budget, in need of the best free video editing software to help you break into video editing, HitFilm Express is a good option to choose. Completely free and available on a "pay what you want basis", this software offers pro-grade tools and effects for making impressive videos without the same price tag as more advanced free video editing software options.
HitFilm Express can boast of some impressive features, including the biggest free VFX toolkit on the market, support for 4K exports, a really intuitive user interface, and impressive animation tools. It also comes with 100+ hours of tutorials and classes to get you up to speed, making it one of the best free video editing software options for people who want to build up their editing skills.
Download HitFilm Express
Easy to learn and fun to master
Made with young users in mind
Lots of effects and transitions
Add-ons are not free
Many features locked behind add-ons

3.7/5 stars, 4.4K reviews
Making short social media clips on your phone
Camera effects
Filters and animations
Add emojis and stickers
Import photos and videos from your library in one tap
Sometimes, you just want to make some fun and silly videos on your phone to share on social media sites like Facebook, TikTok, Instagram, and Twitter. If so, Clips is one of the best free video editing software applications you can choose.
It runs on iOS devices like the iPhone 13 and gives you a bunch of fun effects and colorful stickers to add to your videos. You can add videos from your phone library with a single tap and make changes and alterations in mere seconds.
Download Clips
Very easy to use
One of the best free video editing software for social media content
Fun for younger users
Lots of enjoyable effects
Not the best free video editing software for advanced editing
Movavi Clips (iOS & Android)

Android and iOS
4.5/5 stars, 183,153 reviews
Free version watermarks videos, premium subscription costs $1.99/month
For iOS and Android
Trim, cut, rotate, etc.
Filters and transitions
If you're looking for the best free video editing software for phones and tablets, Movavi Clips is the app for you. Made for the mobile market, this app runs on both Android and iOS, and it's one of the best free video editing software options you can choose on the smaller screen. It lets you do all sorts of editing: cut, merge, crop, and add music to videos.
You can also use this free video editing software to add filters and transitions, with no pesky ads or other obstacles to get in the way.
Download Movavi Clips for iOS
Download Movavi Clips for Android
Easy to use on any mobile device
Add custom sounds with ease
Stylish filters and transitions
Drag and drop timeline
Subscribe to Premium to remove watermarks

Windows, macOS, Android, iOS
Free version with 2GB cloud storage limit, $9.99/month for the full version
Changing video speed
Projects are compatible with Adobe® Premiere® Pro
Supports 4K XAVC-S format
Adobe ® Premiere ® Rush makes the video editing process fast, and there’s more than enough editing capabilities in the app. Numerous titles, transitions, and audio edits will help you to create a decent-looking video for a vlog. But for the majority of YouTubers needs more advanced capabilities which only a full-featured desktop video editor can offer. If you’re looking for professional level apps that most YouTubers use, try Adobe ® Premiere ® Pro or Apple Final Cut Pro.
Download Adobe ® Premiere ® Rush
The interface is clear and simple
Decent choice of titles and captions
Quick performance
Can’t choose the output format and codec
No chroma key and freeze frame
Few audio-editing tools

Windows 8, 10, 11
Face and object detection
Automatic album creation
One of the best free video-editing apps, Microsoft Photos is an excellent option for viewing, simple editing, and sharing of digital photos and videos. Unlike professional video making programs that offer countless menus, panels, and features, Microsoft Photos is easy to use, clear, and has everything you need for basic viewing and fixes. For any casual user, Microsoft Photos is a fine choice for managing, editing, and sharing videos.
Download Microsoft Photos
Intuitive interface optimized for touch screen
Built-in software doesn’t require installation
Add text, transitions, and soundtracks
No before-and-after view
No panorama stitching or selective focus
Frequently asked questions
What is the best free video-editing software for beginners.
Here are two articles that review top video-editing programs – have a look at them and choose the software you like best.
Top 15 video-editing software for beginners
What do most YouTubers use to edit their videos?
It depends on many factors: the type of videos the YouTuber focuses on, personal taste in video editing apps, etc. Here's a part of the list we came up with:
AVS Video Editor
CyberLink PowerDirector
For more top picks, read the article linked below:
13 best YouTube video makers
COMMENTS
The presenter is learning how to give a presentation by doing it. To prepare a presentation, the presenter must know the intricate elements of what they are presenting and the rationale for their importance. In the presentation delivery, the presenter must be articulate and meticulous to ensure that everyone in the audience is able (and willing ...
Presentation skills are the abilities and qualities necessary for creating and delivering a compelling presentation that effectively communicates information and ideas. They encompass what you say, how you structure it, and the materials you include to support what you say, such as slides, videos, or images. You'll make presentations at various ...
Tip #1: Build a narrative. One memorable way to guarantee presentation success is by writing a story of all the points you desire to cover. This statement is based on the logic behind storytelling and its power to connect with people. Don't waste time memorizing slides or reading your presentation to the audience.
Step 1: Make a draft to structure your presentation. As we said before, writing a draft or script of your content will be vital to start on the right foot as a PowerPoint beginner. This advice is so important that we choose it as the first step to learning how to make a PowerPoint presentation.
So, make sure that the colors, fonts, branding, and overall design of the project flows well and is consistent throughout the presentation or slideshow. Also, the design should effectively reflect your brand's image and message. Include audio or video to create a more immersive experience. Audio or video integration is ideal, especially if you ...
Presence/Position/Posture: standing up straight conveys confidence and authority. Eye contact: helps you connect with your audience and keep your students engaged. You may tend to focus your gaze on a particular side of the classroom. Consciously make eye contact in a "W" pattern across the room.
Let's begin! Tip #1: Ensure that your presentation reflects your core message. Tip #2: Always consider the age of your audience in both presentation design and length. Tip #3: Both content and design should be simple and complementary. Tip #4: Don't be afraid to switch it up! Tip #5: Choose your colors wisely.
Effective communications skills are a powerful career activator, and most of us are called upon to communicate in some type of formal presentation mode at some point along the way. For instance, you might be asked to brief management on market research results, walk your team through a new process, lay out the new budget, or explain a new ...
From Excel to Power BI. Skills you'll gain: Data Analysis, Data Model, Data Visualization, Microsoft Excel, Power BI. 4.4. (661 reviews) Beginner · Course · 1 - 4 Weeks. data analysis and presentation skills: the pwc approach. verbal communications and presentation skills. مهارات العرض والتقديم | presentation skills.
Advice from Edelman and Harring on leveraging the working memory with PowerPoint: Leverage the working memory by dividing the information between the visual and auditory modality. Doing this reduces the likelihood of one system becoming overloaded. For instance, spoken words with pictures are better than pictures with text, as integrating an ...
Incorporate active learning throughout the presentation to hold students' interest and reinforce learning. Emphasizing content. Use italics, bold, and color for emphasizing content. Use of a light background (white, beige, yellow) with dark typeface or a dark background (blue, purple, brown) with a light typeface is easy to read in a large room.
Designing and Formatting a Presentation in PowerPoint. Skills you'll gain: Business Communication, Graphic Design. 4.5. (208 reviews) Beginner · Guided Project · Less Than 2 Hours. M. Microsoft.
Interactive presentations demonstrably increase learning success and retention. This is also confirmed by a study of the Keele University. The results here show very clearly to what extent involving the audience increases attention as well as knowledge transfer. It was found that the grades of the participants improved by 3.7%, as well as and ...
Find tips and tricks from teachers like you. What is Google Slides. Accessing Google Slides. Creating a presentation in Google Slides. Adding and editing content. Presenting Google Slides. Sharing Google Slides. Teachers' Lounge.
A Presentation of Learning (POL) requires students to present their learning to an audience, in order to prove that they are ready to progress. Effective POLs include both academic content and the student's reflection on their social and personal growth. They are important rituals - literally "rites of passage" for students.
To do that, simply go up to the Home tab and click on New Slide. This inserts a new slide in your presentation right after the one you were on. You can alternatively hit Ctrl+M on your keyboard to insert a new blank slide in PowerPoint. To learn more about this shortcut, see my guide on using Ctrl+M in PowerPoint.
Create a presentation. Open PowerPoint. In the left pane, select New. Select an option: To create a presentation from scratch, select Blank Presentation. To use a prepared design, select one of the templates. To see tips for using PowerPoint, select Take a Tour, and then select Create, . Add a slide.
Online presentations have become an integral part of our professional and personal lives. In this guide, we will conduct in-depth explanations and analyses on everything from creating engaging content, essential tips, mastering virtual presentation techniques, overcoming challenges to advanced techniques.
Available in five colors: orange, blue, yellow, purple, and green. Includes 1000+ icons and Flaticon's extension for customizing your slides. : editable color, different backgrounds, animated illustrations. Designed to be used in Google Slides, Canva, and Microsoft PowerPoint. 16:9 widescreen format suitable for all types of screens.
Get started with PowerPoint for Beginners. Follow this 20-Minute step by step PowerPoint tutorial to start creating presentations smoothly.Contents of this v...
Abbasi-Asl: Once the AI system captures the movement in video data, our machine learning analysis identifies the most important movement features, such as the speed of finger movement that is associated with a particular severity level. It basically determines whether patients with low or high severity share a particular movement pattern.
It's hard not to smile when you step aboard a boat. The water, the breeze — it inspires a sense of joy. And just about anyone can experience the magic of sailing at Sail Sand Point. "Sail Sand Point is a 501c3 non-profit community sailing center.
Compatibility: Windows, Mac. PCMag rating: 4/5 stars. Price: 7-day trial period with a watermark added to videos, $ 79.95 for the full version. Best for: Users who want to be able to edit and adjust videos with ease. Our special pick for this guide is Movavi Video Editor. Really easy to use and with lots of great editing features, it's perfect for beginners and advanced users alike who want to ...